Gilding is easily the most persnickety, fussy, and painstaking craft I’ve done so far.
True confesh? I’m kind of loving it.
It’s crazy, I know. Gilding, it’s like, soooo eighteenth century. The true fact of the matter is that it produces pretty amazing results. And somehow, the fact that it takes such precision, such attention to detail, such patience, makes it all the more rewarding. There’s something distinctly crafty about it, in the centuries-old meaning of the word as “power,” “skill,” “ability,” “art”— back in the days when you belonged to a guild (no pun intended) to exercise your skilled practice.
And of course, there’s something amazingly and ridiculously indulgent about gilding… eggs.
Step one is, of course, blowing out the eggs, and lordy, this is a nuisance. You will not be at all surprised to hear that Martha’s instructions (on her website; she doesn’t give instructions in the Encyclopedia) are overly complicated and actually require tools. She wants you to use a Dremel, for Pete’s sake, to drill a hole in the bottom of the egg, and then you need one of two (TWO!) different kinds of egg blowers. Yes, there is a device designed precisely for blowing out eggs, and further, there are at least two different philosophies on blowing out eggs, each with its own mechanism for getting the job done. Are you a two-hole egg blower (that’s a “Marge’s egg blower”) or a one-hole egg blower (that one’s called a “Bias-Fix egg blower”)? I kind of feel like I’m in bizarro world here.
Lucky for me, I have a special tool for blowing air already, and it’s called a mouth. So I didn’t waste any time Googling these crazy gadgets and just got to work blowing the eggs out with my mouth. It’s a little hard, and I kind of felt like I was going to pass out a few times, but I managed to get three eggs done, in spite of the lightheadedness.
Sheesh, y’all, this is just the prep.
After the eggs are all clean and dried inside, you can get to work gilding. But WAIT! First you have to build your own “drying rack.” Really, Martha? I put in a half-hearted effort.
There’s my drying rack, my white gloves, and two wooden eggs I decided to throw into the mix to see how they turned out.
You cover your eggs with this special liquid called “gilding size,” and then you let it sit until it “comes to tack.” That means it’s dry enough that it’s not wet, but it’s kind of sticky so the gild will adhere to it. What I found weird is that it takes about 15 minutes to reach the proper consistency, and there’s a lot of “keeping checking your eggs for proper tack” and such in various sets of instructions, but then once it’s ready, it stays ready for 24 – 36 hours. Wha? So why all the pressure to check it? I just waited a few hours, came back, and it was ready.
As I mentioned before, the leaf is insanely delicate and hard to work with. But there is something magical about putting this wrinkly sheet of metal on the eggs and then watching as it molds perfectly and almost becomes one with the egg. I know, it’s so Zen.
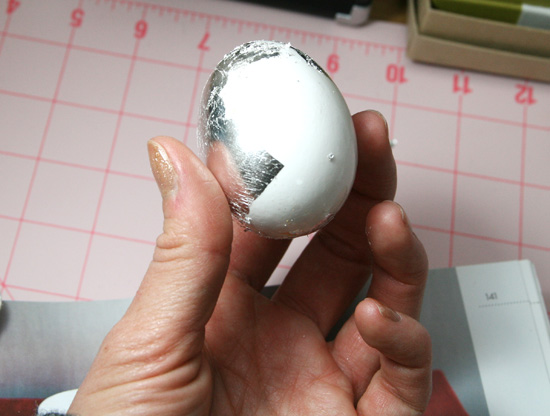
Here I am halfway through a silver egg:
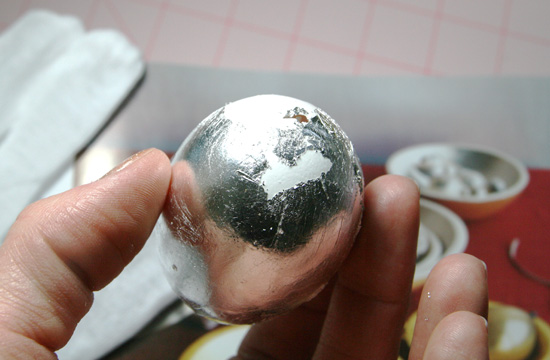
See, it’s all crazy wrinkly and patchy, but you rub it and brush it and it becomes… perfect. In the photo below I’m almost done covering this egg…
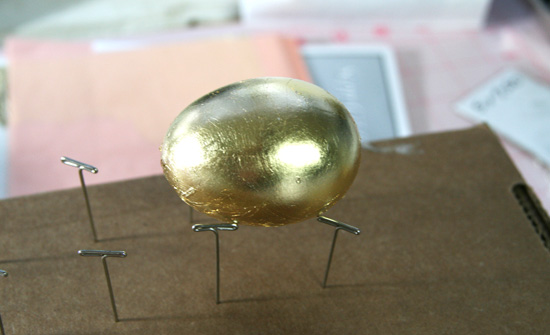
And then once it’s done, it’s magical.
Check out that golden egg! Isn’t is GORG?
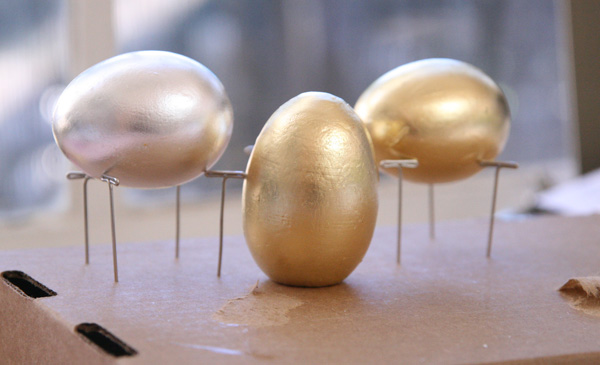
I did one silver and one gold egg with the blown out eggs, and then I did one gold with a wooden egg that I bought at Michaels for something like $0.89. I wanted to see if the blown out eggs really made a difference.
There they are, in all their glory. I really think the wooden egg (in the middle) looks great, too. I think it’s a better option because it’s not as delicate and won’t break as easily.
The gilding instructions do mention that you should make sure your surface is perfectly smooth before proceeding, and they are right. Whatever imperfections are on the surface of your object will only be magnified by the gilding. The wooden egg I bought was painted white, but obviously very haphazardly. So when the gilding was done, I had this effect:
Yep, that’s uneven paint and a drip that was on the egg before I put the gold leaf on it.
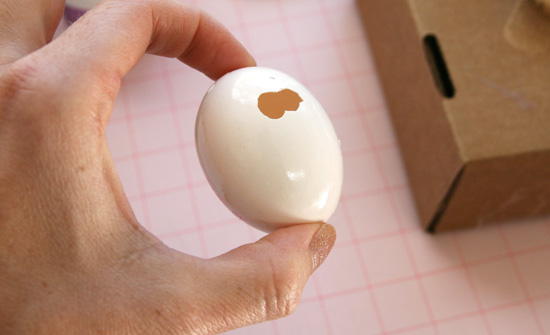
Another tip: the size gets very, very sticky, so make sure you don’t let anything touch… well, anything else. Two of my blown out eggs ended up touching on the side, and then they were melded together. When I finally managed to pry them apart, I had this:
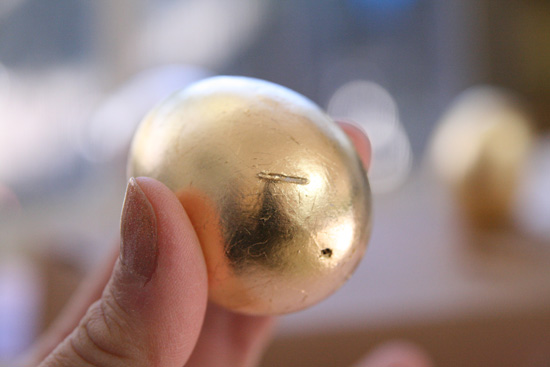
D’oh! Wasted egg. I had to chip off that extra shell that was left on the other egg, and then it left a little mark that ended up marring the gilding. Also, since I used t-pins for my drying rack, there were two little spots where the egg got stuck to the t-pin, which ended up kind of pooling the size and creating another imperfection in the finished product.
See that little line on there? That’s from where the egg was resting on the t-pin. The other mark is the hole through which I blew out the egg.
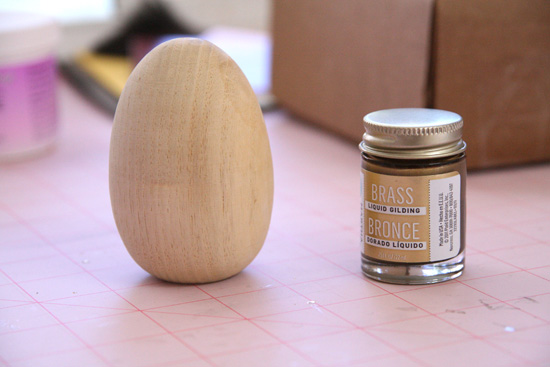
So, just to be thorough, I wanted to see if this gilding craziness really made a difference. I mean, why not just paint a dang egg gold??? In fact, Martha has a new product (ding!) that’s called “Liquid Gilding,” which is essentially a metal paint. Remember those paint pens from high school? (Did you smell them to get high, too?) This paint is like if you poured all the liquid out of about 173 of those pens. Funny, it doesn’t smell as good as it used to.
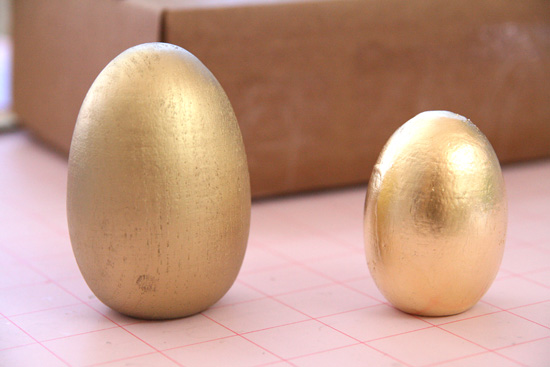
I bought another wooden egg and I painted it with Martha’s “brass” liquid gilding. It really is like painting with metal. I think it actually has metal in it. But, in praise of gilding, I think there is still a difference.
Can you tell which is painted and which is gilded? I don’t know if a top coat or a primer or more coats or whatever would bring them closer together, but GAWD, isn’t the gilding beautiful?
TIME INVESTED
- 30 minutes to blow out 3 eggs
- 30 minutes per egg to gild
Total for 3 eggs: 2 hours
DIFFICULTY
Difficult
TOTAL COST
- imitation gold leaf booklet, $14.00
- Aluminum Basic Gilding Kit, $29.95 (from Gilded Planet)
- gilder’s tip brush, $25.50
- 3 eggs, $0.33 each
Total cost = $70.44
To be fair, you could make a lot more eggs with these supplies and it would only cost you the price of the eggs.
WAS IT WORTH IT?
Well, no. I mean, I love the gilding. But what am I going to do now with 3 gilded eggs? Martha has about 30 of them in a gold spray painted basket in the book, but that is really not my style.
But now I’m looking for things to gild, seeing as how I now have all this leaf. What do you think I could gild, peeps? I’m jonesing to do it, so any suggestions will be taken seriously!
Pin It







Lord, you are not kidding! That is the most fussy thing I have ever heard of! The drying rack alone! But dang those are so pretty. And better than the paint! Now, what about gilding several more eggs and then putting them in a tallish cylindrical vase as a mod Easter centerpiece? Also, the tall vase would protect them and you could just stash ’til next year?
Can you gild something like a pinecone? That would be a nightmare, wouldn’t it?
Now, you know I spraypainted those silver birds. That was a metallic spray paint, and it came out very metallic. I’d be interested to see you compare that product to gilding.
LOVING IT.