Inspired by all the Sharpie tie dye shirts I’d seen on the interwebs, I thought to myself, “This could be a good way to produce ikat.” And you know what? It was!
In the process, I discovered that there are two ways to go with this craft, both resulting in different looks that are, in my opinion, equally cool. You can decide which, if either, you like best.
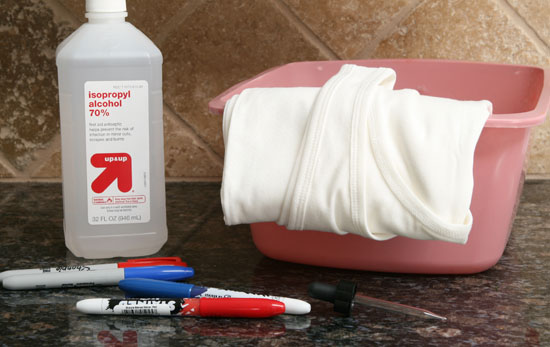
For this tee, you’ll need:
- a white tee of your choice (I used a tank from Target)
- 2 Sharpies in the same color, one standard and the other a “Stained” Sharpie fabric marker
- rubbing alcohol
- dropper or other tool for dripping alcohol
- container over which to stretch your shirt
You will start with the fabric marker, which doesn’t run when you use the alcohol. I wanted the core of the ikat diamond pattern to remain intact; without it, all the ink from your drawn design can sometimes spread, leaving nothing in its wake.
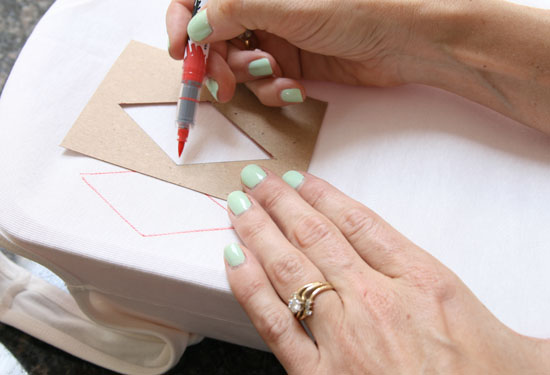
I also constructed a little template so that all my diamonds would be uniform. If you aren’t that uptight, if you are an excellent artist, or if you like the uneven look, you can freehand them.
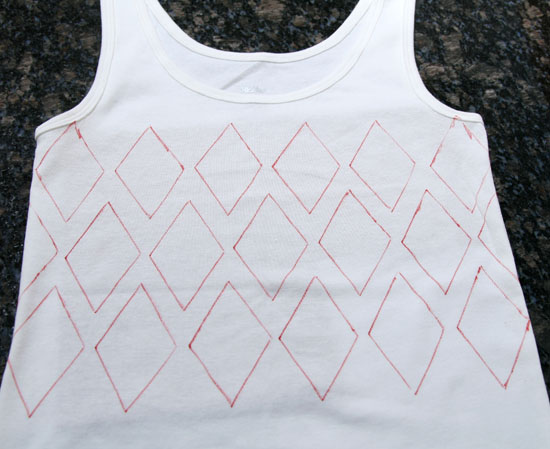
Start by drawing your diamond pattern where you’d like it on the shirt. I decided to do 3 rows of diamonds across the chest of the shirt.
I started with my shirt stretched over the container, but it wasn’t tight enough, so I switched to putting some cardboard between the layers so the marker didn’t bleed through.
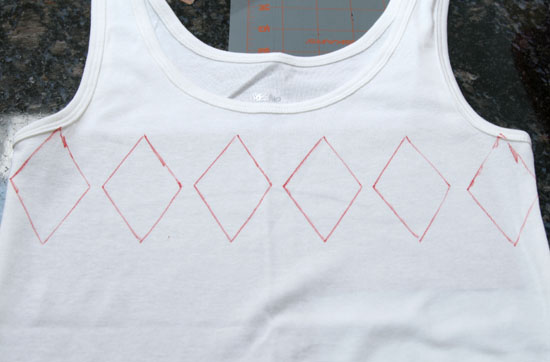
That’s my first row. Once I completed the outline of the design, it looked like this:
My design went all the way around the shirt, continuously.
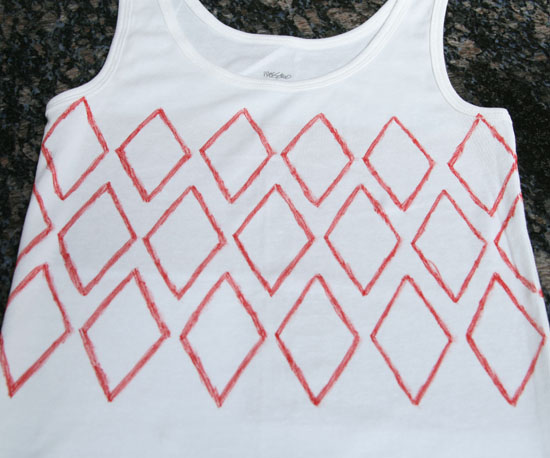
Now you want to thicken the lines of your diamonds, still using the fabric Sharpie.
You don’t need to be that neat here, but do keep in mind none of this will feather or bleed out. I thickened my lines to about 1/4″. The nice part about the Sharpie fabric marker is that it’s a brush-style tip, so it sort of fades of its own accord around the edges.
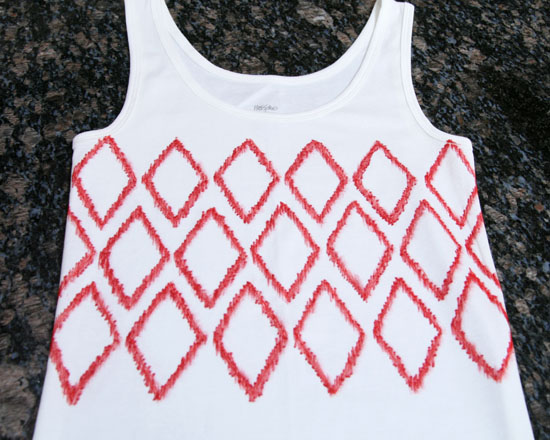
Once you’ve thickened all the lines, it’s time to start in with the regular Sharpie. You are going to trace over the diamonds you have, but sketching in an up-and-down motion along the length of each side.
You want that sort of feathered, messy look.
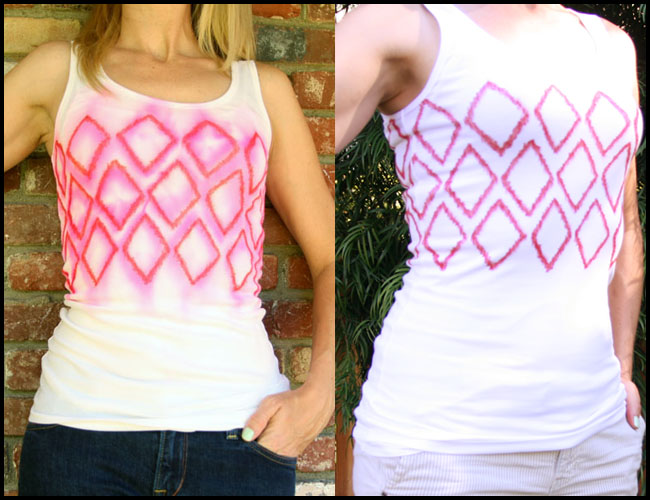
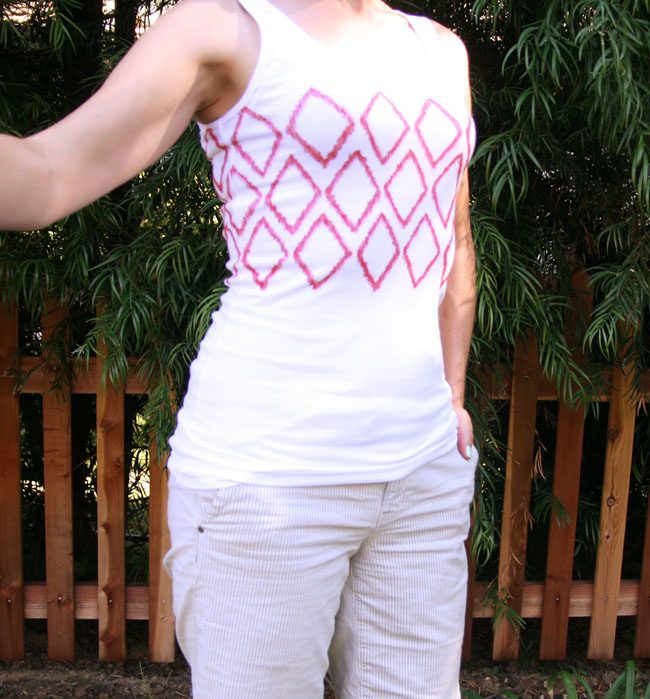
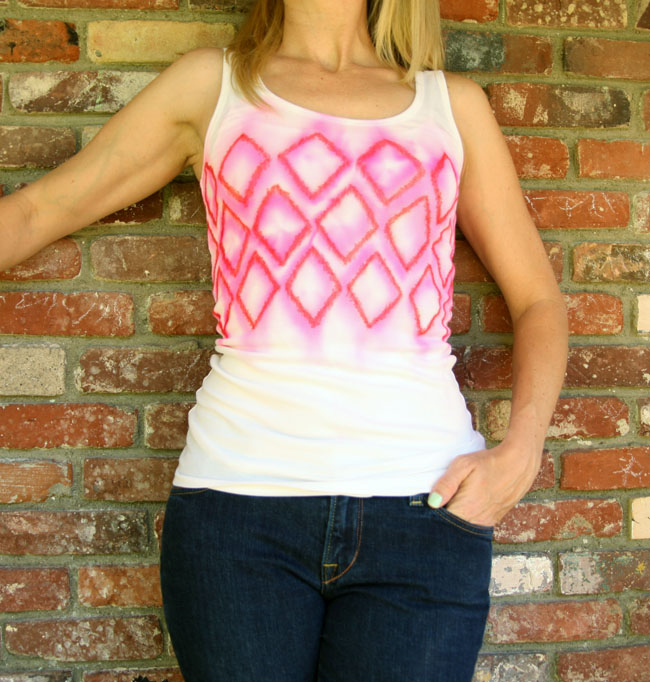
Once I finished, I realized, “Hey. This looks pretty cool on its own!” I almost didn’t want to drip it because it was so neat looking. So I tried it on and modeled it.
And I thought it looked pretty cool. So, if you like this look, you can be done! You’ve got a neat and tidy ikat tee.
But I had to press on to see what happened with the alcohol. At this point, you’ll stretch your shirt over the container, with the front and back on opposite sides (that is, the front will be stretched over the opening, and the back will be on the back of the container).
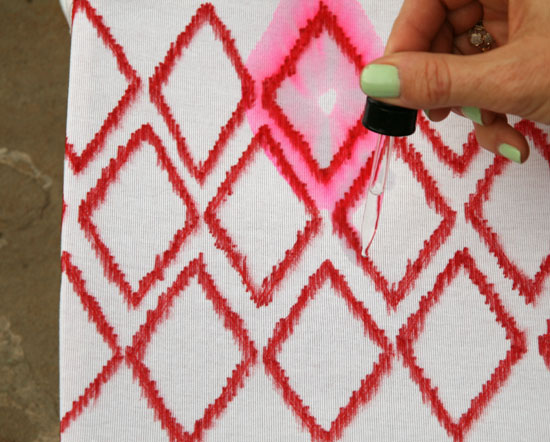
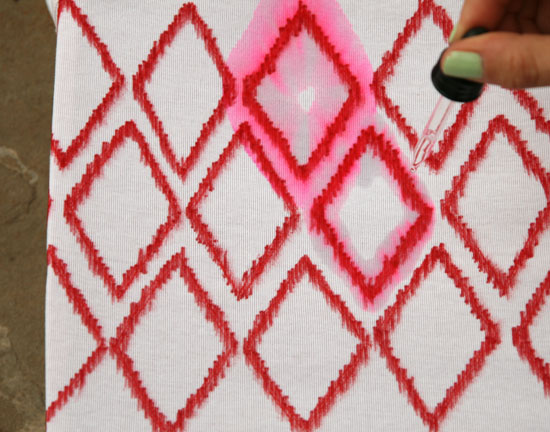
Use your dropper to drip small amounts of alcohol directly on top of the lines of your diamonds. You’ll want to follow along, almost tracing again over the diamonds with the alcohol. (This differs from what you do in Sharpie tie dye, where you want to drip in the center of the pattern so it feathers outward. Here, you want the feathering to go both in- and outward.)
You’ll need to turn the shirt to get all the sides. Be careful not to set it on anything you don’t want stained, since the Sharpie will be running.
You’ll also want to take care that you don’t fold the shirt upon itself, since the color will run into the white parts of the shirt that you want to keep clean.
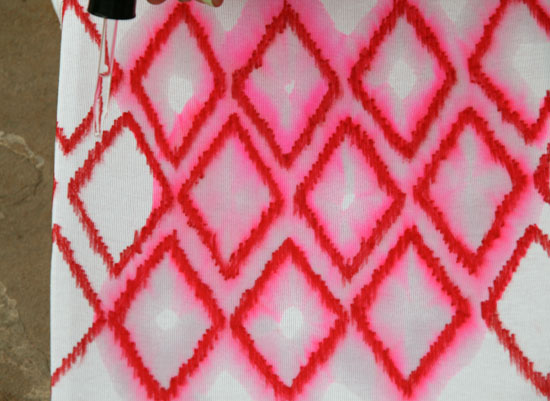
Once I finished all the diamonds, I went around the top and bottom border and dripped alcohol so that the line of “wetness” was relatively straight. This evened out the feathering and faded it nicely into the white of the shirt.
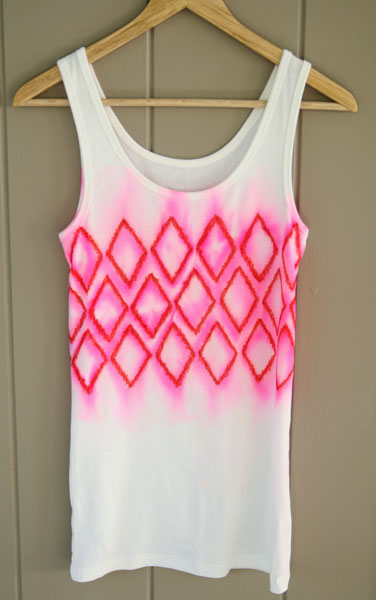
What I love about this version, too, is that when the color runs, it changes, so you’ve got a cross between a red and a neon pink shirt. Totally awesome.
Hang it up so that the two sides don’t touch; I put it on a wooden hanger.
I let mine dry overnight. And then I rocked it!
There are all different kinds of patterns you can make, using multiple colors, sizes, and shapes. If you make one, be sure to send me a pic!








Love this tutorial! I found you via Craft Gawker!