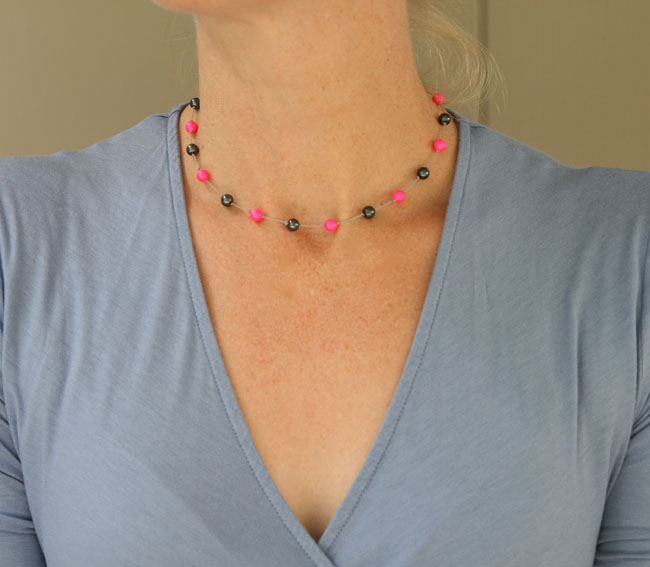
I promised you I had another neon bead project, and here it is!
These are the third variety of beads that I ordered in the neon. They are Swarovski neon crystal pearls in 6mm. I wanted to make some kind of necklace, and as is my modus operandi, I didn’t want it to be too outrageous.
I found the dark gray beads at Michaels; they were super cheap and I actually just bought them because they were on sale and I figured I’d use them sometime. They looked perfect with the neon beads as a way to incorporate neon into an everyday look. I find that mixing neon with neutrals looks really nice and makes it totally wearable.
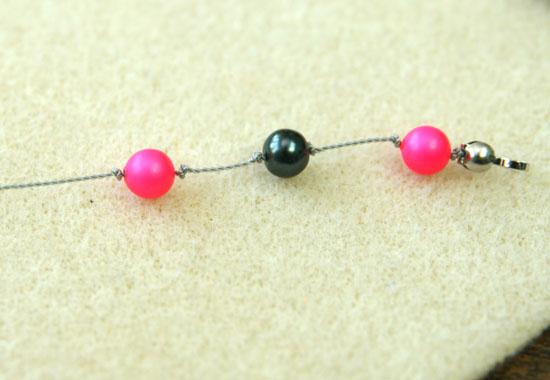
For this project, I used silk beading cord (I chose light gray in size 4), the two kinds of beads, bead tips and a clasp. A bead tip is a small metal piece that hides the knot you put at the beginning and end of the cord, and also has a hook on it so you can attach a clasp. The main tool you will need is jewelry pliers.
To start, cut your cord to the appropriate length. Depending on how closely you space your beads (and therefore how many knots you’ll have), you can estimate that you’ll want to at least double the length of the finished necklace. So if you want a 16″ choker, cut at least 32″ of cord. Make a knot at the end of your cord and apply the bead tip over it. (If you need help with the bead tips, check out this video tutorial from Jewelry Supply.)
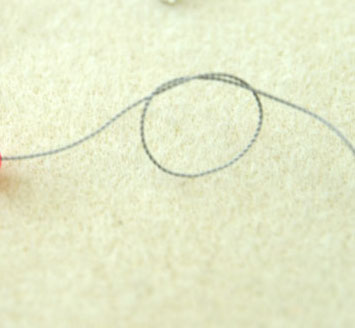
To add your first bead, make a very loose knot it the cord, but don’t tighten it.
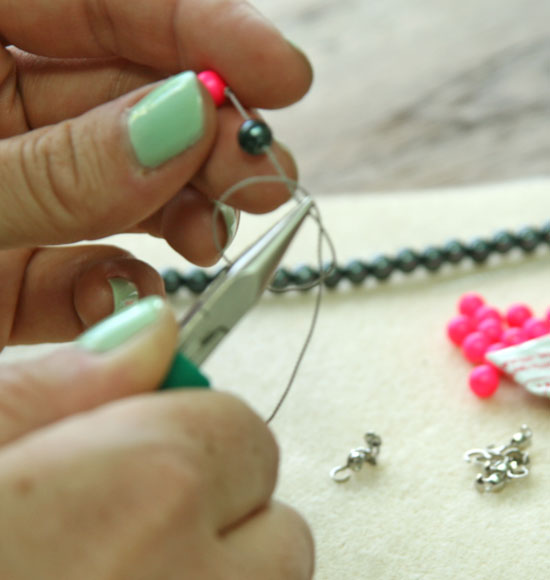
Decide where you want your bead to fall. (I put about 1/2″ of space between my beads.) Slide your pliers through the loose knot and grab the cord with the tips of the pliers right where you want your bead to fall.
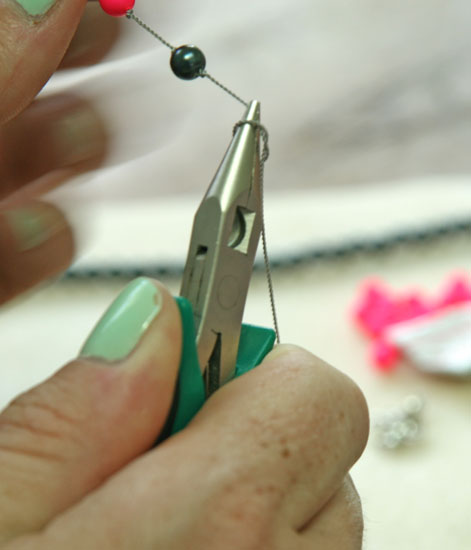
By grabbing the cord with the pliers, you essentially cement that spot as the place where your knot will fall. Now, start to tighten your knot, being careful not to let the knot slide over the pliers (that is, keep the knot you are tightening laying on top of the pliers).
As you get the knot tightened as far as it can go with the pliers in place, slowly slide the pliers out while tightening the knot the rest of the way. And you will have your first end knot for a bead.
Now, add the bead to your cord, sliding it next to that knot. The knot will stop the bead from moving further on the cord.
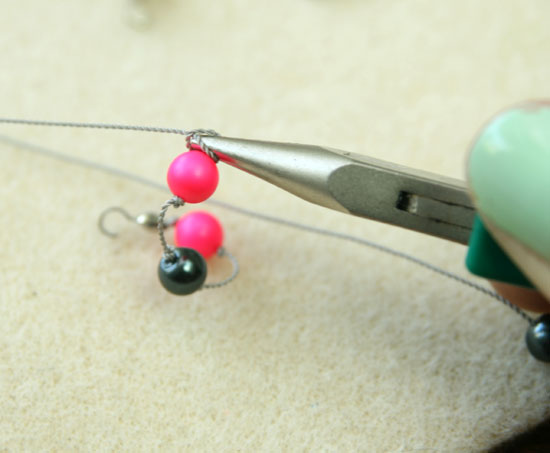
Make your loose knot again, and again slide your pliers through the loose knot. Now, push the bead up to the first knot, holding it there firmly. With the pliers, grab the cord right next to the bead, as closely as you can, with the tips of the pliers.
Tighten down as you did for the first knot, releasing the pliers when the knot is almost complete.
Now you should have a bead that is stable on the cord because it is held in place by two knots.
Continue knotting and beading until the necklace is the length that you want. At the end, you will put the bead tip on and then knot the cord so that the knot falls inside the bead tip.
Attach a jump ring to one end and a clasp to another, and you’re done. Then, sport your neon with pride!
Pin It


