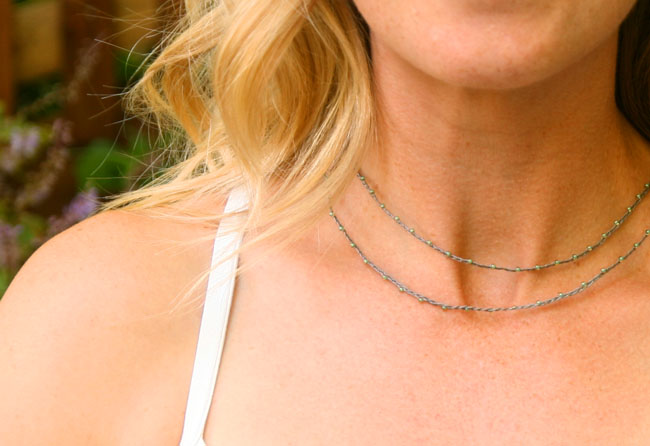
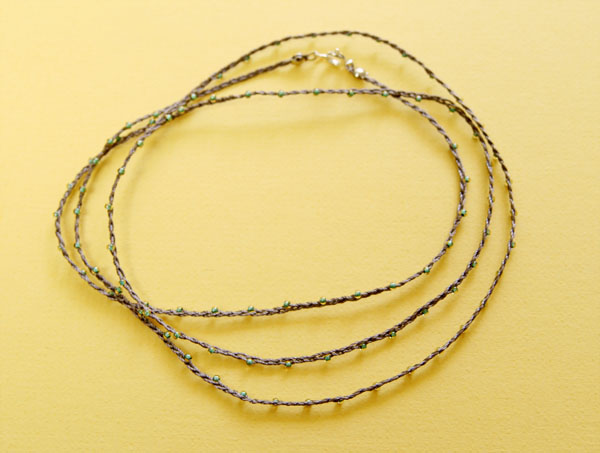
I’ve been taking some private yoga lessons over the last few months to up my yoga game, as it were. And one day, my lovely yoga instructor Holli was wearing this beautiful and simple necklace. I looked at it more closely, and, as is my wont, I thought, “I could make that!” So I did.
Or at least I made a version of it. It’s so simple and easy, and you could make it in any color combinations you want.
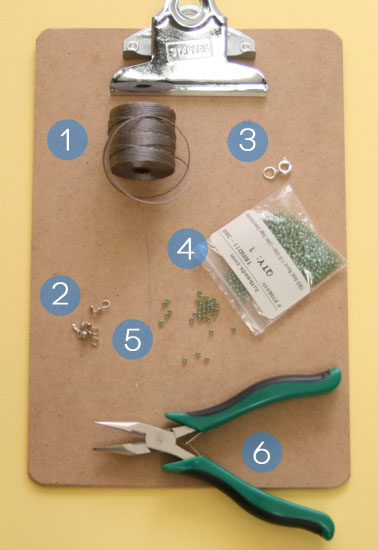
Here’s what you’ll need:
1. 3 1/2 yards beading thread, size 4, cut into three 42″ lengths (I used C-Lon bead thread in size D, but you can use whatever thread will fit into the holes of your seed beads), in your choice of color
2. 2 bead tips (you should be able to find these at Michaels)
3. one clasp (available at Michaels)
4. seed beads in your choice of color (size 11.0, which is standard size)
5. a beading needle (optional)
6. jewelry pliers for closing your bead tips
You may also want a clipboard or a piece of tape to anchor down your cords while braiding.
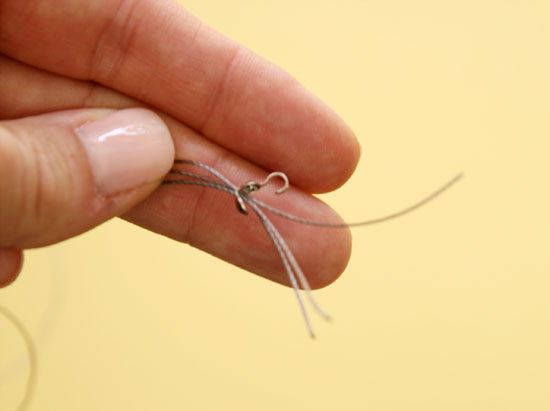
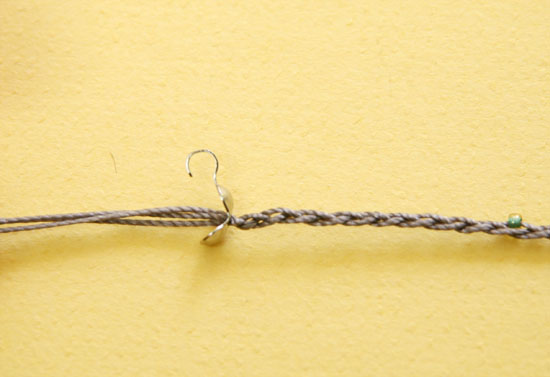
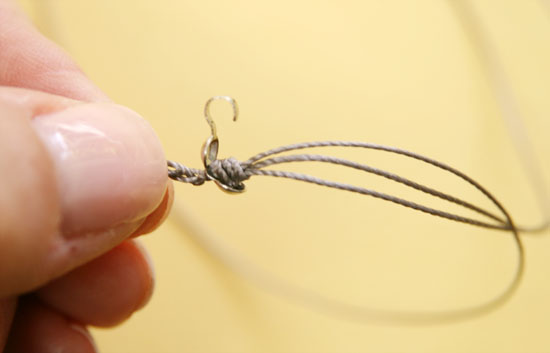
To start, gather your three threads together and feed them through your bead tip. You may need a beading needle to get the last thread through, depending on the size of the hole in your bead tip.
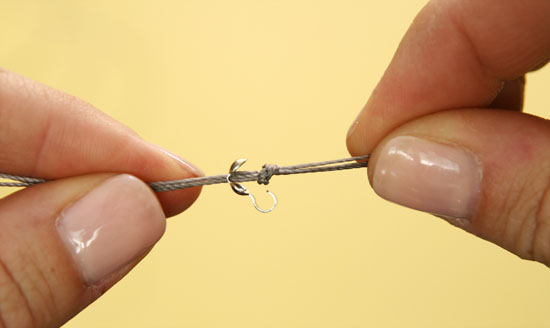
Then, tie an overhand knot with your three threads:
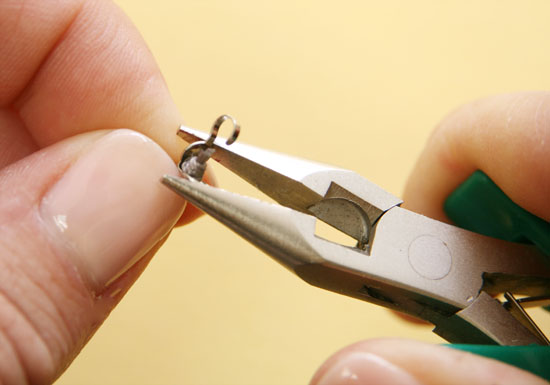
And push this knot into the clamshell of the bead tip. Cut off the ends and close the clamshell with your pliers.
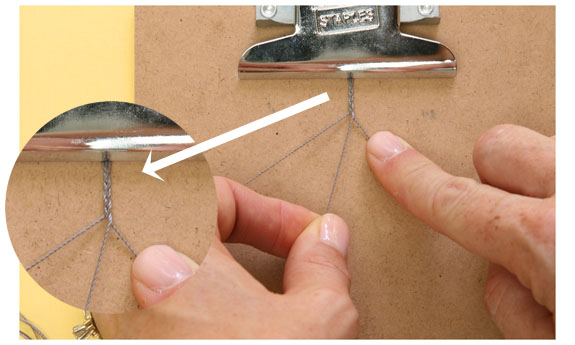
Now you’ll begin braiding, in a traditional braid. (If you don’t know how to braid: bring the left string into the middle of the other two strings, then the right string into the middle of the other two strings, and keep repeating.)
Braid about an inch or two before you start adding your seed beads.
Now, here’s where you get to be super creative and decide what your necklace will look like. There are two different variables here that you’ll need to choose:
~ spacing
~ placement
For spacing, you’ll want to decide how far apart you want to place your beads. I spaced mine pretty widely, so I added a bead and then braided 4 times before I added another bead. You can choose to add beads whenever you want, but you will likely want to be consistent.
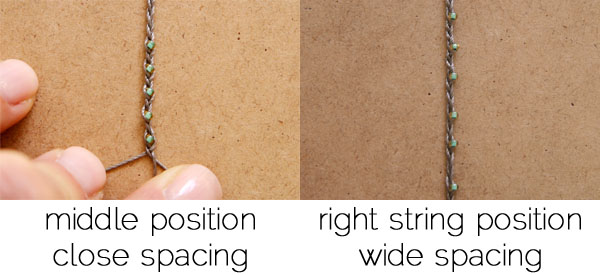
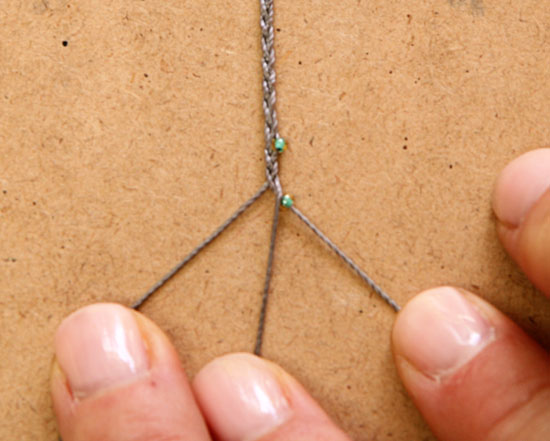
For placement, you can either add the bead to the outer strand or the middle strand.
Here are two different patterns that illustrate what these choices mean:
So here is where you get all artistic and designy.
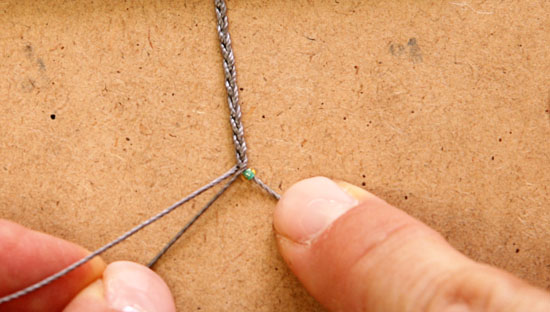
The pattern on the right is how I made my necklace. To start beading, slide the bead onto the string of your choice and push it right up against the braiding.
Now, continue braiding until you are ready to add another bead. This might be after your next crossover of the string with the current bead on it, or it may be after several crossovers. The trick, though, is to keep that bead where it is; don’t let it slide down the string at all, or it will end up in another position (say, the middle string position). Also, don’t let your braid twist. I like to work my braid flat on a surface, always keeping it flush against the table, so I’m sure it doesn’t flip or twist.
When it’s time to add your next bead, go for it.
Then, continue beading and braiding until you reach your desired length. Here, you have a choice, too; I made mine 32″ long so I could double it up, but you could make a single strand that’s much shorter. (Obviously, you can adjust the length of your strings if you are making a shorter necklace, too. To be safe, count on each strand being twice as long as your desired finished length.)
When you are just about to the length you want, stop adding beads and braid for an inch or so.
Add your second bead tip just like you did the first.
Tie a knot again, getting it as close as possible inside the bead tip.
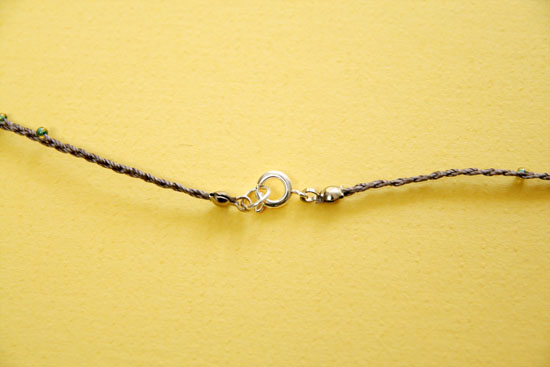
Cut off your ends and close the bead tip as you did before. Then, add your clasp to the ends of the necklace with the jump rings.
Now, wear it with pride to the grocery store, out to dinner, or while doing your favorite yoga pose (trikonasana, anyone?).
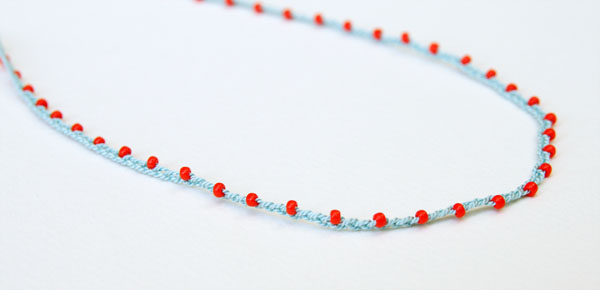
Besides the different patterns you can make, using different colored cords and beads makes a big difference in your outcome.
If you make one, send me a pic! I’d love to see your creations.









very cute! I actually have lots of tiny beads I’d like to use, but didn’t exactly know what to do with them… until now! Thanks