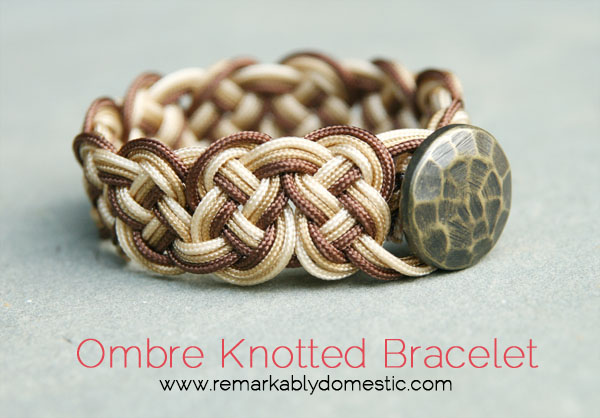
Ermagherd, peeps, this is the epic bracelet tutorial! It took me weeks to design the pattern, not because it’s so complicated but because I looked at so many different kinds of knots and I couldn’t decide. Indecision 2012! Turns out, I liked the first step of a larger knot the best and finally decided to run with that. But then the tutorial itself was never-ending, with all the Phototaking and Photoshopping and Photouploading.
But it’s done, and it’s here!
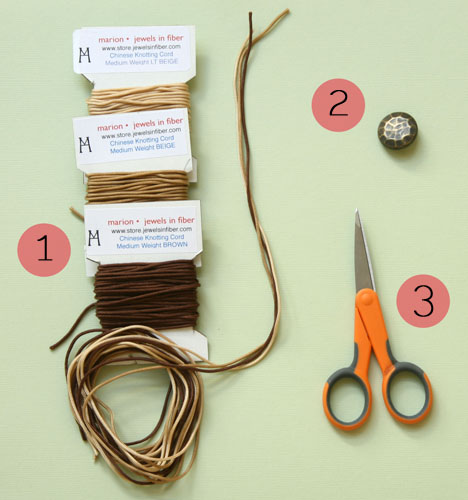
Here’s what you’ll need to make this bracelet:
1. medium weight Chinese knotting cord in three shades of one color, each strand cut to 2 yards (alternately, you could choose three totally independent shades for a different look)
2. a button with a shank
3. scissors
4. (not pictured) some kind of glue to secure your final knots; I used Hypo-Cement but you could use hot glue or even Elmer’s
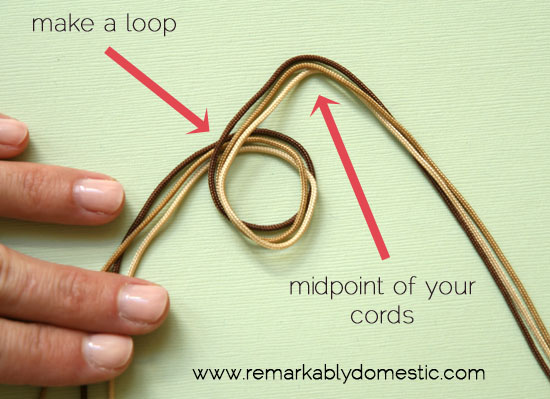
To start, you’ll cut your cords to length and lay them together. You will be knotting them as if they were one cord. Fold them over so that you are starting with the halfway point, right in the middle.
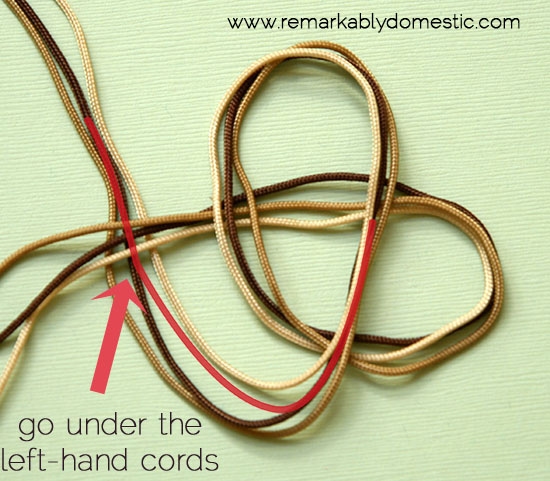
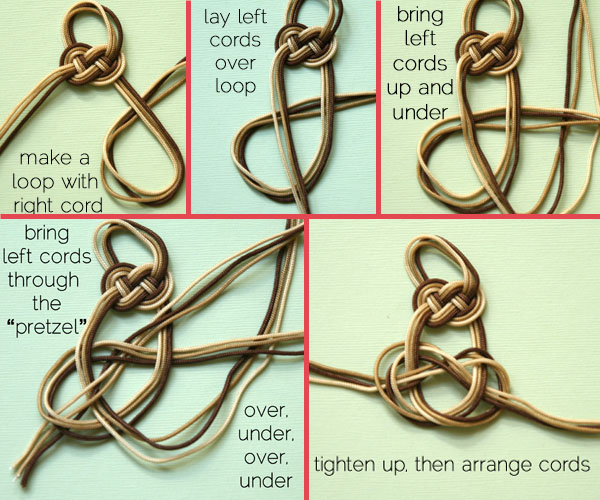
Make a loop with the left-hand cords.
Make sure the loop goes under the left-hand cords as pictured above.
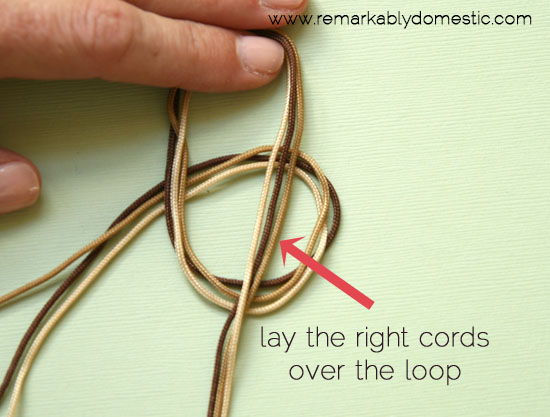
Then, lay the right-hand cords over this loop.
Take the right-hand cords and bring them up and under the tail of the left-hand cords.
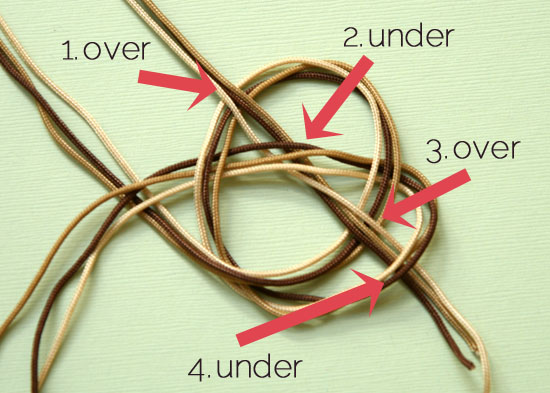
Take the end of the right hand cords (the ones you just pulled up and under the left-hand cords) and weave them through the loops that form a kind of pretzel shape: over, under, over, under.
Then, pull that cord through.
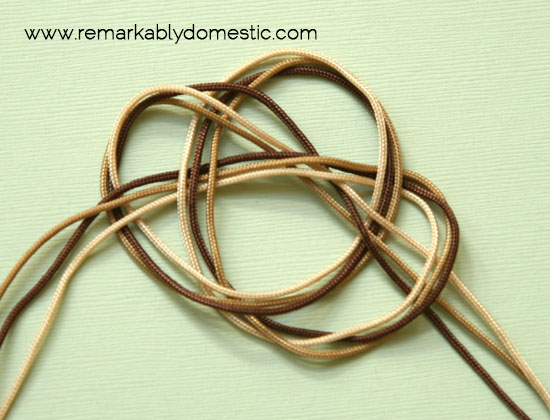
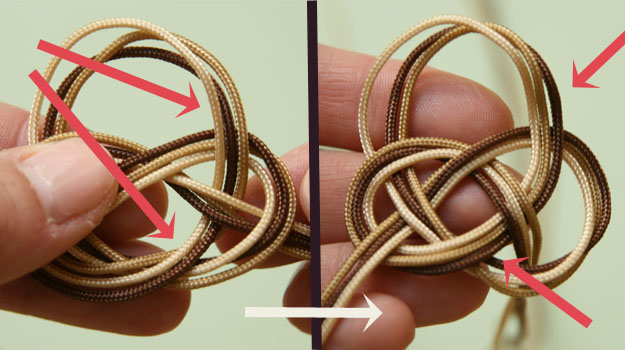
Now you can tighten this knot up a bit, but not all the way. This is where it gets tricky and a little persnickety. You’ll notice that your three cords, that should be laying nicely in shade order (that is, darkest to lightest or lightest to darkest) have gotten all cattywampus in the process of knotting. They are so inconsiderate.
See that? It’s all crazytown up in there. (Besides the fact that my cuticles are like, so. dry.) Before you tighten the knot completely, you are going to arrange the cords so that they are in the proper order. I know, it sounds insane, but it’s really not that hard.
You can see in the photos above, where I’ve used arrows, the before and after. This is the beginning of me rearranging the cords. To illustrate it better, I’ve created a little video of the process of realigning the cords:
Oh, Lordy, I know, that’s the weakest video ever, but like I said, this was so epic I just wanted to get it up and running.
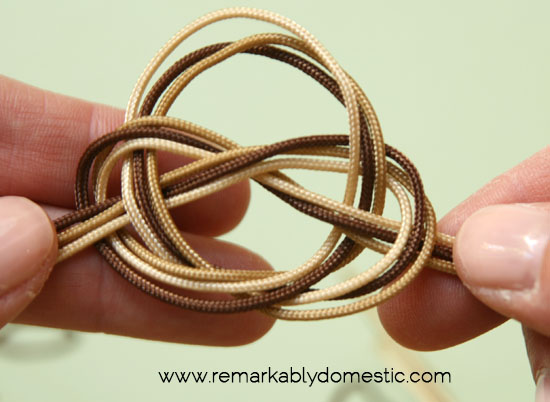
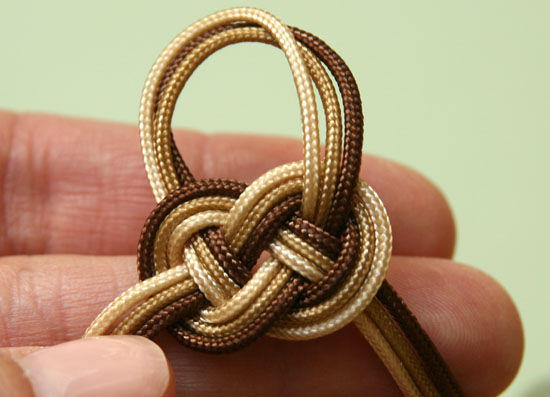
Once you’ve arranged all your cords, your first knot should look like this:
Tighten it up so that the top loop is big enough to go over your button.
The next knot is the same, except in the opposite direction.
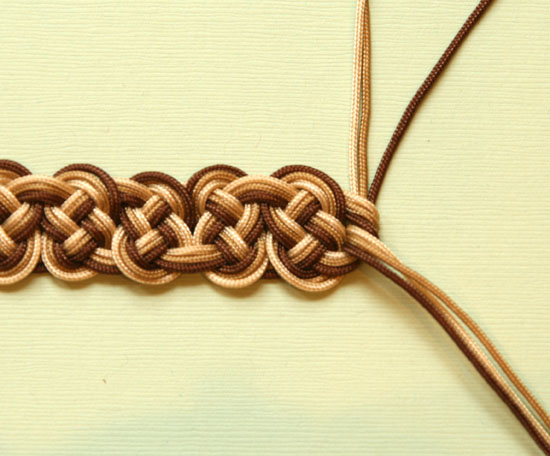
Once you’ve arranged the cords and tightened it all up, it will look like this:
Now, repeat the whole process, starting with making a loop on the left-hand side. You will continue knotting, alternating between starting with the left-hand and right-hand cords. When your bracelet reaches the desired length, you can add your button.
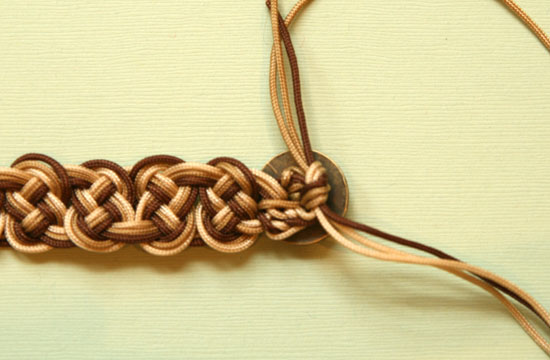
First, tie a single overhand knot at the end of the bracelet to secure your knotting. It won’t be very tight, but you are going to add your button afterwards which will secure everything.
The number of cords you will be able to thread through will depend on the size of the shank on your button (that sounds vaguely obscene, doesn’t it?). Mine only fit two cords through, since I have a small shank (I figured I should just go with the obscenity, right?). I sent one cord from each side through the button and then tied some knots. Truth is, though, that this kind of cord is relatively slippery and doesn’t hold a knot that well, so we will secure it with some glue in a minute.
I know, this knotting looks INSANE, but no one’s going to see it, right? I wanted to make sure it was secure.
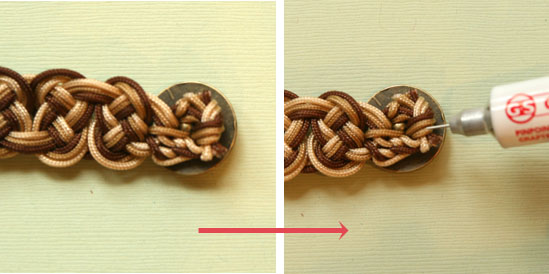
Cut the ends of your cords and then add a little glue to the ends and the knot to make sure it doesn’t come undone.
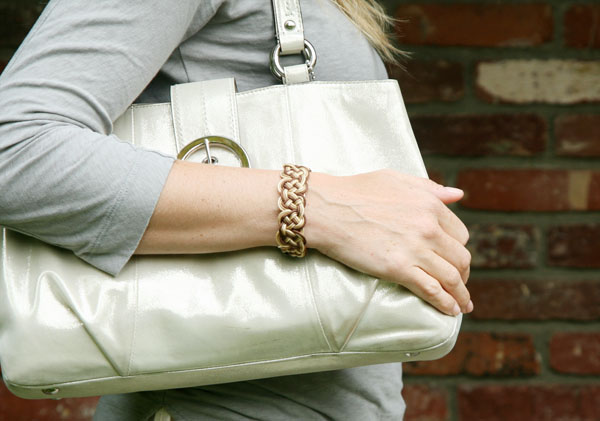
Once it’s dry, you’re good to go!
Hope you enjoyed!
Pin It






LOVE! This is so lovely! And I really like the non-ombre idea of using non-color-family color cords, too. Bee-you-tea-full!