Since so many of you have been interested in the review I did of the Sally Hansen Gel Polish kit, I thought I’d give the Insta Gel Strips a try to let you know how they work. (For my review of the Gel Polish kit, go here.)
I bought just the strips, not the entire kit, since I have the LED light from the Salon Polish kit. To use the strips, you peel them off of a backing, kind of like a sticker, and then place them on your nails. You use a file to remove the excess strip, then put on a top coat and cure it with the light. So you only have to cure one time.
 So, you put these strips on. First, I will say that I was pleasantly surprised that the strips weren’t as hard to work with as the regular Sally Hansen strips, which I’ve used before. I guess because they are gel, they are thicker, so it isn’t like working with tissue paper. They don’t tear as easily or fold in on themselves as much as the regular ones do.
Filing down was a little awkward, and you have to be careful not to file too much towards the top of your nail or you end up with worn-looking edges.
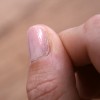
The main problem with strips is that your nails need to be shaped in exactly the same way as the strips to get perfect coverage. And mine aren’t. I can’t imagine very many people’s are. So I ended up with some bare spots in the bottom corners, near my cuticle, and on the sides.
 See that little area that didn’t get covered in the corner? Not that big of a deal, but since I’m kind of a stickler it bothered me.
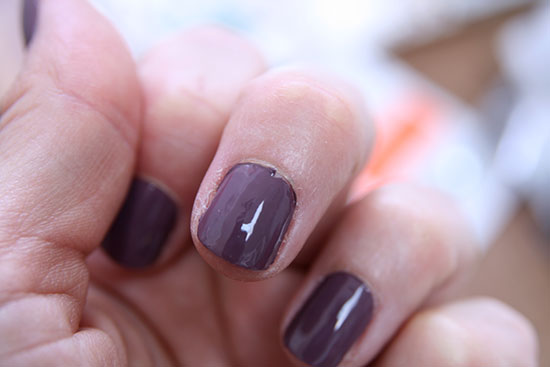
 Here you can see how the edge of the nail didn’t quite get covered by the strip.
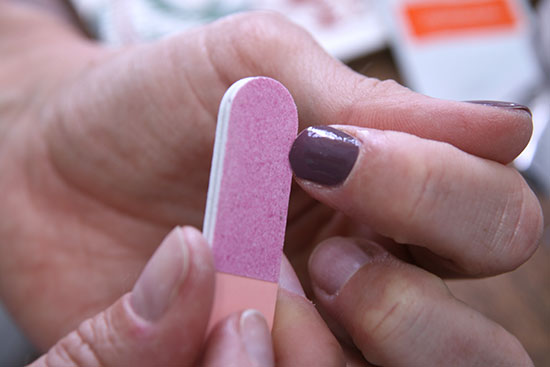
Once you put the strips on, you need to smooth down the edges, and they give you a little orange stick to use. The problem is that the strips are pretty delicate, and so I ended up tearing one just using the orange stick.
 I was trying to smooth down where the strip met my cuticle, and it just tore. And you can’t really fix that. After that, I was uber careful about using that stick.
Once you’ve got the strips on, you put on a top coat and cure it. With the Insta Gel kit, the LED light is very small, so you can only fit one finger at a time. I was using my polish kit light, so I was able to do all 4 fingers at once, and the thumb separately.
I wore them for about 4 days, but 2 hours into my manicure I already had a chip:

So that was a major bummer.
The most major bummer, though, was taking this gel off. I’ve had really good success and an easy time of it taking off the polish gel. These strips were a disaster. I don’t know what happened, but instead of flaking off, the polish seemed to… melt? It was like the top coat turned to gelatin or something; it was all goopy and was sticking not only to my nails but my fingers as well. I had to scrub it off with a cotton ball covered in acetone and then wash my hands a bunch of times. And even then, some of it stuck to my skin and I had to file it off. I’m curious to know if anyone else has experienced this phenomenon.
Here’s my overall assessment and thoughts on the Insta Gel Strips: don’t waste your time or money. Here’s why:
- Although you are only curing your fingers once, it takes so long to get the strips just right that it really isn’t that much faster than using the polish.
- The strips aren’t as sturdy as the polish and don’t wear as well.
- The strips are very limited in covering your nails perfectly because they only come in one size/shape.
- You don’t really get a mirror finish or that smooth of a surface with the strips.
And, probably the number one reason I say pass? It’s super expensive.
Now, the Insta Gel kit is only $30, compared to $65 for the polish kit, so at first glance it seems like the strips option is cheaper. But you only get 16 strips in the kit, which I’m pretty sure is supposed to be for only one manicure (the extra strips are because they give you a few different sizes to cover as many differently-sized hands, I believe). If you are really good, you can get two nails out of one strip if you are careful removing the excess and can salvage it for another finger. If not, you just paid $30 for one gel manicure, versus $65 for probably 6 – 8 gel manicures with the polish kit.
And the refills! This is what I do not understand. The refill packs come with the same 16 gel strips and an entirely new bottle of top coat. And it costs $13!!! It would make more sense to me if they sold packets with just the strips, since you could easily get a good 6 – 8 top coat applications out of that bottle. And $13 is pretty steep for just one application. With the polish gel, you spend $12 for a bottle of color that will give you a bunch of manis, instead of just one.
But, I’m still a huge fan of the Sally Hansen Salon Gel Polish. So if you are in the market for an at home gel solution, save up for the $65 option; in the end, you’ll really be saving money. And frustration!