


I love making these cord bracelets. There are so many ways to knot, macrame, or twist them up. And I’m definitely hooked on it now!
Today I’ve got this infinity knot bracelet to show you. It’s really quite easy to do, although it does require some concentration while you are making the knot. But you can easily bang it out in about an hour’s worth of active time, with time in between for drying and such.
Here’s what you’ll need:
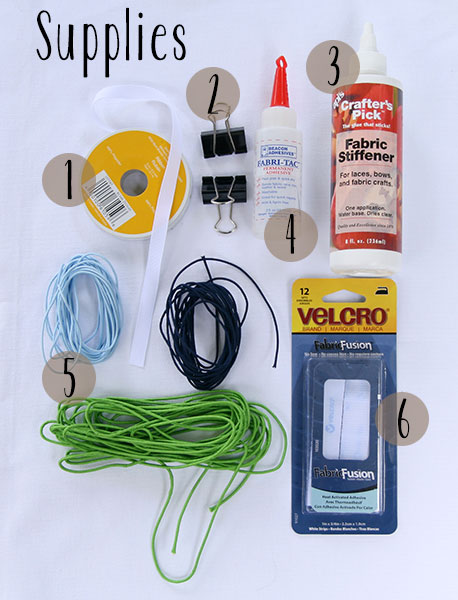
- 3/8″ wide white ribbon, 16″
- binder clips
- fabric stiffener
- fabric glue
- Korean knotting cord, in 1.5mm or 2mm, or a combination, 1 yard of each color
- fusible velcro
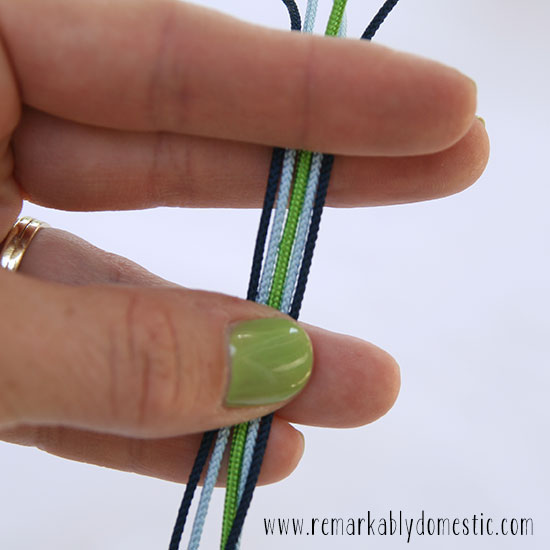
For this bracelet, I used a combination of 1.5mm and 2mm cord. As you may be able to tell from the photo above, the center green cord is 2mm and the light and dark blue ones are 1.5mm, slightly thinner. It worked out well, even though I was kind of skeptical at first.
Decide what you want your pattern to be. I chose a green center with light blue and dark blue on the outsides. I thought it looked suitably preppy for what is sort of a preppy-type knot.
 You want to choose your pattern first, but you won’t worry about keeping it in this order until you’ve got your knot completed.
Find the center of your cords, making sure that they are all stacked evenly (that is, you don’t have one cord that’s shorter than the others on one end and longer on the other).
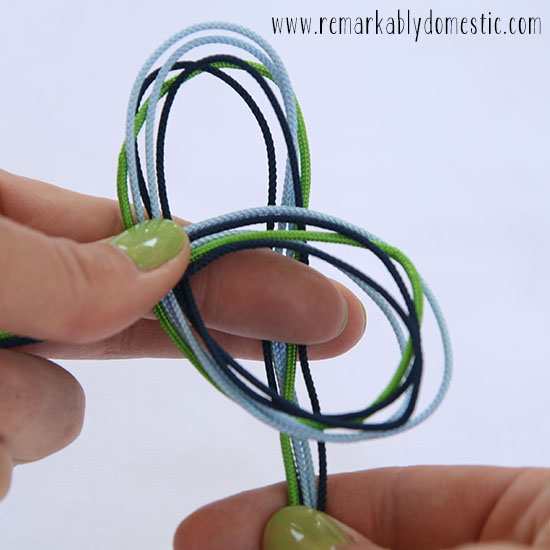
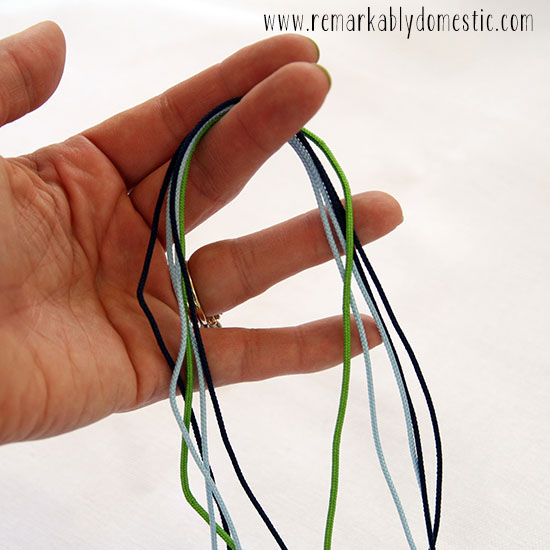 Step 1: Time to start knotting! Keeping the center of your cords at the top, take the left-hand cords and bring the ends up and over, laying them on top of themselves higher up. You are essentially making a loop with the left cords.
 Step 2: Now, bring the right hand cords behind that loop.
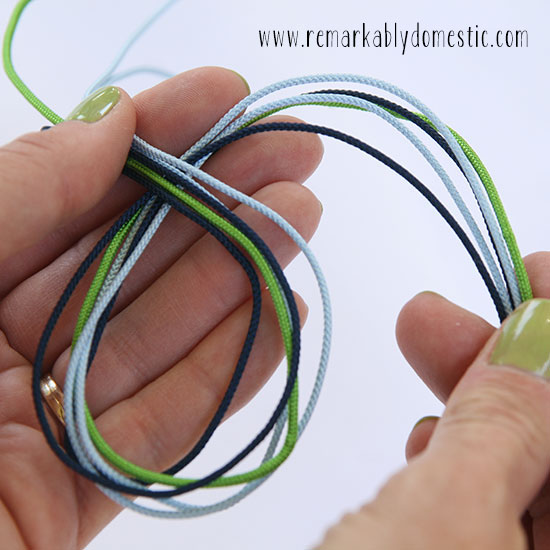
 Step 3: Bring the ends of the right hand cords up and over the ends of the left hand cords, laying them on top.
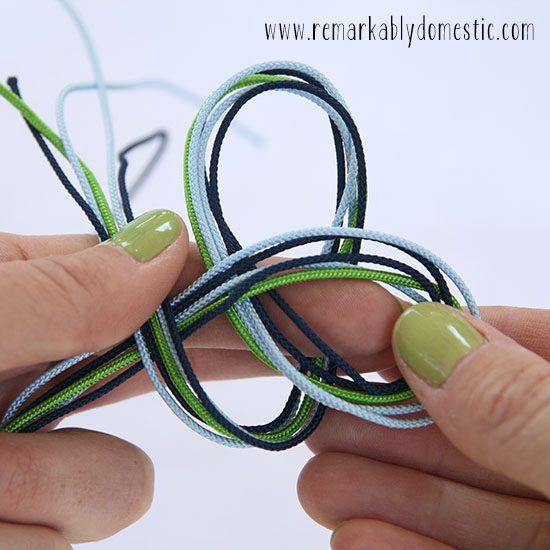 Step 4: You’ll notice you have a loop at the top, the center of which should be the center of your cords (it’s not that important at this point that it be perfectly centered, but I wanted you to know how to identify this loop). You will now bring the ends of the right-hand cords (that you just bent up over the left cords) under the first side (left) of this loop. Don’t worry, you’re almost there!
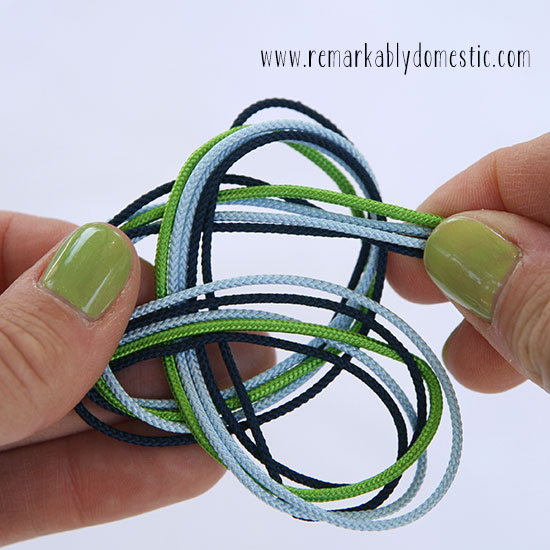 Step 5: Here’s the trickiest part, but you are almost done. Looking at the photo above, you’ll see there’s another loop right below the cords you are working with. This is the initial loop that you made on the left side. Feed the ends of the right cords over the top of that loop. (See below.) After you feed it over the top of that loop, go back under the right side of the top loop, the “center of the cords loop,” if you will.
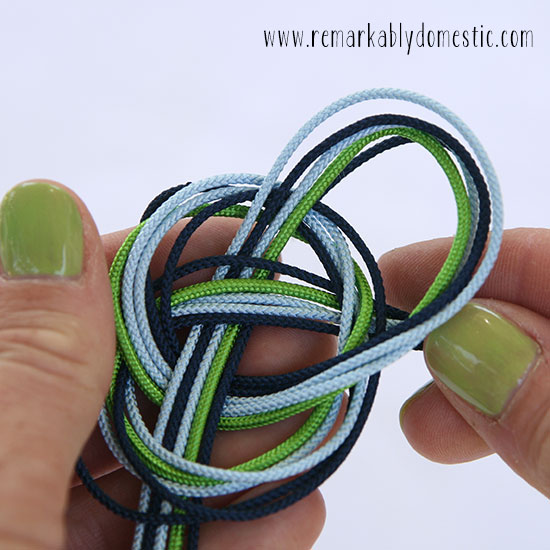
Step 6: Last knotting step! Bring the cords you have been working with up and through the loop you originally created with the left-hand cords. You are essentially bringing it up and over the right side of this loop. You’ll see that your knot is complete with this last step.
 If this seems a tad confusing, check this diagram for steps 5 and 6:
Bring the working cords (in right hand) along the path of the red arrows.
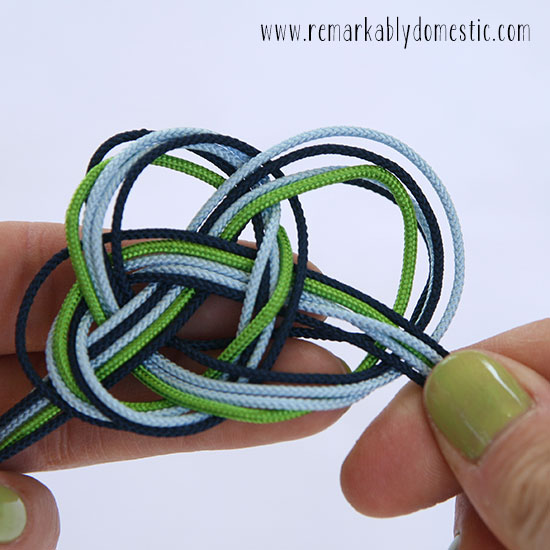
Phew! Done knotting. You’ll want to tighten the knot up a bit, but not too much.
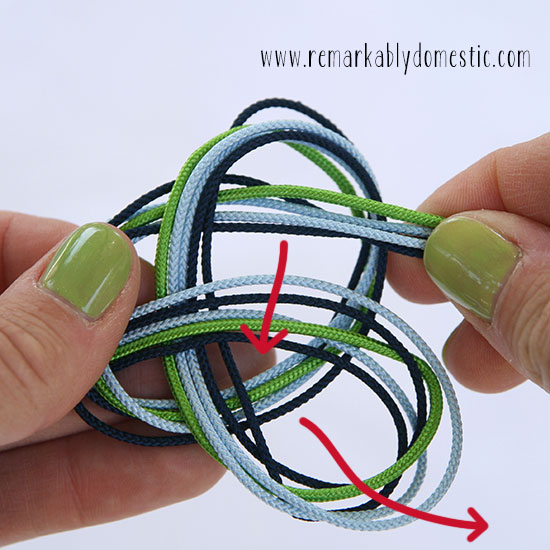
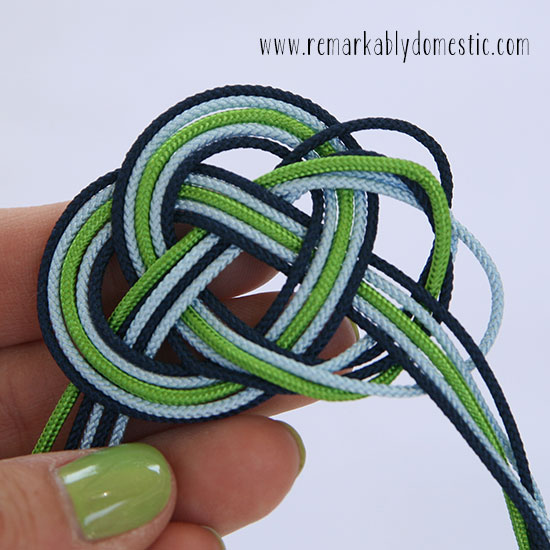
This looks a mess. It’s time to fix up your cords so they follow your original pattern idea. It’s easiest to do this step by step, following the line of the knot. So pick a part of the knot to start on, and begin forming the strings into the pattern.
 You’ll see I started with the cords that come out of the right side of the knot. Continue to straighten them, following the cords along through the knot. Here, I’ve straightened them past the first left-hand loop.
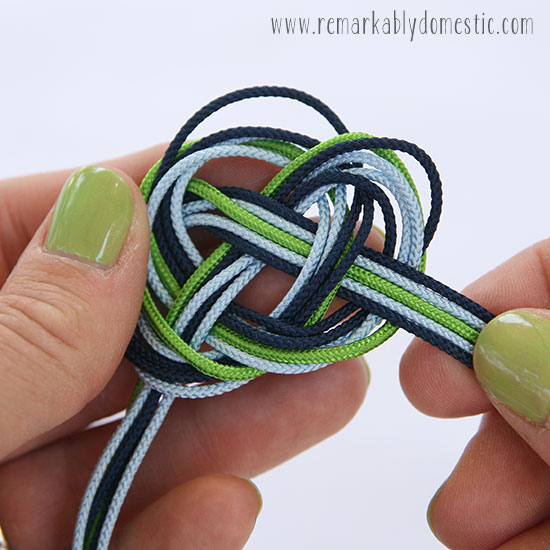
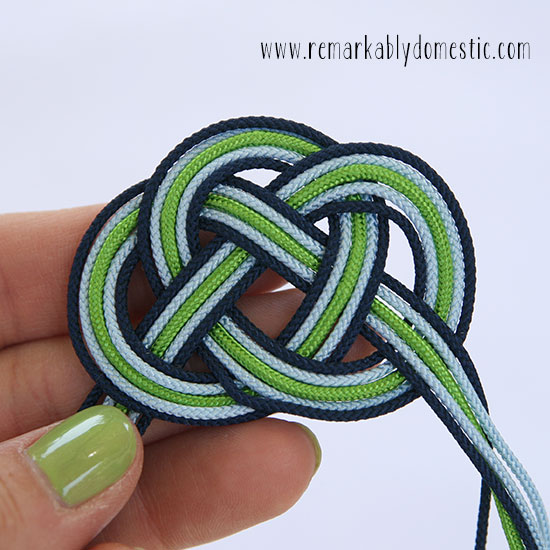
 A little more straightening…
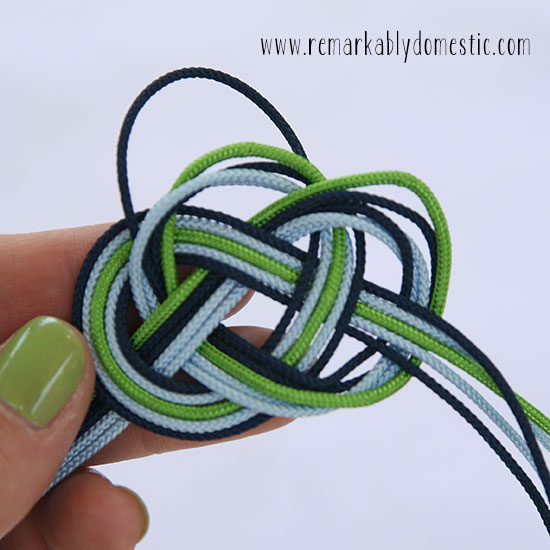
 And a bit more, and we’re done! Time to tighten up the knot properly.
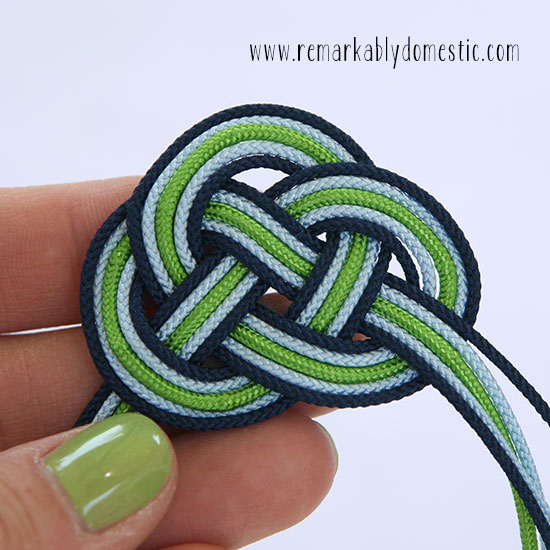
 Tighten up the knot by pulling gently from the inside of the knot out. Don’t simply pull on the ends, or you’ll undo all your good work. Start with a section towards the middle and tighten that area, and move outward pulling up slack until you get to the outside of the knot. You’ll have to fiddle with it a bit, because you don’t want to pull it so tightly that the pattern gets distorted.
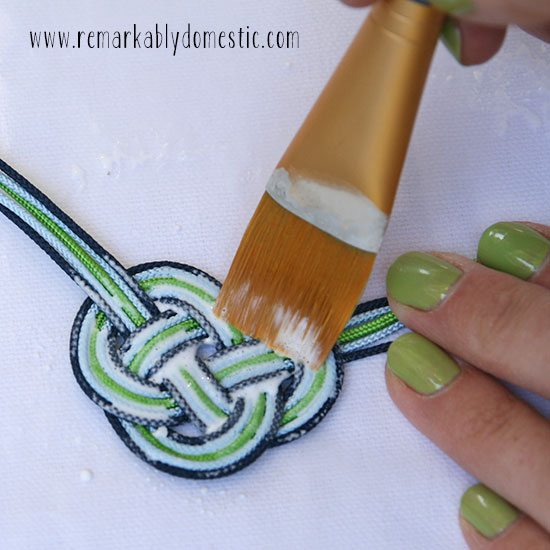
 Lovely! Next, we need to stiffen up the knot so that it keeps this great knot and pattern. For that, we use fabric stiffener and a brush. Simply brush a generous amount of fabric stiffener onto the knot, coating both sides and letting the stiffener soak in.
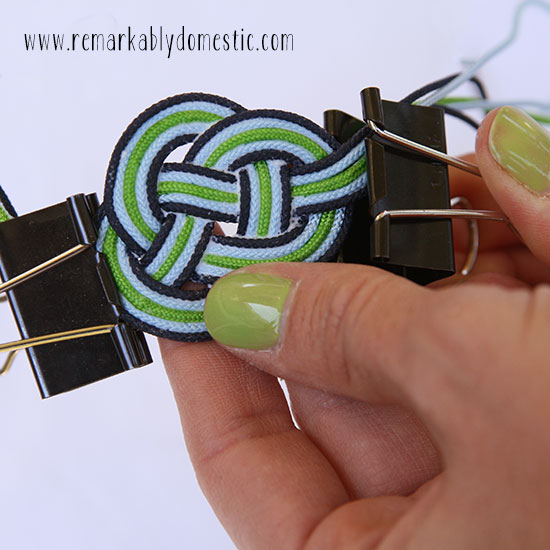
 Following the directions on your fabric stiffener, let this knot dry. You’re going to need the knot to conform to your wrist, though, so you’ll want to dry it in a curved position. I used the binder clips to set my knot up with a slight curve to it. Clip the edges of the knot so that the cords don’t get kinked.
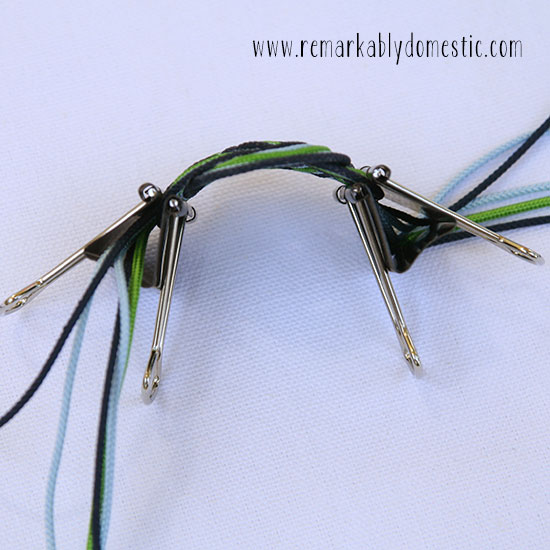
 Then bend the knot into a curve that will conform to your wrist (it doesn’t have to be exact).
 Once it’s dry, you’ll add the backing to the free-hanging cords to create the band of your bracelet. Cut two pieces of 3/8″ ribbon to about 8″ each. Using your fabric glue, glue the cords in their pattern to the ribbon, extending the ribbon a little bit into the knot, but not so much that the ribbon shows through the holes in the knot. The idea here is to hide completely the ribbon that is holding the cords in place.
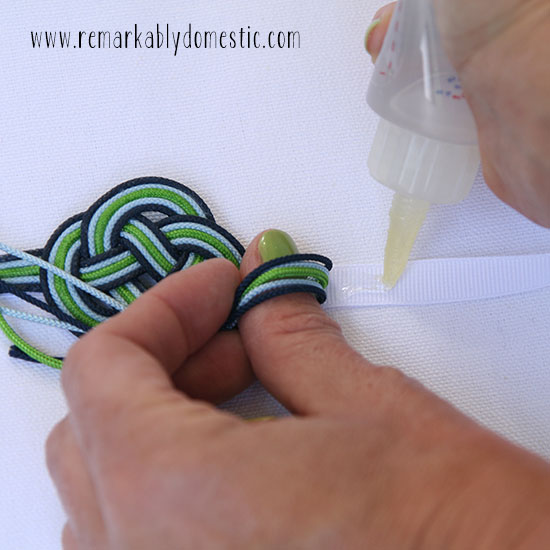
Let the fabric glue dry with the bracelet shaped into a curved position as it will be on your arm.
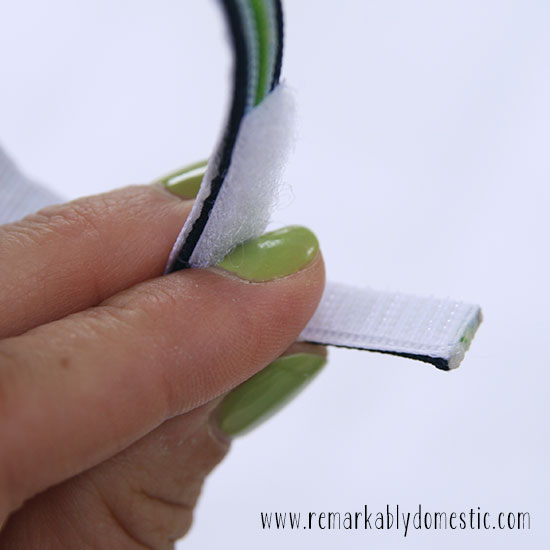
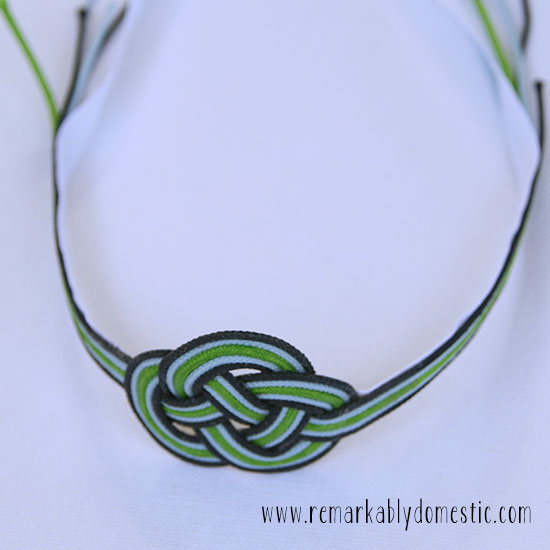 Once everything is dry, you can cut your bracelet to the proper length, making sure to leave about 2″ for the overlapping clasp. You can add a little fabric glue to the ends to prevent fraying. To create a clasp, add some fusible velcro to the band.

Make sure you actually put it on to measure where you want the ends to overlap, and make sure you are putting the velcro on the proper sides of the band.
 All done! Wear it with pride. And jeans.
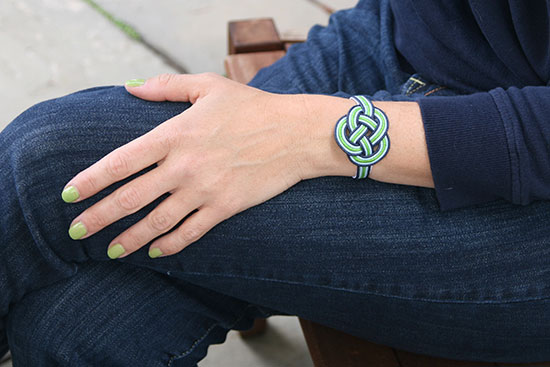
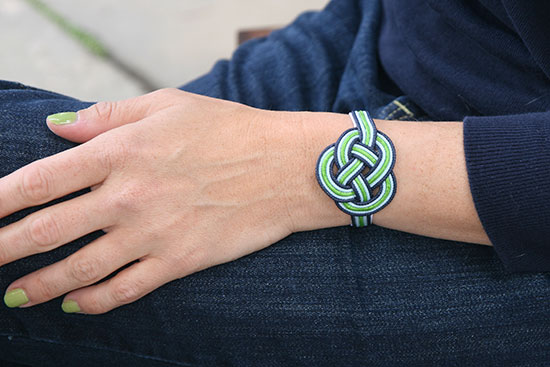


Oh my, how I love this! The knot is beautiful, and the colors are so fresh and nautical — dare I say knotical?