


More knotting, y’all!
This is one I’ve been working on for a while. The basket weave knot seems tricky to tie at first, but once you’ve done it, it’s pretty simple. I learned it from JD at TIAT, so if you want to see a video of how to tie this knot, check it out here.
Here’s what you’ll need:
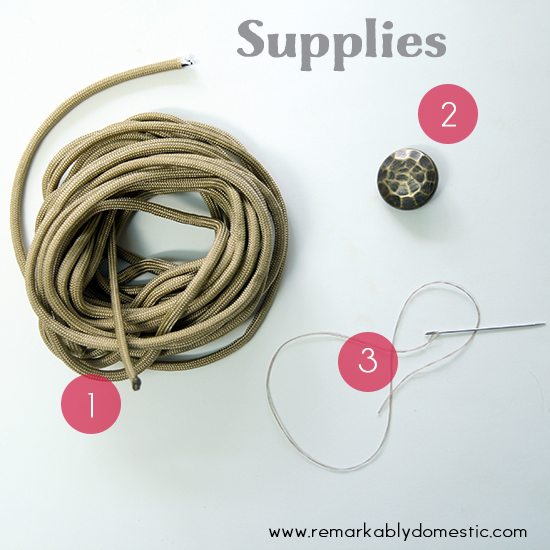
- 2 ½ yards of 550 paracord, in a color of your choice
- a button of your choice
- needle and thread
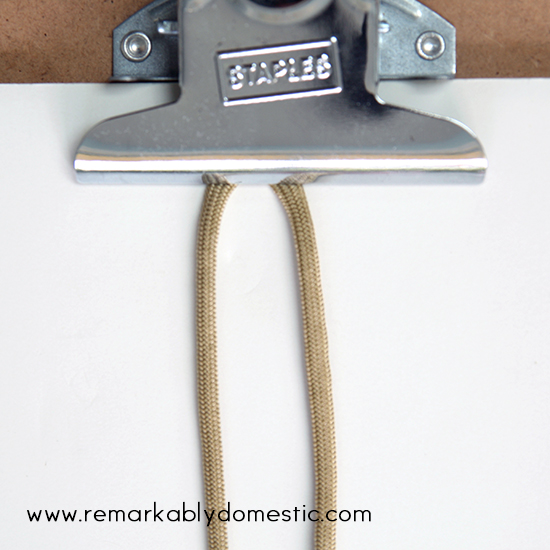
You’ll also want something to hold the cords while you are tying. I usually use a clipboard, but you can also tape it to a table.
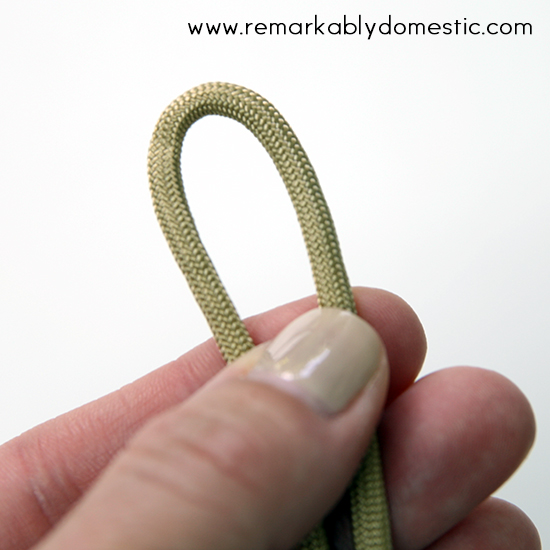
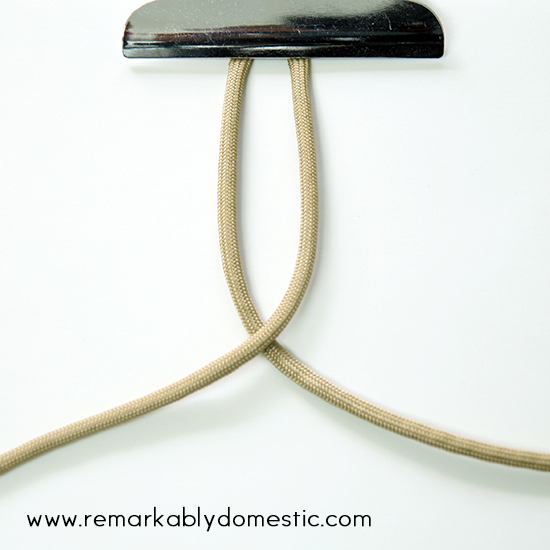
To start, fold your cords in half. This bend will be your clasp loop.
Attach this loop to the table or your clipboard.
Start by laying the right-hand cord over the left-hand cord.
Now the cords have switched places. Take what is now the right-hand cord and bring it up and through the loop, and out to the right.
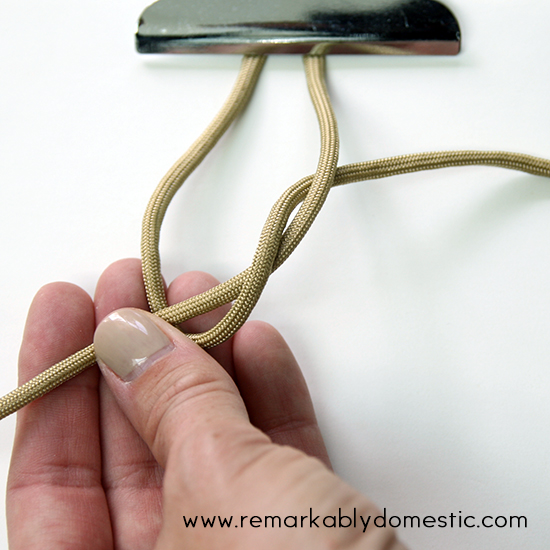
This is the base from which you’ll weave. Straighten it out a bit.

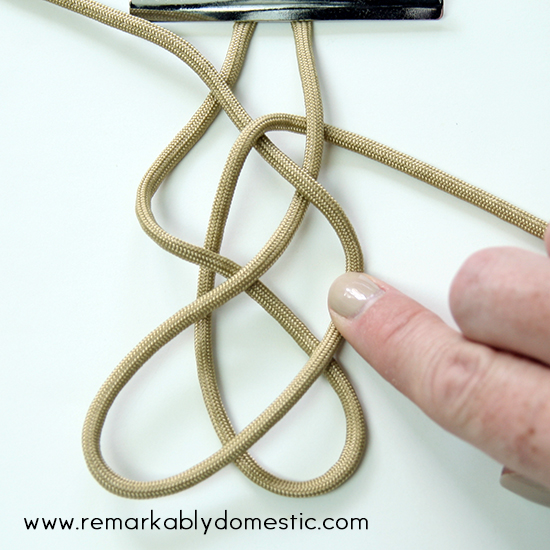
Now, loosen the knot up a lot, putting the ends pointing upwards.
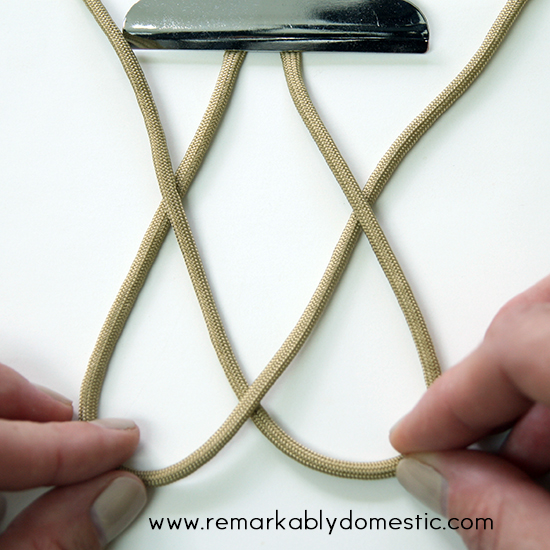
Next you are going to take each of these large loops and twist each one to the right. Do the right side first, and then the left side.
Now you’ve got two twisted loops. Place the right-side loop over the left-side loop like this:
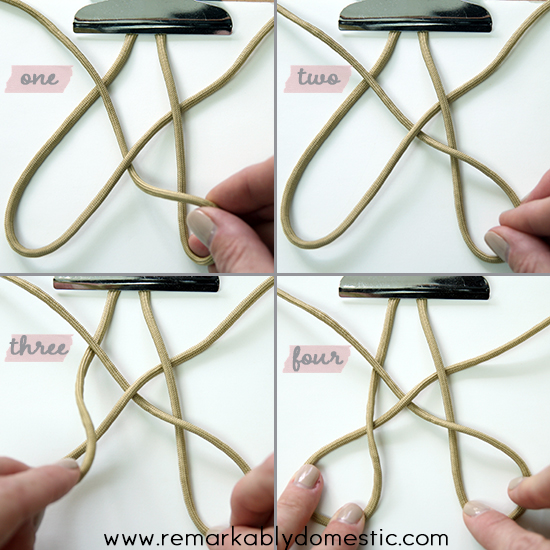
Take the end of the cord on the right and feed it through the loops like so:
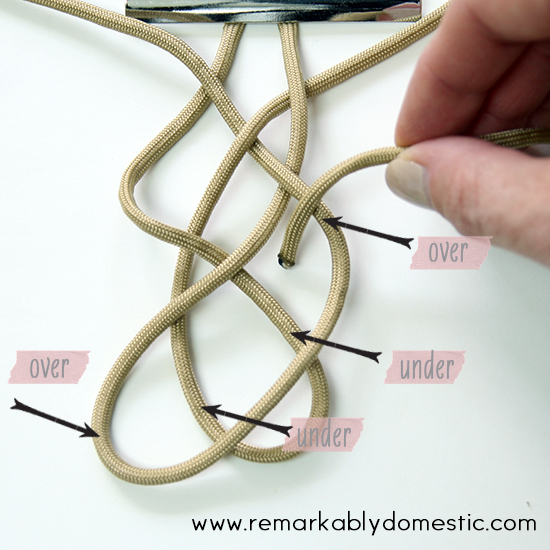 You’re going over the first loop, under the two middle loops, and over the last loop.
Pull it through.
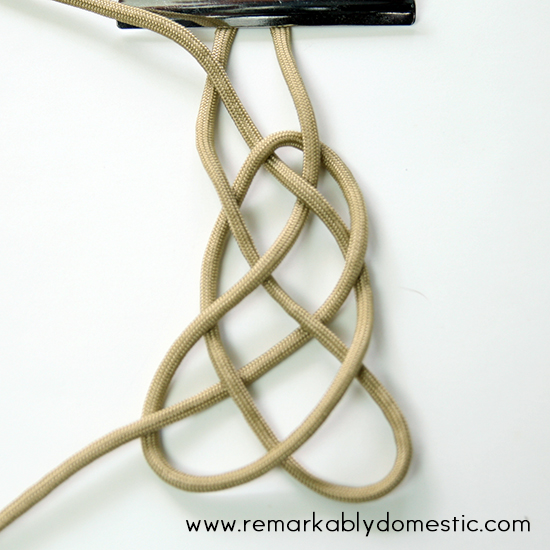
Next, take the end of the cord on the left side and feed it through in a similar fashion, like so:
 And pull it through.
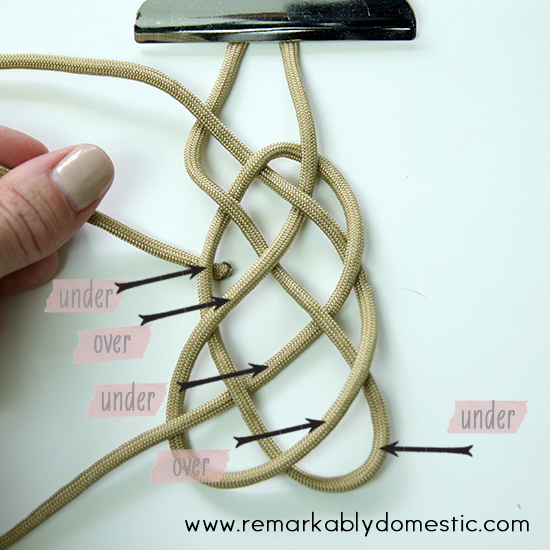
 Tighten up this knot by gently pulling the threads through, starting at the top.
 You can tighten to whatever size you want. I usually like a smaller knot, so I tighten quite a bit.
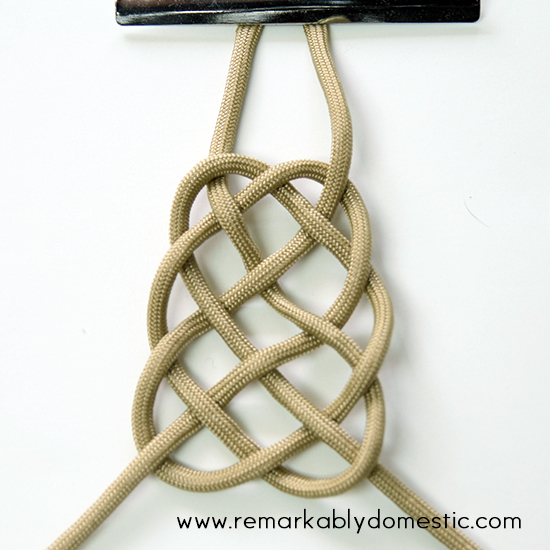
 Now you can see what the knots will look like when finished. From here, simply start another knot.

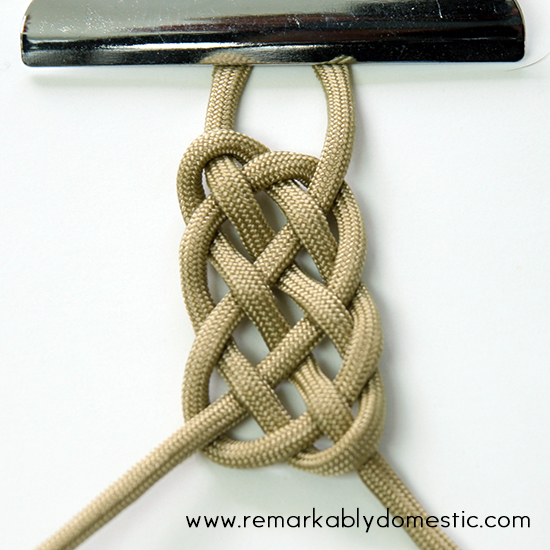
Follow the exact same procedure as the above for the second knot. Once you’re done, tighten it up so it looks the same as your previous knot.
Continue knotting like this until the bracelet is the right length for your wrist. You could also leave more space between knots if you want a more open look.
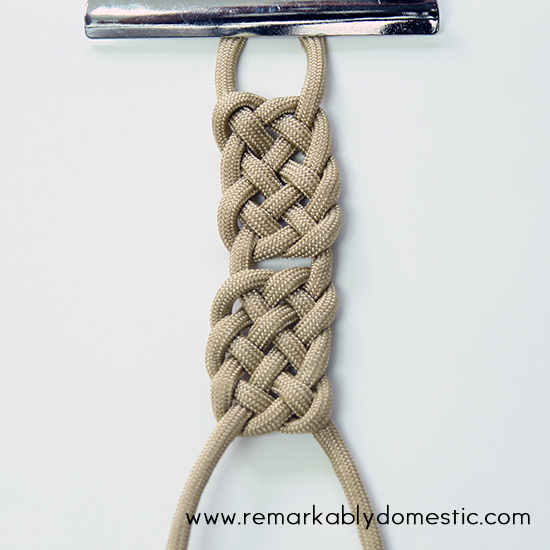
Add the button to the end by sewing it on. See my previous paracord tutorial for sewing a button with a shank on; if your button has holes, you can simply sew up through the cords and into the button holes.

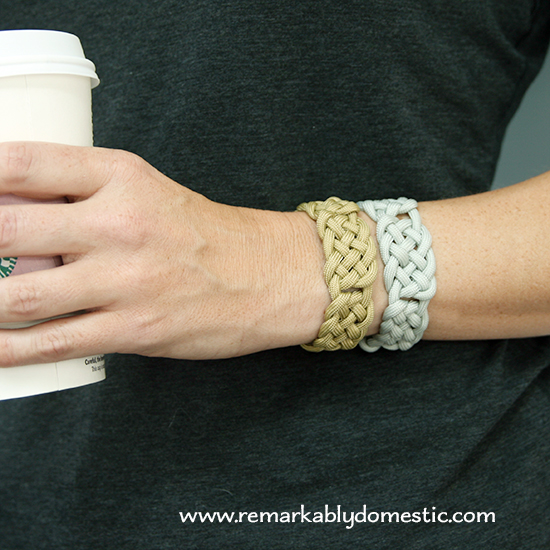
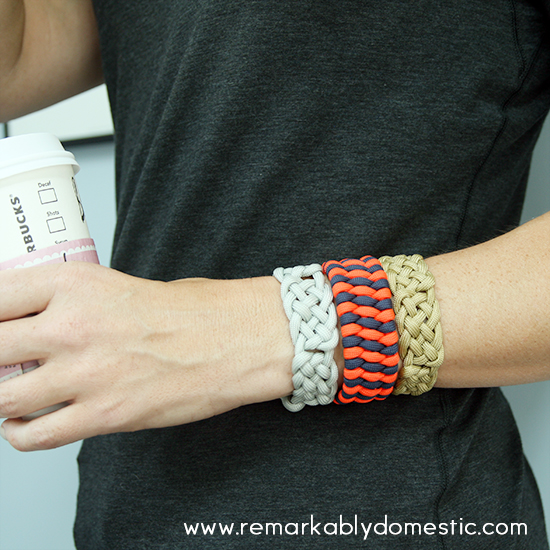
And stack them up!
You can even stack them with other paracord bracelets, like the ones I made here.


Hello! Would you please check up your tutorial, I am following it and it does’nt ends well, I love the bracelet and I want to do one for me. Thank you.