This is probably the chapter I’ve most been looking forward to throughout the project. Something extremely practical that I don’t really have any idea how to do. Yay!

True confesh: I’ve actually done some work with this chapter before, so I’m not a complete newbie. Jewelry making was one of the reasons I bought this book, so a bit back I made some bracelets for my sister and mom.

This first project is beaded necklaces. You can make three different kinds: wire wrapped beads, beads strung on silk cord, and beads spaced along a knotted cord. I made the latter two, since wire wrapping is really tricky and takes forever (although I do love the look). I’ll do a wire wrap bracelet when that comes up to show you the technique and let you know how Martha’s instructions are.

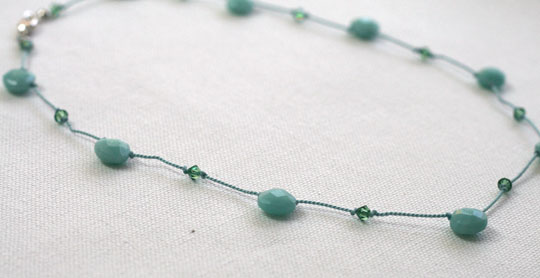
First, I made the knotted cord necklace. This took relatively little time because you only put a bead every inch or so. So it works up pretty quickly. I chose Amazonite pear-shaped beads and some sea-greenish, small Swarovski crystal bi-cone beads.

I strung them on a light aqua colored silk cord.

So, not too shabby. The trickiest part is getting the knots in the right place, and Martha gives relatively good instructions on how to do it. In general I didn’t have too hard a time.

What lacks in these instructions is more information about how to use “bead tips,” which are what you put on the ends to finish off the strand and allow for a clasp. I was just going by intuition, which is never really all that precise, and then I found a tutorial on YouTube and discovered I was totally doing it wrong. Bleh. I do think there should be more instructions on using these bead tips, because that was definitely the most confusing thing.

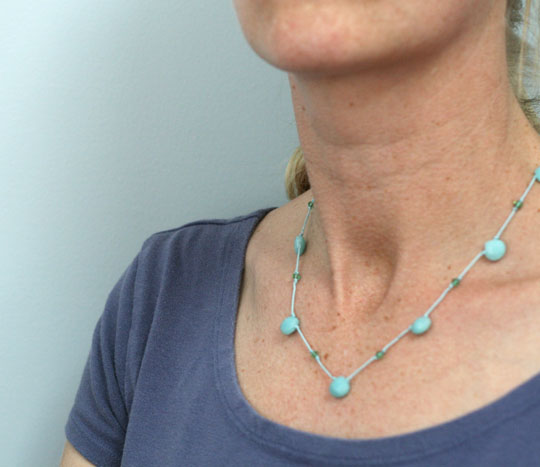
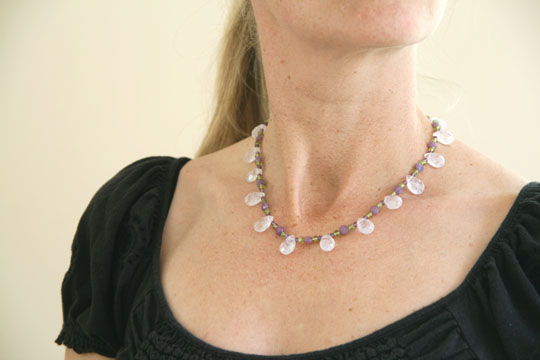
Here’s how it looks on:

Sorry the focus is kind of in the wrong area; self-portrait, you know.

Designing jewelry is harder than I expected. I wasn’t sure how long to make different designs; maybe I should’ve made this one longer? When you go to the bead store, too, there are so many choices that it makes me kind of paralyzed.

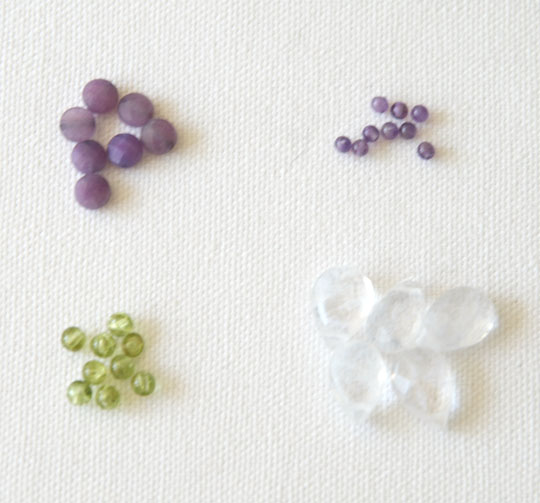
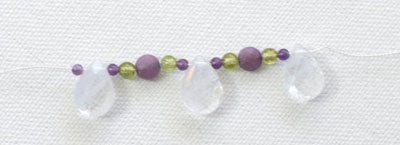
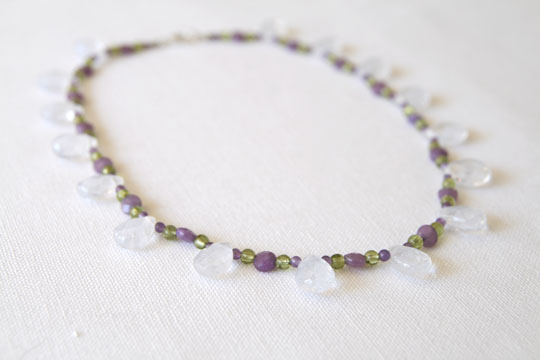
The second one I made was simply beads strung on a cord. I went with a purple theme because I found these lavender quartz pear-shaped beads that were gorgeous. I got smaller purple jade ones and then even smaller amethyst ones.

But once I started stringing them, it felt off. The large lavender pears seemed to come too frequently, and it was too purple. So I decided to add some light green peridot that I had on hand. So here are the gems I used:

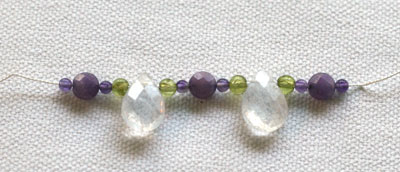
I tried putting them together, but this scheme wasn’t quite right either. The peridots were too big to sit flush next to the pears, and the colors were just… off. So I tried once more.

Better. The green now cuts up the purple more evenly, and the small amethyst beads fit nicely next to the lavender quartzes. But even once I got it all done, I was kind of like, “Meh.”

It’s kind of a lot, you know? Like, maybe for a special event?

Or maybe it just doesn’t even work. The good part about making these on your own (especially with the silk cord) is that you can wear it once and then take it apart and make something else. Kind of cool.

Martha’s instructions, as I say, are about as good as they can be, since it’s a very visual process. I recommend looking for some videos on YouTube for wire wrapping and for the bead tips. My other suggestion is that you don’t cut your cord too short; I did that and then it was a total bee-atch to make the knots in the ends.

TIME INVESTED

For the knotted necklace: About 1 hour

For the fully beaded necklace, including design time (and un-beading and re-beading): About 2 1/2 hours

DIFFICULTY

Moderate

TOTAL COST

Here’s where your costs can really vary. If you use sterling silver, things are going to get expensive. One sterling silver clasp can run you $5 – $7, while you can get a whole package of base metal clasps at Michaels for about $3.99. Your gemstones will also vary widely in cost. I generally chose nicer stones that were on the inexpensive side; one strand usually ran anywhere from $7 to $20. But if you want something more rare, you might be looking at $100 or more per strand.

  • lavender quartz strand: $19.95
  • purple jade strand: $18.95
  • amethyst strand: $9.95
  • peridot strand: $14.95
  • bead cord: $1.75 (enough for about 3 – 4 necklaces)
  • bead tips: $0.75 (for a bag of base metal tips)
  • clasps: $3.99 (a package of base metal clasps)

Total cost, lavender necklace: $70.29

I had plenty of beads left over, though, to make other necklaces, bracelets, or earrings.

  • amazonite strand: $14.95
  • Swarovski crsytals, bag: $16.25
  • bead cord: $1.75 (enough for about 3 – 4 necklaces)
  • bead tips: $0.75 (for a bag of base metal tips)
  • clasps: $3.99 (a package of base metal clasps)

Total cost, green necklace: $37.69

WAS IT WORTH IT?

Yes. The techniques in the book can be used for lots of different kinds of jewelry, and I think it’s a valuable skill to acquire. Then you can make your own custom jewelry, and it’s great for gifts.


{ 1 comment }

I’m putting these three projects together because they all constitute glittering paper stuff. And this is the end of the glitter!

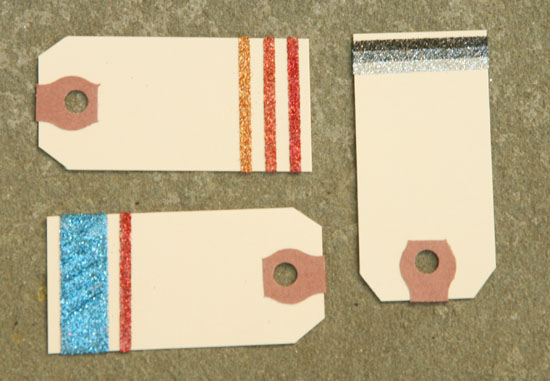
First up, glittered gift tags. I liked the fact that you didn’t need to use glue here; you put double-sided tape on the tags and then glitter. The only problem is that the tape doesn’t quite hold the glitter like the glue does. So you can’t tap the glitter off too hard, or you end up losing too much glitter. (OMG, stop saying GLITTER!)

I just used those little manila tags. I like the look of them; I especially like doing the ombre effect.

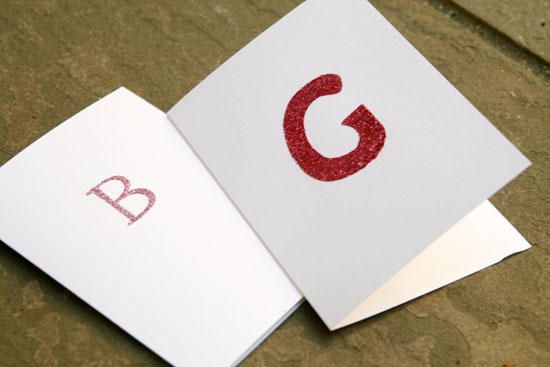
Next was glittering a stenciled letter onto a card. Like so:

The big “G” I did as instructed, by using a letter stencil and painting glue onto the card. The second one, the little “B”, I did with a glue stamp pad. I had some letter stamps, and you can buy a stamp pad that’s glue instead of ink. I found that it worked really well, especially if you want a more delicate letter.

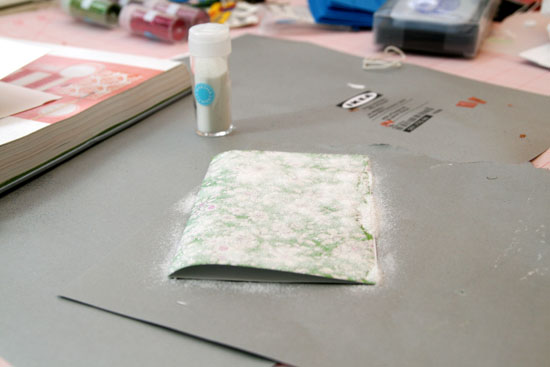
Finally, you take a patterned card and then glitter the crap out of it with clear glitter. Main problem here? Painting glue all over the card makes it warp like nobody’s business. While I was glittering:

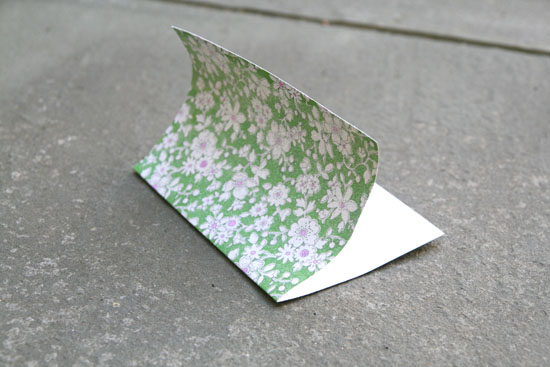
And when it was done and dried?

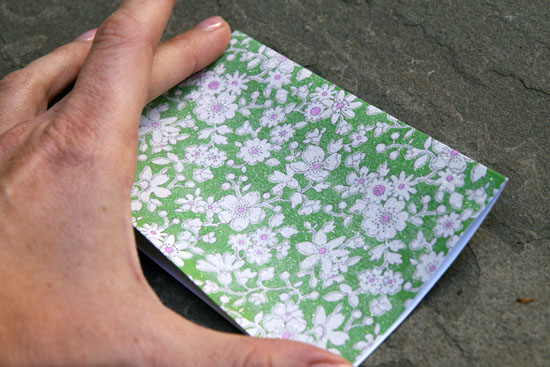
Um, warped much? Martha does, in fact, warn of this issue. She recommends encasing the card in waxed paper and then putting it in a book for a few hours to flatten it. OK, fine, but… really? I didn’t want to have to do that at this juncture. So I held it down while I photographed the glittered result:

Meh. Glitter.

TIME INVESTED

About 5 – 10 minutes per piece

DIFFICULTY

Easy

TOTAL COST

  • Martha Stewart fine glitter, $4.99 (1 bottle), or glitter pack, $29.99
  • glittering glue, $3.99
    • blank cards, $4.99 for a pack of 10
    • manila shipping tags, $4.87 for 100
    • patterned card, prices vary

Total cost = $14.00 – $38.00

WAS IT WORTH IT?

Honestly, I think the glittered monograms were my favorite glitter project, maybe of all. It was cute. The tags were “meh” even if I did like the ombre effect, and the card covered in clear glitter was a total bust.

Now, onto jewelry making, which I’m very excited about!

{ 3 comments }

Candles and candleholders, they go together like… candles and candleholders, don’t they?

Both of these projects were fairly easy with very few glitches. Although of course I mixed it up a bit from Martha’s original instructions.

Here, she does call for using the spray adhesive, thank goodness. I suppose the candle will have trouble burning with gluey wicks, since the instructions tell you to tape the wicks before spraying. But I also felt like I didn’t want the tops of the candles to be glittered, too; seems like that’s a recipe for burning glitter smell and a mess of puddling wax and glitter. So I covered the entire top of the candle with a piece of contact paper cut to size. Only the sides of my candle got the glitter treatment.

TIME INVESTED

About 10 minutes

DIFFICULTY

Easy Peasy

TOTAL COST

  • 3 pack of candles, $8.99
  • Martha Stewart fine glitter, $4.99 (1 bottle)
  • glittering glue, $3.99

Here’s a case where you could get some candles for cheap and dress them up with glitter. These I bought at Michaels, but I probably should’ve tried Ross. I also used just one bottle of glitter instead of the multiples from the big pack.

Total cost = $17.97

WAS IT WORTH IT?

This is the first glittering project where I’m going to give a half-hearted “yes.” It’s easy, relatively cheap, and you can do it in no time. If you like glitter.

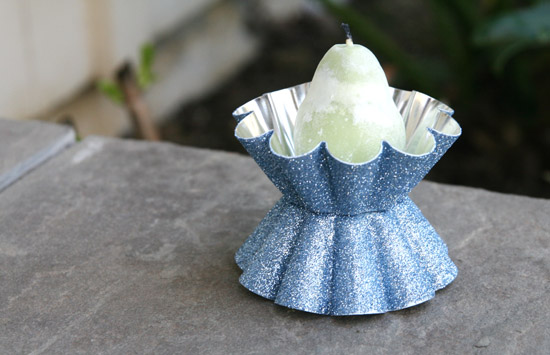
Now, moving onto the candleholders. For this craft, you take two perfectly good brioche pans and glue them together at the bottoms and then glitter the bejesus out of them. I was a little bitter because brioche pans are expensive, yo!

I bought a brand new pack of 6 “made in France” tiny brioche pans at Williams Sonoma for $15. And since I figured I might want to actually use these for, I don’t know, BRIOCHE, I only made one candleholder. That required two pans, so I’m left with four for cooking. (I told you I’m good at math, right?)

I bought the smallest ones since they were the cheapest, but you can really do this craft with any size pan, depending on what kind of candle monstrosity you might be trying to accomodate.

Hot glue those puppies together, THEN paint them with two coats of white acrylic paint (you knew there had to be an extra superfluous step, right?), then glitter.

Ta da. Look, I put one of the pear candles I made way back when in there, since I didn’t have any small enough pillars or anything appropriate.

A few caveats and tips, here.

First, I found it easier to glitter the top and then the bottom. That is, I painted on the glue on the top and added the glitter, and then I painted the bottom and glittered it. It seemed easier than hurrying before the glue dried too much on the whole piece.

Second, I did not glitter the insides of the pans, as Martha did, because again, why? I thought the reflective surface of the metal tin on the inside might actually be more appropriate.

Finally, make sure you really get the glue inside the cracks on these pans. Sometimes you think it’s covered in glue, and then the glitter doesn’t stick in any of the crevices because there’s no glue in there. It’s hard to tell if you’ve gotten it covered.

TIME INVESTED

About 30 minutes active time, plus paint drying time (several hours)

DIFFICULTY

Easy

TOTAL COST

  • glittering glue, $3.99
  • Martha Stewart craft paint, $2.29
  • Martha Stewart fine glitter, $4.99 (1 bottle)
  • brioche pans, $15.00 (these will make 3 small holders)

Total cost = $26.27

WAS IT WORTH IT?

I can think of a lot of better things to do with brioche pans. I vote NO.

I’m gathering the last three glittering projects into one final glittering post, and then we can move on to jewelry making.

{ 4 comments }

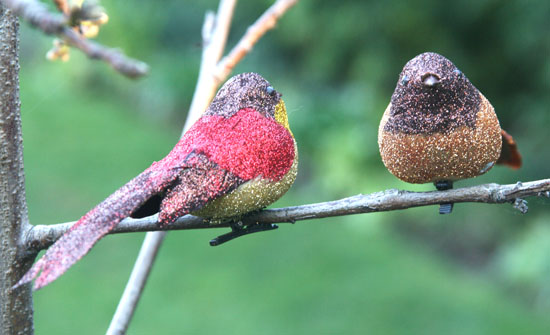
Don’t worry, they aren’t real birds. But is there anything Martha won’t put glitter on?

Now we’re glittering fake birds. Yay? The good news is this one is, in fact, very straightforward. Instead of putting a bird on it, you put glitter on the bird.

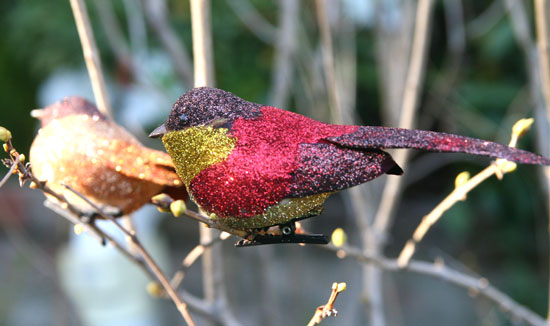
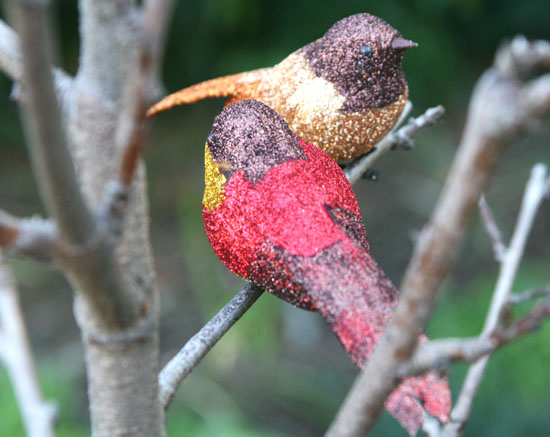
And here are the results you’ve been waiting for!

So there they are, my two little glittered birds. What do you think?

There is nothing exciting to report, here. I followed the directions, and it was easy. Boring.

TIME INVESTED

About 30 minutes for two birds

DIFFICULTY

Easy

TOTAL COST

  • glitter pack, $29.99 (or significantly cheaper if you buy it at Michaels with the 40% off coupon)
  • glittering glue, $3.99
  • birds, $2.99 ea (at Michaels)

Total cost = $39.96

WAS IT WORTH IT?

Well, what am I going to do with two glittered birds now? Not really my aesthetic. So I vote NO.

Am I being too hard on the glitter, people? I want to give it its fair shake, but… glitter?

{ 5 comments }