You would not guess, looking at this project, that it was the one that almost pushed me over the edge.  For the first time, I actually considered giving up.  Giving up on Martha!

It’s a totally straightforward project.  Cut out snowflakes.  Cover them in glue.  Cover them in glitter.  And… scene.

But the problems start with the cutting.  Step one.  I had a feeling that it was going to be slow going because you have to cut out a detailed image in cardboard.  With a craft knife.  My craft knife skillz are not the best.  But this craft had me considering: “Am I even doing this right?  Do I need a craft knife tutorial?  Isn’t this tool pretty self-explanatory?”

The problem is that cutting out so many details with a craft knife takes a long time, and it’s really hard to be precise.  To outline a few of the main problems:

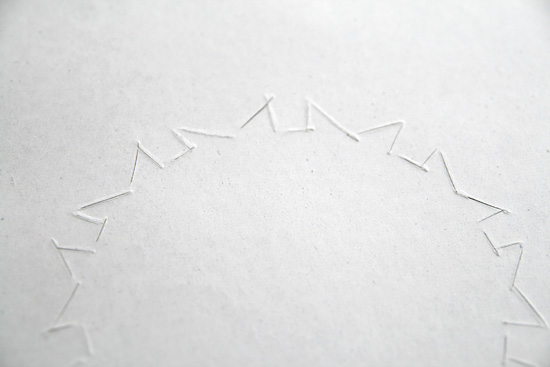
~ The knife doesn’t cut all the way through the cardboard.  You have to go over the cut several times until you can tell it’s gone through.  But then what happens is the seams between cuts don’t go all the way through.

You can see here that where the edges come together, the cuts haven’t gone all the way through.  That’s annoying, and what I ended up having to do was go over all the cuts from the back.

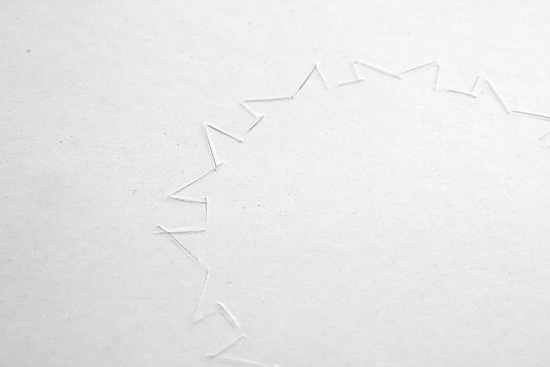
~ While some of the cuts don’t go through at the connection points, the others get overcut, and that makes the delicate points on the snowflake less stable.

You can see how some of the cuts go past where they should.  GAH!

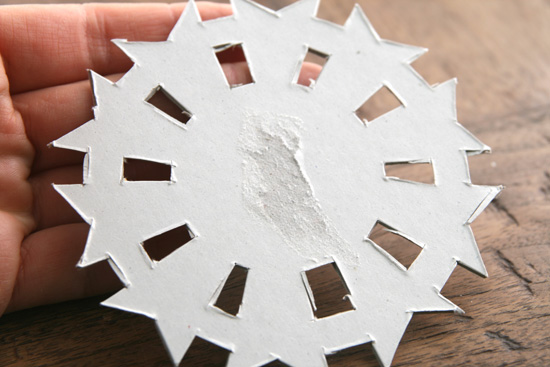
So, do you want to know how long it took me to cut out this snowflake with a craft knife? It took me 23 minutes. Seriously! Half way through, I started an internal dialogue.

“This is what I’m doing right now.  I have just spent 15 minutes cutting out a snowflake that I will probably never use and that I don’t want.  Should I just quit?  Cut my losses?  I could be doing one hundred other things with my time right now.  What am I doing?”

But I staggered on, with each cut thinking, “this is going to be my last cut.  I’m quitting.”  Until finally, it was done.  PRAISE THE LORD.

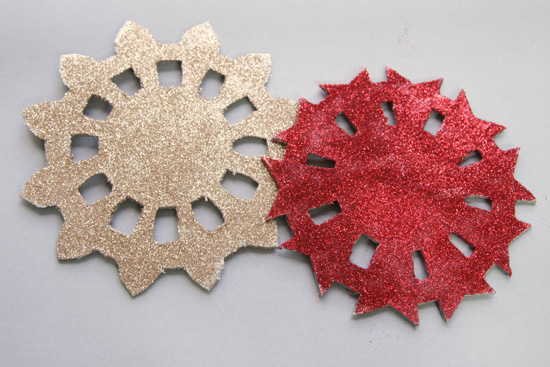
So as you can see, this looks like crap. But I was hopeful that the glittering would cover over most of the imperfections.  I pulled off all those little hangy pieces and moved on.

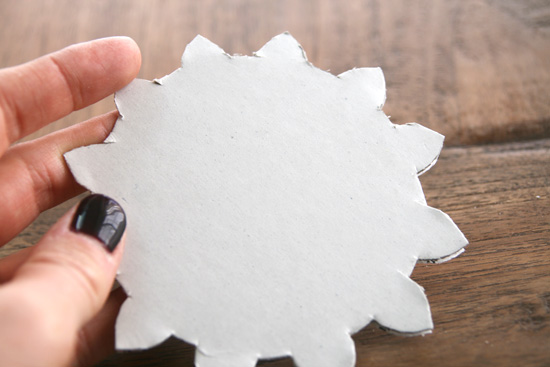
There was another template with a differently-shaped snowflake, and in spite of my hatred for this process, I decided to do an experiment.  I wondered whether cutting with scissors might not be easier.  So I cut the outside of this snowflake with scissors.

Aaaaand that one looks like crap, too. It was highly frustrating (and even a little painful) to cut through the cardboard with scissors, but it was faster. I had to cut the inside with the craft knife, but all told this one took me 18 minutes instead of 23.

Gah!  I’ve already spend 40 minutes on this craft, and I haven’t even gotten to the glitter part!

But when I did, there was more frustration awaiting.  I covered the snowflake with Martha’s own “glittering glue,” and I covered it well.  I let it sit for a while to dry before I shook off the extra glitter.  And then?

BLARGH!  The glitter was very, very spotty.

Now, this was a real disappointment, every step of the way.  So I took matters into my own hands.  I went and got the spray adhesive an sprayed the crap out of these snowflakes, and then coated them in glitter.  And you know what?  It worked like a charm in about 3 seconds.  What the hell, Martha?

There they are.  Mocking me with their preschool art project looks and their epic difficulty.  I’m pretty sure these were one of the labors of Hercules.

To recap: this project blows.

TIME INVESTED

ZOMGZ I spent over an hour on these two snowflakes.

DIFFICULTY

Really, really crazy hard

TOTAL COST

  • glitter pack, $29.99 (or significantly cheaper if you buy it at Michaels with the 40% off coupon)*
  • glittering glue, $3.99
  • cardboard (I keep pieces of cardboard from packaging that I think might be useful, so I didn’t spend any money on this item)

Total cost = $33.98

WAS IT WORTH IT?

It is possible that this is the least desirable craft in the Encyclopedia so far.  No, indeed.

More glittering to come.

{ 9 comments }

Yes, folks, we’re starting glittering, and we’re starting with… eggs? What is going on with all the decorative eggs Martha must have?

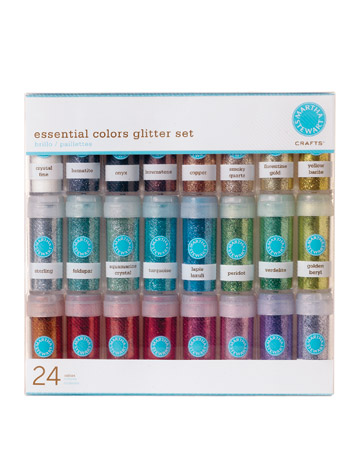
As I mentioned before, I don’t love glittering. It seems a little low-brow to me, too gaudy. But, true to my Martha Challenge, I bought this sucker:

Twenty four little jars of glitter. How can you have just one?

So, blown out eggs, yadda yadda, cover them with glitter.  Woot!

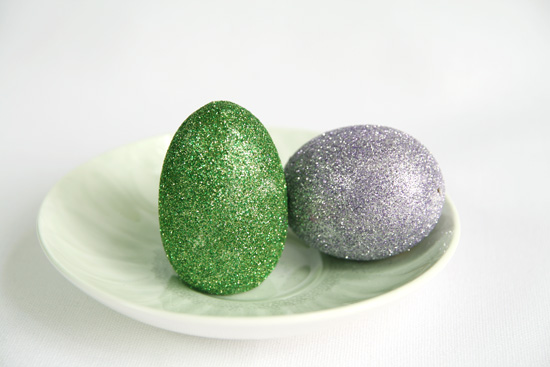
This is one wooden egg and one blown out egg.

A few notes here.  First, I bought Martha’s “glittering glue,” since I think it was on sale and I figured, why not?  It comes with it’s own brush attached to the lid, which is perfect since then I don’t have to wash a brush after I use it.

D’oh!  Might want to rethink the quality of that brush applicator there.  As you can see, it broke off immediately, was a mess and totally useless.  * Le Sigh*.

Also, the Encyclopedia tells you to put your glitter in a bowl, set the egg in it and then use a spoon to “spoon” the glitter over the egg.  Do you know how much glitter it would require to have a bowl of it big enough to accomplish this?  You’d need at least three of those little vials that I bought.  So I simply sprinkled the glitter over the eggs, which seemed to work fine.

Incidentally, the glitters I used were “Periodot” and “Purple Sapphire.”  Of course they were.

TIME INVESTED

About 15 minutes to blow out one egg, plus about 15 minutes to glitter.

About 30 minutes

DIFFICULTY

Super easy

TOTAL COST

  • one egg, $0.33
  • wooden egg, $0.99
  • glitter pack, $29.99 (or significantly cheaper if you buy it at Michaels with the 40% off coupon)*
  • glittering glue, $3.99

Total cost = $44.30

* You can also buy the glitter separately.  Each container (slightly bigger than the vials) is $4.99.  So really, with a coupon, it’s a much better value to get the 24 pack so you can have lots of different colors.  Unless you are planning on glittering something enormous.

WAS IT WORTH IT?

I don’t even know what I’m going to do with my gilded eggs, let alone these glittered monstrosities.  No. WAY.

{ 2 comments }

Gilding is coming to an end in the Encyclopedia, but not for me!

I spent some time today trolling the home goods shelves at Ross, looking for things to cover with gold or silver foil. I’m hooked, y’all. I found a few things, and then I found some things laying around the house, and long story short, you will see more original gilding in the weeks to come, I fear.

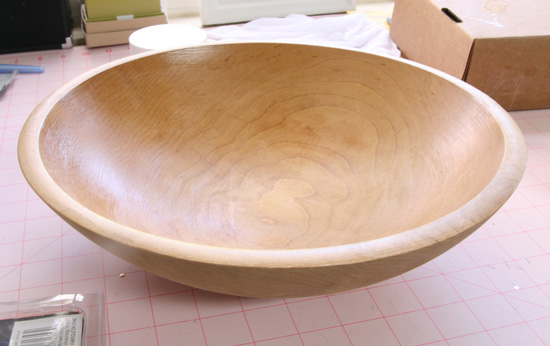
The last project was gilding bowls. Or bowl, in my case. I happened to have this old wooden bowl that we got for our wedding, and it has a tiny crack in it. Enough of a crack that I don’t want to put anything liquid in it, but not enough to throw the bowl out. Perfect for gilding!

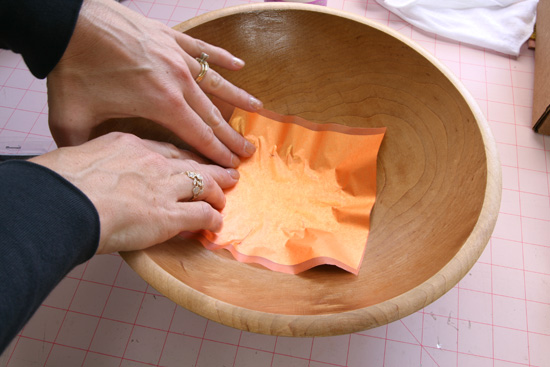
This time, I used paper-backed gilding, which is easier to handle because it’s lightly attached to paper. You can pick up the paper and position it, and once you set it down you rub it and the gilding comes off onto your surface. I bought it at Michaels.

I coated my bowl with size and got started.

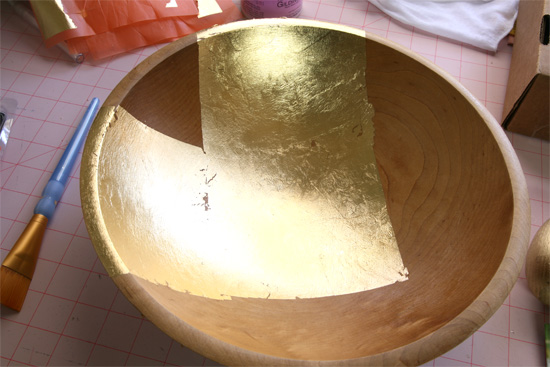
Here’s how it looked after I had a few sheets on:

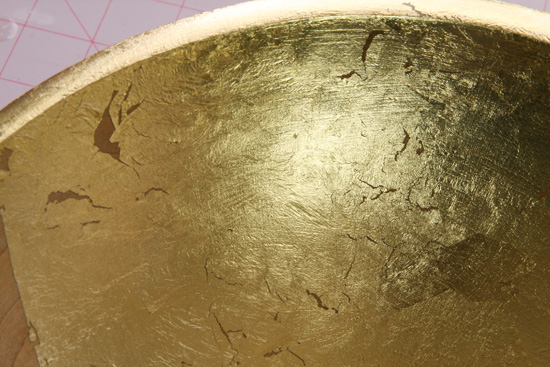
The problem with this project is that it’s hard to get the gold leaf to lay well on the curved surface of the bowl, so you end up with a lot of tears. The Encyclopedia acknowledges this, telling you to use the little bits of gold leaf left on the papers to “fill in holes or cracks.” And there were a lot of these. Witness:

And they ended up being rather difficult to patch. Some of them were so thin that there wasn’t enough size peeking through to make more gold leaf stick. So I tried putting more size on the more patchy areas after I’d finished the whole thing, which didn’t work well at all. First, the size didn’t stick very well to the leaf, and then it left a kind of film on the leaf that wasn’t cracked, so I had to cover over everywhere size got painted, whether or not it actually had a crack. And then the patching was more noticeable than it was on the eggs.

Looking at Martha’s photos in the book, I don’t think I did much worse than her people did, because her bowls look less than perfect, too.

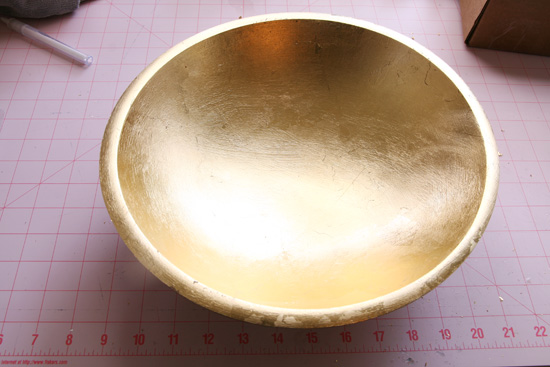
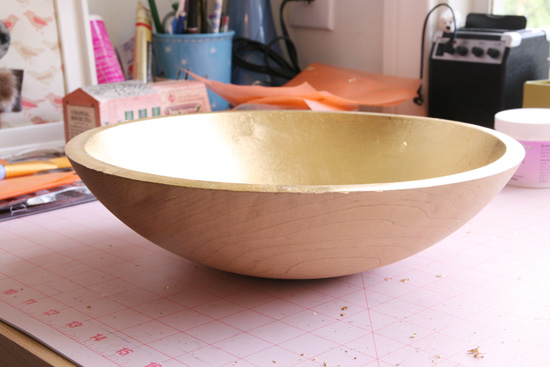
The overall result is nice, though.

If you look closely, you can see some of the patching (look in particular at the rim on the lower part of the photo).

As Martha did, I left the outside of the bowl wooden, which makes a nice effect, I think.

Now I’ll have to figure out what to do with this bowl.

TIME INVESTED

About 3 hours

DIFFICULTY

Difficult

TOTAL COST

Total cost = $89.24

WAS IT WORTH IT?

Hmmm. Well, kind of. It’s an expensive craft, but once you have the supplies, you can do a lot with them. The bowl is definitely more useful than the eggs. But is it much more beautiful than one you could buy in the store?  Or less expensive?  I found these pretty little ceramic bowls online:

(Image: Olive + Cocoa)

Lovely, aren’t they? Now, these are porcelain bowls that are coated with platinum inside, but they are $84 for the set of two. You could probably do something similar for much less. It wouldn’t be platinum (although I’m sure you could find platinum leaf!), but it could make a nice gift.

What do you think?

Next up is glittering. Oy. I find glitter to be a bit unrefined, but I’ve got a lot of it in my future.

{ 2 comments }

Gilding is easily the most persnickety, fussy, and painstaking craft I’ve done so far.

True confesh?  I’m kind of loving it.

It’s crazy, I know.  Gilding, it’s like, soooo eighteenth century.  The true fact of the matter is that it produces pretty amazing results.  And somehow, the fact that it takes such precision, such attention to detail, such patience, makes it all the more rewarding.  There’s something distinctly crafty about it, in the centuries-old meaning of the word as “power,” “skill,” “ability,” “art”— back in the days when you belonged to a guild (no pun intended) to exercise your skilled practice.

And of course, there’s something amazingly and ridiculously indulgent about gilding… eggs.

Step one is, of course, blowing out the eggs, and lordy, this is a nuisance.  You will not be at all surprised to hear that Martha’s instructions (on her website; she doesn’t give instructions in the Encyclopedia) are overly complicated and actually require tools.  She wants you to use a Dremel, for Pete’s sake, to drill a hole in the bottom of the egg, and then you need one of two (TWO!) different kinds of egg blowers.  Yes, there is a device designed precisely for blowing out eggs, and further, there are at least two different philosophies on blowing out eggs, each with its own mechanism for getting the job done.  Are you a two-hole egg blower (that’s a “Marge’s egg blower”) or a one-hole egg blower (that one’s called a “Bias-Fix egg blower”)?  I kind of feel like I’m in bizarro world here.

Lucky for me, I have a special tool for blowing air already, and it’s called a mouth.  So I didn’t waste any time Googling these crazy gadgets and just got to work blowing the eggs out with my mouth.  It’s a little hard, and I kind of felt like I was going to pass out a few times, but I managed to get three eggs done, in spite of the lightheadedness.

Sheesh, y’all, this is just the prep.

After the eggs are all clean and dried inside, you can get to work gilding.  But WAIT!  First you have to build your own “drying rack.”  Really, Martha?  I put in a half-hearted effort.

There’s my drying rack, my white gloves, and two wooden eggs I decided to throw into the mix to see how they turned out.

You cover your eggs with this special liquid called “gilding size,” and then you let it sit until it “comes to tack.”  That means it’s dry enough that it’s not wet, but it’s kind of sticky so the gild will adhere to it.  What I found weird is that it takes about 15 minutes to reach the proper consistency, and there’s a lot of “keeping checking your eggs for proper tack” and such in various sets of instructions, but then once it’s ready, it stays ready for 24 – 36 hours.  Wha?  So why all the pressure to check it?  I just waited a few hours, came back, and it was ready.

As I mentioned before, the leaf is insanely delicate and hard to work with.  But there is something magical about putting this wrinkly sheet of metal on the eggs and then watching as it molds perfectly and almost becomes one with the egg.  I know, it’s so Zen.

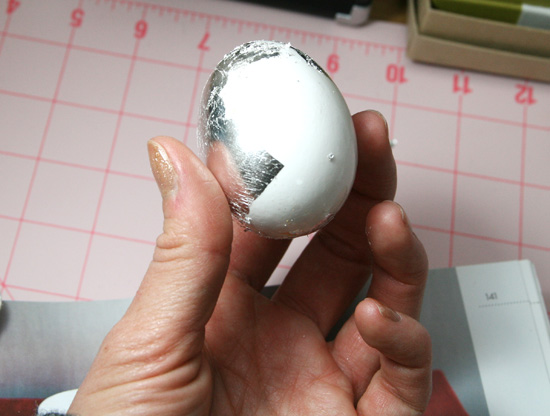
Here I am halfway through a silver egg:

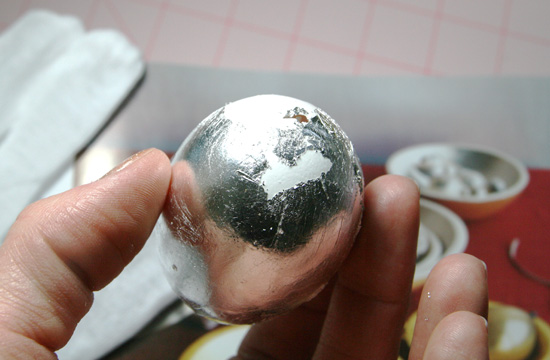
See, it’s all crazy wrinkly and patchy, but you rub it and brush it and it becomes… perfect.  In the photo below I’m almost done covering this egg…

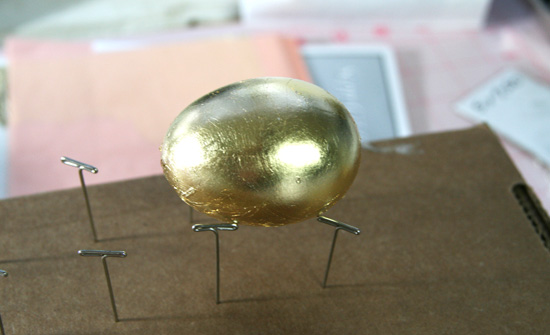
And then once it’s done, it’s magical.

Check out that golden egg!  Isn’t is GORG?

I did one silver and one gold egg with the blown out eggs, and then I did one gold with a wooden egg that I bought at Michaels for something like $0.89.  I wanted to see if the blown out eggs really made a difference.

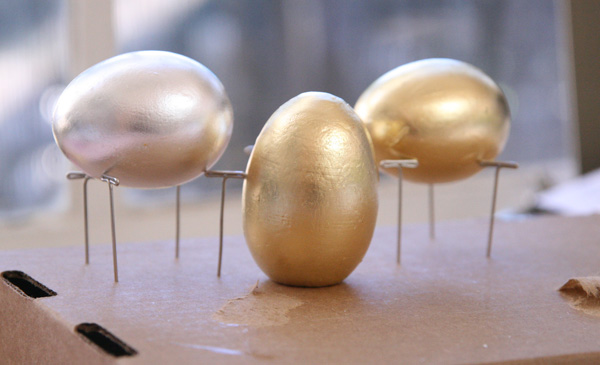
There they are, in all their glory.  I really think the wooden egg (in the middle) looks great, too.  I think it’s a better option because it’s not as delicate and won’t break as easily.

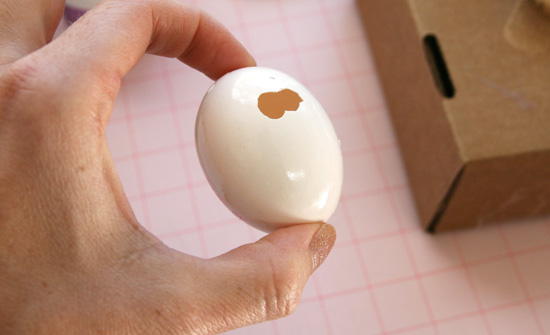
The gilding instructions do mention that you should make sure your surface is perfectly smooth before proceeding, and they are right.  Whatever imperfections are on the surface of your object will only be magnified by the gilding.  The wooden egg I bought was painted white, but obviously very haphazardly.  So when the gilding was done, I had this effect:

Yep, that’s uneven paint and a drip that was on the egg before I put the gold leaf on it.

Another tip: the size gets very, very sticky, so make sure you don’t let anything touch… well, anything else.  Two of my blown out eggs ended up touching on the side, and then they were melded together.  When I finally managed to pry them apart, I had this:

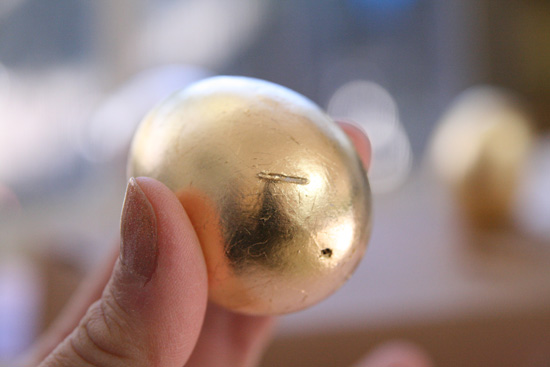
D’oh!  Wasted egg.  I had to chip off that extra shell that was left on the other egg, and then it left a little mark that ended up marring the gilding.  Also, since I used t-pins for my drying rack, there were two little spots where the egg got stuck to the t-pin, which ended up kind of pooling the size and creating another imperfection in the finished product.

See that little line on there?  That’s from where the egg was resting on the t-pin.  The other mark is the hole through which I blew out the egg.

So, just to be thorough, I wanted to see if this gilding craziness really made a difference.  I mean, why not just paint a dang egg gold???  In fact, Martha has a new product (ding!) that’s called “Liquid Gilding,” which is essentially a metal paint.  Remember those paint pens from high school?  (Did you smell them to get high, too?)  This paint is like if you poured all the liquid out of about 173 of those pens.  Funny, it doesn’t smell as good as it used to.

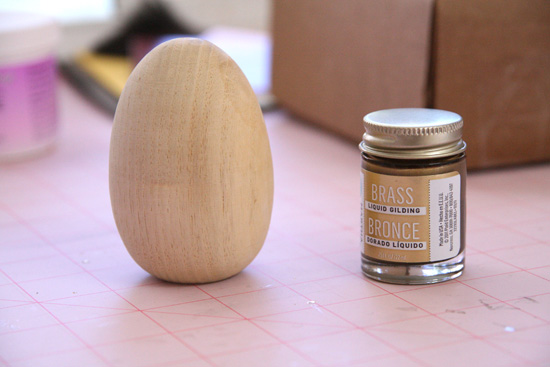
I bought another wooden egg and I painted it with Martha’s “brass” liquid gilding.  It really is like painting with metal.  I think it actually has metal in it.  But, in praise of gilding, I think there is still a difference.

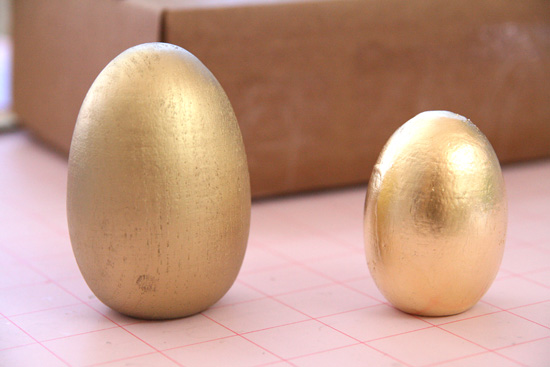
Can you tell which is painted and which is gilded?  I don’t know if a top coat or a primer or more coats or whatever would bring them closer together, but GAWD, isn’t the gilding beautiful?

TIME INVESTED

  • 30 minutes to blow out 3 eggs
  • 30 minutes per egg to gild

Total for 3 eggs: 2 hours

DIFFICULTY

Difficult

TOTAL COST

Total cost = $70.44

To be fair, you could make a lot more eggs with these supplies and it would only cost you the price of the eggs.

WAS IT WORTH IT?

Well, no.  I mean, I love the gilding.  But what am I going to do now with 3 gilded eggs?  Martha has about 30 of them in a gold spray painted basket in the book, but that is really not my style.

But now I’m looking for things to gild, seeing as how I now have all this leaf.  What do you think I could gild, peeps?  I’m jonesing to do it, so any suggestions will be taken seriously!

Pin It

{ 12 comments }