


So, when I went out of SYTYC, I had already completed the next challenge whose theme was “summer.” Since I won’t get to post it over there, I’m sharing it here with you, tutorial and all!
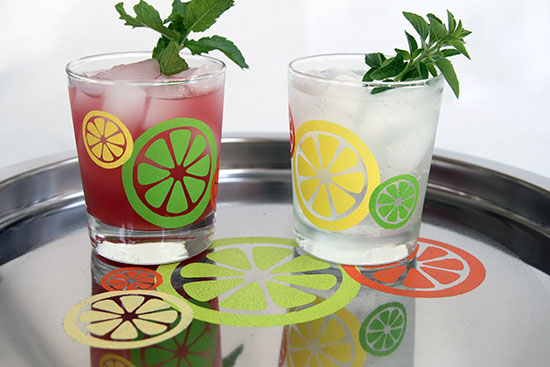
Call me a lush, but for me, summer means refreshing cocktails out on the patio! They are always tastier in fun glasses, though. So I made myself a citrus-themed cocktail set.
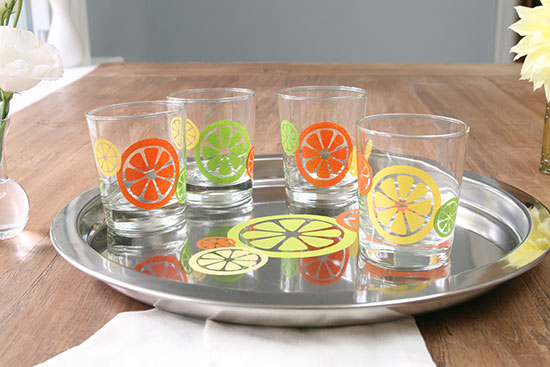
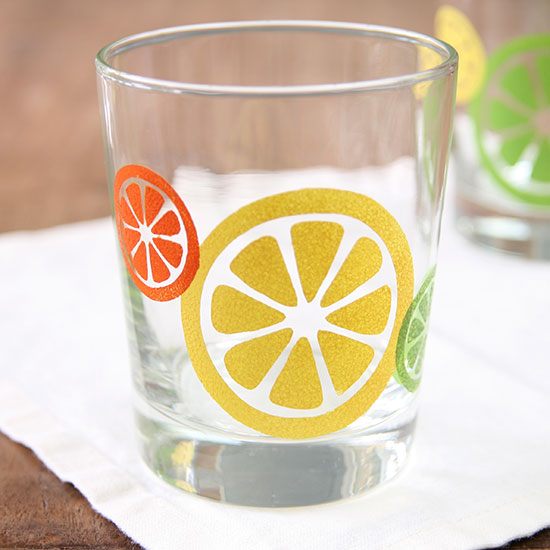
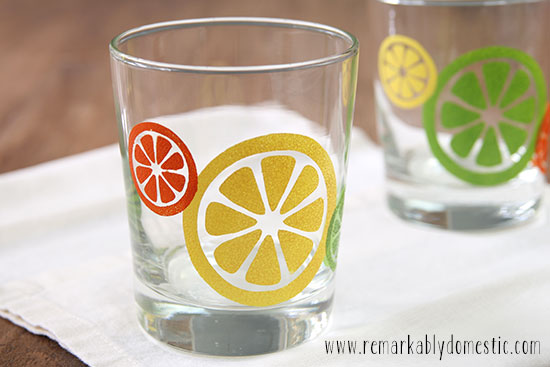
I was inspired by some mid-century modern glassware pieces that I’ve seen recently, but I wanted to update the aesthetic, too. I made my own stencil on my Silhouette machine using a citrus slice image. It’s a great motif because you can use it in multiple colors and it still kind of clings to reality: lime slice, lemon slice, orange slice, grapefruit slice! The different colors for the same motif give it a modern feel, I think.
I used glass paint for the glasses and all-purpose craft paint for the metal tray.

And I used gin and tonic and a pomtini to fill them, but they work just as well with sparkling water and lemonade.
Here’s the deets on how I made them, so you can make some, too!
 You’ll need some smooth, clear glasses; I got mine at IKEA. They’re Godis, and they were $5.99 for a pack of 6. A buck a piece! When I brought them home, RD Husband said, “Got you some Go-dees, didcha?”
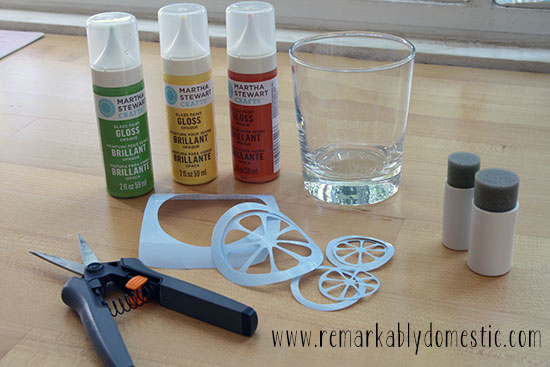
I used the Martha Stewart glass paint, which I think worked well, but I’m not sure you need that specific paint since she has a line of craft paints that are supposed to work on any surface. If you want a more opaque look, use the opaque gloss kind. There are something like 6 different varieties of this glass paint, so pay attention.
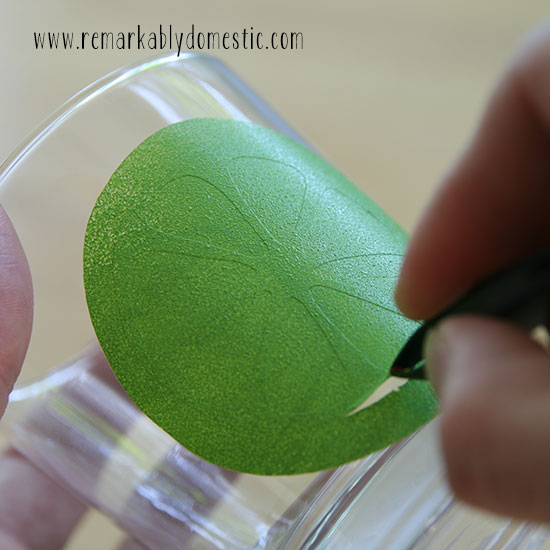
You’ll also need a stencil, either a pre-made one or one you make yourself. To make one yourself, you can use something like the Silhouette if you have it, or the low tech solution is to print out your image, put it on top of some unpeeled contact paper, and cut it out with a craft knife. Bingo! Insta-stencil.
I used my Silhouette and the Martha Stewart stencil film, which is basically a fancy and expensive version of contact paper. Although it is transparent, so if you need to see through it to what you’re putting it over, that helps.
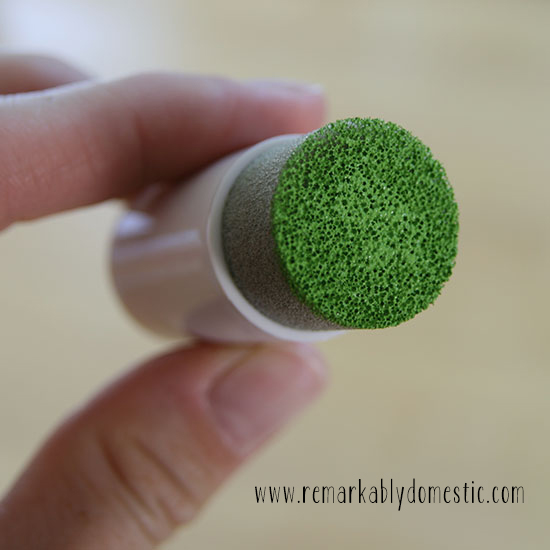
Finally, get yourself something to paint with, either these fancy stencil “daubers” or those cheap foam paint brushes. You need something foam in order to pounce the paint. (More on that later.)
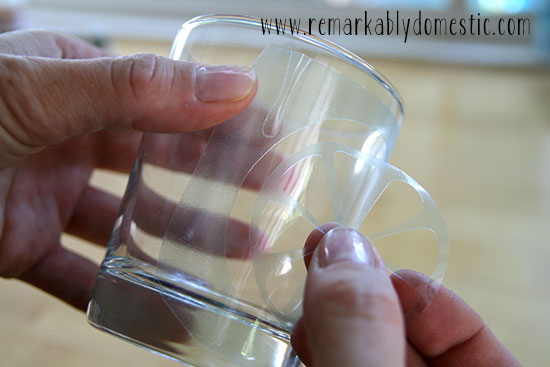
Stick your stencil on your glass. The larger the stencil, the trickier it is since the curve of the glass kind of messes with how flat it will lay. Make sure the edges are sealed down so you get a clean line.
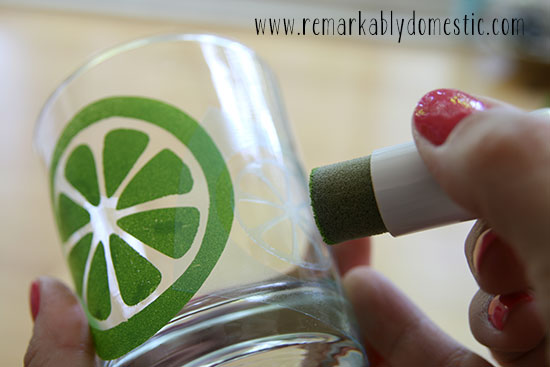
 Put some paint on your foam brush by tapping the brush into the paint. You want to get the paint evenly coated over the surface.
 Start painting by tapping the paint brush onto the stencil. You will tap it up and down… this is called pouncing in stenciling circles, I’m told.
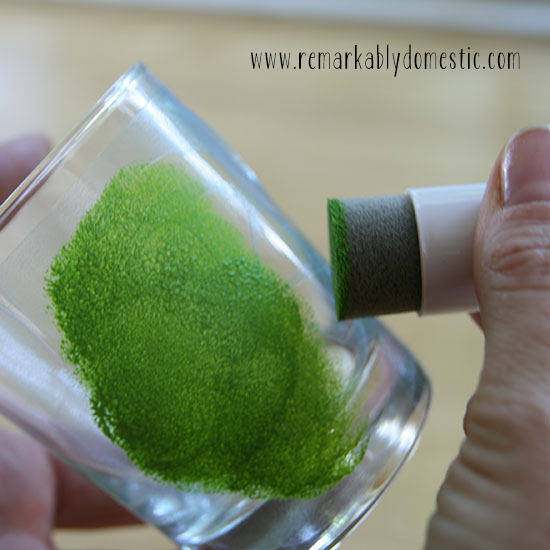 Make sure you get the paint on evenly and that you really get the edges.
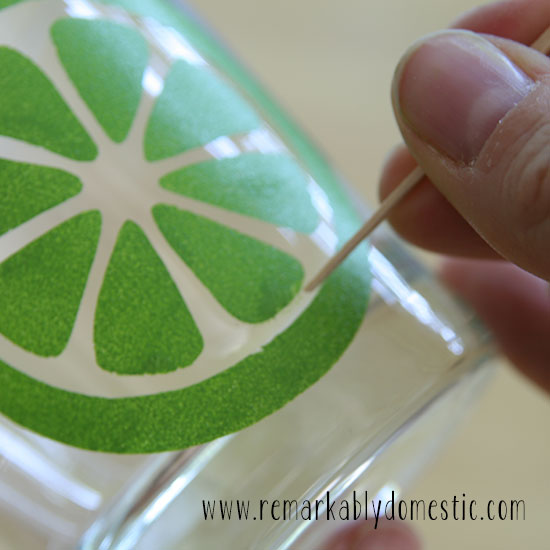
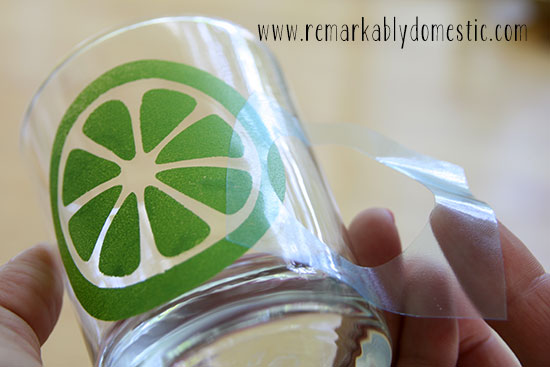
Once you’ve covered the stencil area (without going over the outside edge of the stencil), IMMEDIATELY peel the stencil off. Don’t let the paint dry. In fact, don’t even go to the bathroom first. You have to get that stencil off right away or the paint will peel off with it.
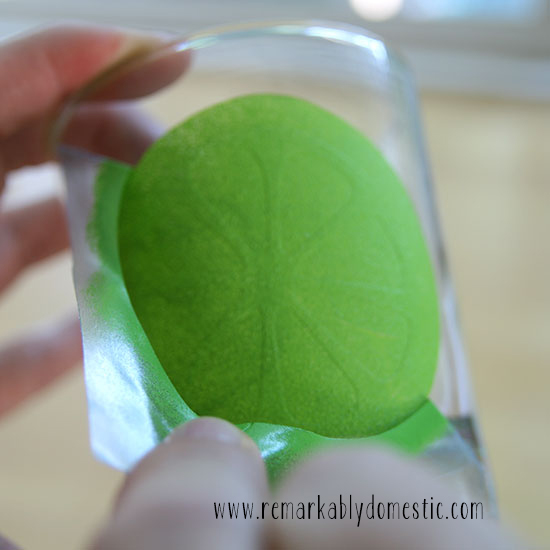 If you’ve made your own stencil and you have an inner piece (if you have an inner peace, then congrats!), you need to be particularly careful in getting it off. I used tweezers very carefully, trying to disturb the stencil image as little as possible.
 Once you’ve peeled the stencil, you can clean up any mistakes with a toothpick.
 Let this dry for an hour.
I wanted my pattern to overlap, so once I let it dry I had to cure it, which means I had to bake it in the oven. Place the glass in a cold oven, turn it on to 350°F and let it warm up. Once it reaches 350°, set the timer for 30 minutes and let it bake. Then turn the oven off and let it cool with the glass inside. I opened my oven to speed this process along. Once the glass is cool to the touch, you can now stick more stencils on over the previous paint, and it won’t peel. Without curing, the first image will peel off when you remove a new stencil.
Once you’ve baked it, you can place a new stencil over top of your first image.
Once you’ve placed your new stencil, go ahead and pounce it!
 Add as many other images to the glass as you want, and then bake it again to make it dishwasher safe and more durable.
 I used the same technique for the tray, except instead of using glass paint, I used Martha Stewart all-purpose craft paint. I cured it in the oven the same way I did the glasses.
And then I sat back and drank an entire pitcher of sangria myself. Ha! Just kidding. Maybe.


