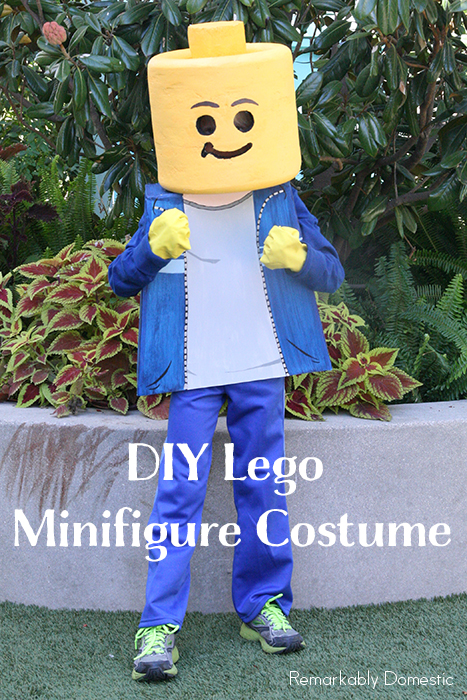
I promised I’d show you how I made the 7 year old’s Lego minifig costume, so here we go! I have to apologize in advance that I didn’t take nearly enough photos. There was so much trial and error and it was, frankly, so epic, that I couldn’t handle taking pictures of the process as well.
But I’ll explain in detail and show you what I’ve got!
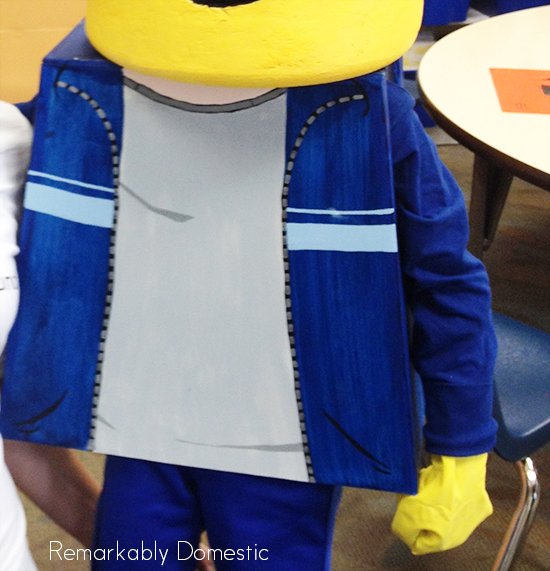
There are two elements to this costume: the shirt and the head. You could go crazy with legs and hands, but it seems really cumbersome, and you fully get the picture with just the head and shirt. I just gave my son yellow dishwashing gloves to simulate the Lego hands.
Here’s what you need for the shirt:
- several pieces of foam core poster board
- masking or painter’s tape
- hot glue gun
- paint in your choice of colors
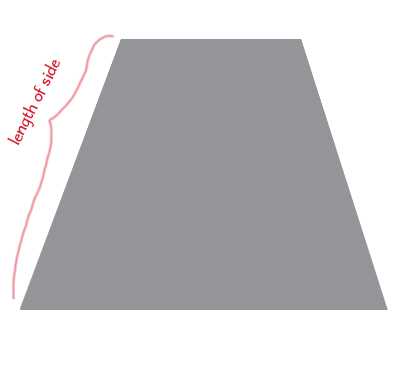
To make the shirt, I used foam core poster board. I took a shirt that belonged to the 7 year old to use as a pattern and essentially cut out a trapezoid that would serve as the front of the shirt. It should be shaped something like this:
 You’ll want to cut a second one out exactly the same size and shape for the back. I recommend a straight edge and a craft knife to cut the poster board; it worked really well.
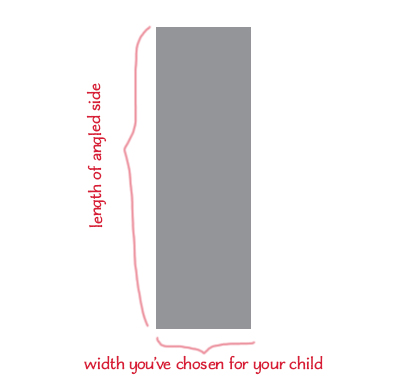
Next, measure your child’s “width.” That is, determine how thick you want this shirt to be to accommodate his or her stomach and torso. I made mine 6″ thick and it was pretty tight. I didn’t want it to be too disproportionally thick, so I erred on the side of small. I should’ve made it 7″ or even 8″ thick. Keep in mind that your child’s head will need to fit through this shape as well.
Once you’ve decided on the width, you will cut two rectangles that are the same length as the angled side of the trapezoid and are as wide as your chosen width. So:
 Make sure that you are measuring the length of the side and not the height of the entire trapezoid. There’s a Pythagorean theorum in here somewhere if that helps you. If you only measure the height, your side piece will be too short.
Once you’ve got your dimesions, you can cut two identitcal sides.
 Now it’s time to glue them together! I just used hot glue, which seems to have worked quite well. Once they are glued, I used painter’s tape to cover the seams so that painting would be easier. You’ll have some raw foam core edges that don’t take paint very well, so covering them with masking tape works well.
Now you’ll want to cut out two U shapes from the top of the sides for your child’s arms. I sort of put the shirt on him to measure, but it’s kind of a guessing and trial-and-error game. I cut once, tried it on, and then had to cut a little deeper so he could put his arms down.
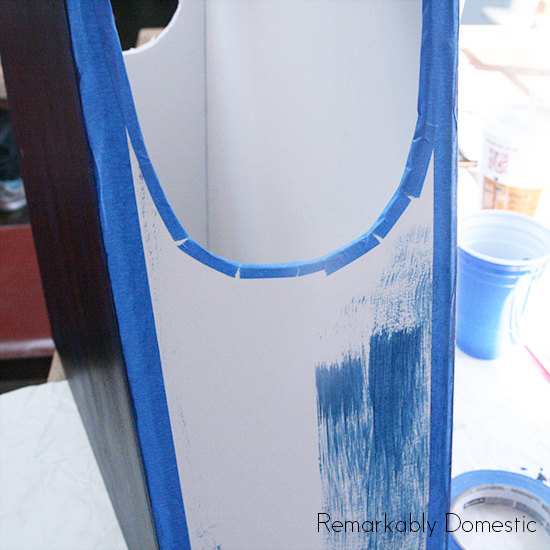
 You’ll want to cover the cut edges of the arm holes with masking tape, too. Here’s an actual photo!
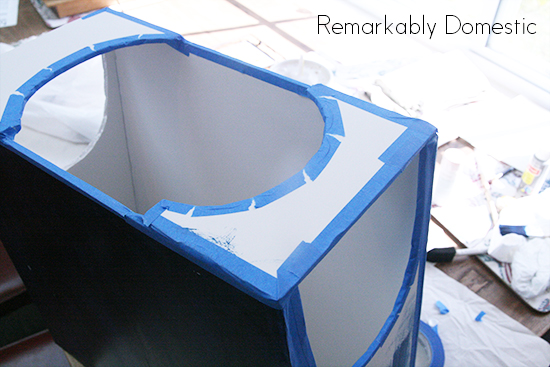
 Your final step before painting is to add the shoulders. You’ll need to measure your child’s head to make sure that it will fit through when you put the shirt on. I cut two small rectangles and then cut half circles out of them to make space for my son’s head.
 Then you can paint your shirt however you want. I found that diluting the paint with some water made it go on smoother.
Then you’ve got yourself a shirt!
The head is more complicated, but if you take it step by step, it doesn’t require a lot of advanced skills.
Here’s what you’ll need for the head:
- a sheet of styrofoam insulation, preferably 1.5″ thick. You can buy this at Home Depot; it’s back in the lumber area. The only thick sheet they had at my Home Depot was pretty enormous; it barely fit in my car! But it only cost $14.
- a 12″ styrofoam wreath. I got mine at JoAnn, but you can get it at Michaels, too. Easier if you choose white. First things first: make sure this wreath can slip over your kid’s head and slide down around his or her neck.
- a small hand saw
- sandpaper
- glue gun
- drill with 1″ paddle bit (optional)
- spackle (optional) and a putty knife
- yellow paint (NOT spray paint)
- black paint
- Dremel tool with sandpaper attachment (optional)
The instructions for making this head can be found on Instructables. There are a lot of versions on the site, but the one I’ve linked to here is, I think, the best and easiest. I will give you a Cliff Notes version and also tell you what I did that differed from their instructions. I think I made it even a little easier.
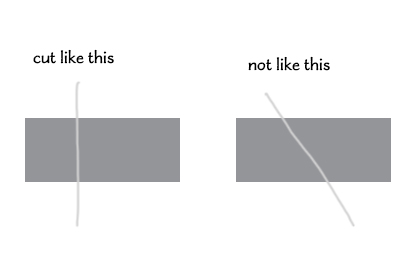
Essentially, you are going to be cutting a bunch of disks out of the styrofoam and stacking them to form a cylinder. You’ll use the wreath as the curved edges. So the first step is to carefully cut your wreath in half so that you have two wreaths, each one with a flat side and a rounded side.
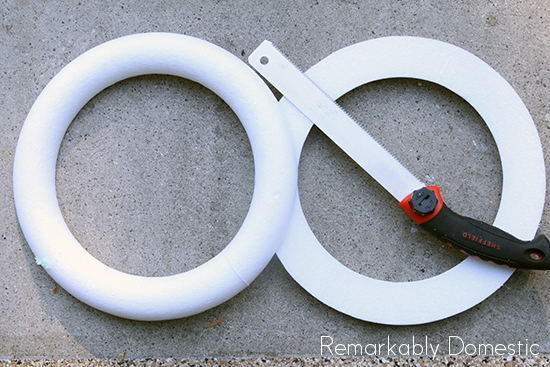 I know it’s kind of hard to see here, but that’s one wreath, cut into two, using that little handsaw thing.
Now you can use your wreath as a template to cut your disks. Trace the shape– inside and outside circles– onto your styrofoam. Depending on the height of your child’s head, you’ll probably need at least 4 or 5 of these. Then, cut them out with your saw. Be careful to make sure that you are cutting straight up and down so that you don’t end up with slanted sides.
 You may be surprised, as I was, how difficult it is to keep the saw going straight up and down.
As you get towards the top, you’ll want to make the center cut outs smaller and smaller so that the head sits snugly on your child’s head. That way, when she turns her head, the Lego head will go with her. I took one of my circular cut outs, and before I cut the center, I placed it on my son’s head and kind of traced around his head onto the circle of styrofoam. Then I cut out the oval shape and tested it a few times, making adjustments along the way, so that it sat on his head like a hat.
You’ll end up with a piece that looks more like this:
 For the top piece, you won’t want to cut all the way through since you’ll need a closed top. I carved a small oval halfway through the top circle so that it accommodated my son’s head. I carved it with the Dremel sanding tool, so I was really just sanding a little oval impression into the styrofoam.
Now you’re going to stack up all your disks, starting with one half of the wreath, then the full circles, then the head-shaped-opening circles, and finally the other half-wreath. Make sure it will fit on your child’s head before you glue.
Once you’re sure everything fits nicely, start gluing. The hot gluing was a little tricky because you need to get a lot of glue out of your gun in a little time. Just work as quickly as you can so that the glue doesn’t harden before you connect it.
Once you’ve got everything glued together, sand the sides so that everything is flush. Optionally, you can spackle any spots where there’s a chunk missing or if the pieces aren’t completely flush together. I used almost an entire small jar of spackle. But in the end, when you are done sanding and spackling (if you so choose), here’s what you’ll get:
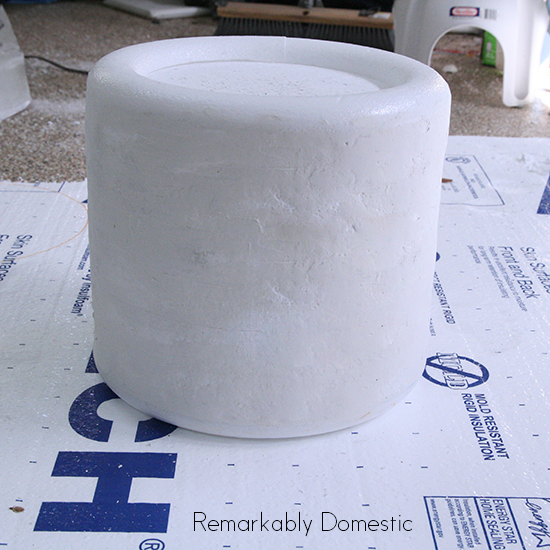 Pretty cool, eh?
Time to add the face. Draw your chosen face onto the cylinder. Then, cut out the eyes and mouth. I used a 1″ drill bit to drill the eyes, which worked really well. I used a kitchen knife and my Dremel tool to cut out the mouth, but you could probably do it with only a small kitchen knife, depending on the mouth your child has chosen. I drew the eyebrows on because I knew I was just going to paint them.
 Use the sandpaper to smooth out the holes and the inside of your head.
To make the button on top of the head, I cut out two smaller circles from the styrofoam insulation and glued them together, sanded them, and then glued them to the top of the head.
Now it’s time to paint. Spray paint will actually dissolve the styrofoam, so use regular craft paint. I painted the entire head yellow, and then I painted the insides of the eyes and mouth black, so that it looked more like they were painted on. Then I painted the eyebrows on in brown.
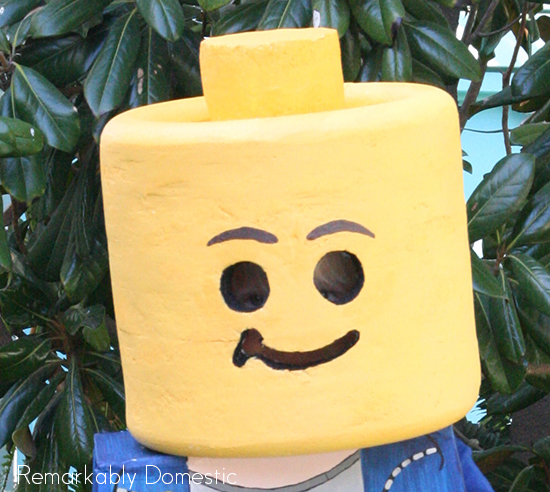 And that’s it! Takes a good amount of time, but isn’t really that hard.
Enjoy, and let me know if you have questions!


 I find it pretty hard to come up with ideas for a fifth grade boy for Valentines. You don’t want it to be too cheesy and young, or too twee, but you still want it to be something clever and memorable. What to do?
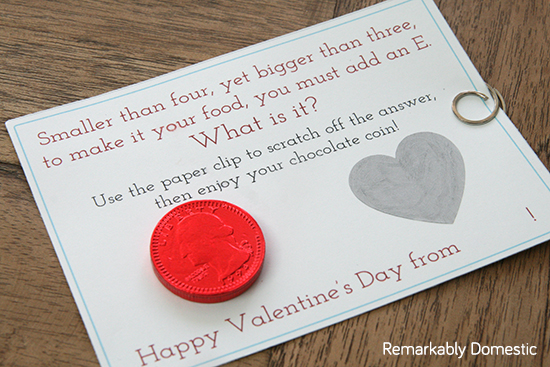
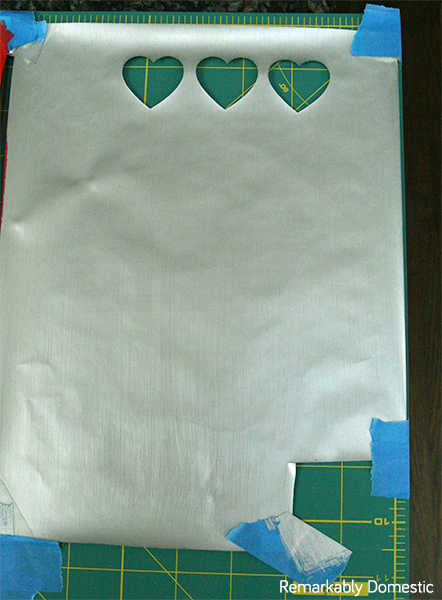 Here you can see my painted piece of Contact paper, with a few test cuts I made with the Silhouette.
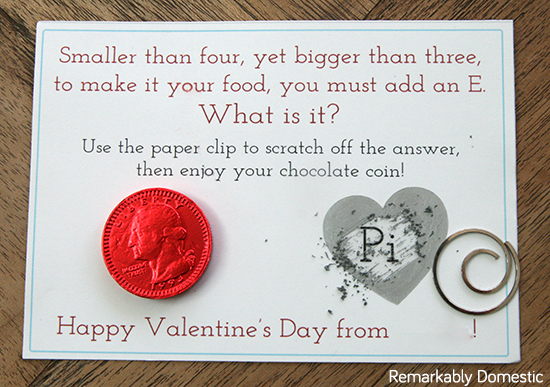 So that’s it! It was pretty simple to create, and if you can get past the fact that this scratching mechanism isn’t perfect, I think it makes for a cute Valentine.