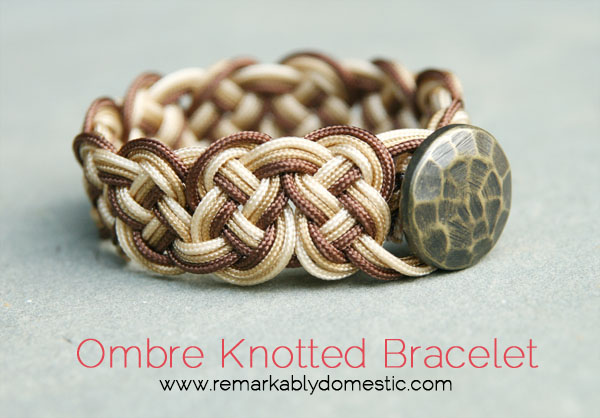
Ermagherd, peeps, this is the epic bracelet tutorial! It took me weeks to design the pattern, not because it’s so complicated but because I looked at so many different kinds of knots and I couldn’t decide. Indecision 2012! Turns out, I liked the first step of a larger knot the best and finally decided to run with that. But then the tutorial itself was never-ending, with all the Phototaking and Photoshopping and Photouploading.
But it’s done, and it’s here!
Here’s what you’ll need to make this bracelet:
1. medium weight Chinese knotting cord in three shades of one color, each strand cut to 2 yards (alternately, you could choose three totally independent shades for a different look)
2. a button with a shank
3. scissors
4. (not pictured) some kind of glue to secure your final knots; I used Hypo-Cement but you could use hot glue or even Elmer’s
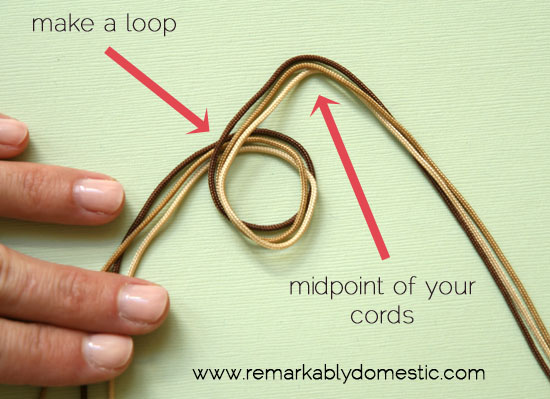
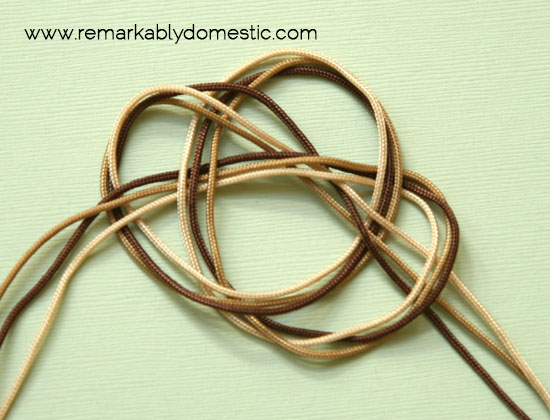
To start, you’ll cut your cords to length and lay them together. You will be knotting them as if they were one cord. Fold them over so that you are starting with the halfway point, right in the middle.
Make a loop with the left-hand cords.
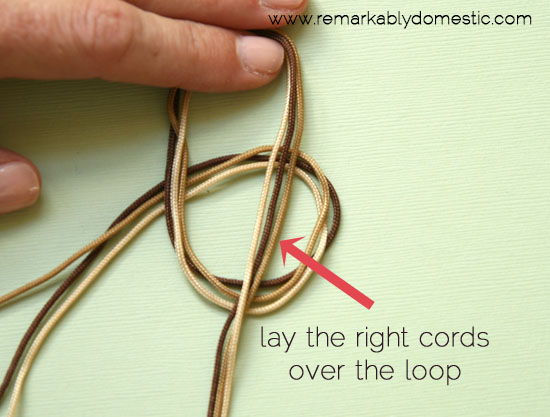
Make sure the loop goes under the left-hand cords as pictured above.
Then, lay the right-hand cords over this loop.
Take the right-hand cords and bring them up and under the tail of the left-hand cords.
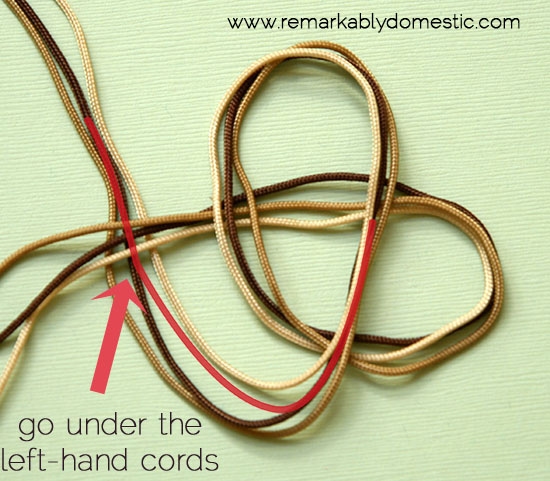
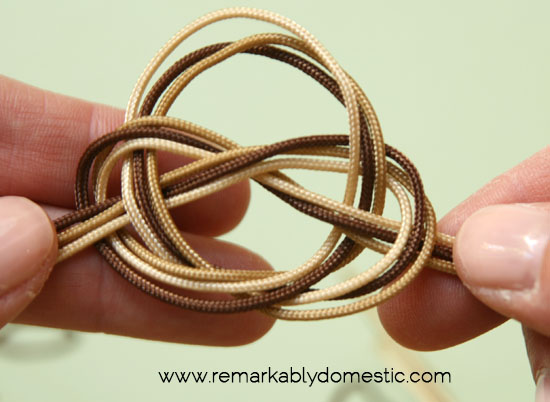
Take the end of the right hand cords (the ones you just pulled up and under the left-hand cords) and weave them through the loops that form a kind of pretzel shape: over, under, over, under.
Then, pull that cord through.
Now you can tighten this knot up a bit, but not all the way. This is where it gets tricky and a little persnickety. You’ll notice that your three cords, that should be laying nicely in shade order (that is, darkest to lightest or lightest to darkest) have gotten all cattywampus in the process of knotting. They are so inconsiderate.
See that? It’s all crazytown up in there. (Besides the fact that my cuticles are like, so. dry.) Before you tighten the knot completely, you are going to arrange the cords so that they are in the proper order. I know, it sounds insane, but it’s really not that hard.
You can see in the photos above, where I’ve used arrows, the before and after. This is the beginning of me rearranging the cords. To illustrate it better, I’ve created a little video of the process of realigning the cords:
Oh, Lordy, I know, that’s the weakest video ever, but like I said, this was so epic I just wanted to get it up and running.
Once you’ve arranged all your cords, your first knot should look like this:
Tighten it up so that the top loop is big enough to go over your button.
The next knot is the same, except in the opposite direction.
Once you’ve arranged the cords and tightened it all up, it will look like this:
Now, repeat the whole process, starting with making a loop on the left-hand side. You will continue knotting, alternating between starting with the left-hand and right-hand cords. When your bracelet reaches the desired length, you can add your button.
First, tie a single overhand knot at the end of the bracelet to secure your knotting. It won’t be very tight, but you are going to add your button afterwards which will secure everything.
The number of cords you will be able to thread through will depend on the size of the shank on your button (that sounds vaguely obscene, doesn’t it?). Mine only fit two cords through, since I have a small shank (I figured I should just go with the obscenity, right?). I sent one cord from each side through the button and then tied some knots. Truth is, though, that this kind of cord is relatively slippery and doesn’t hold a knot that well, so we will secure it with some glue in a minute.
I know, this knotting looks INSANE, but no one’s going to see it, right? I wanted to make sure it was secure.
Cut the ends of your cords and then add a little glue to the ends and the knot to make sure it doesn’t come undone.
Once it’s dry, you’re good to go!
Hope you enjoyed!
Pin It


October 12, 2012 at 2:39 pm Kathy
LOVE! This is so lovely! And I really like the non-ombre idea of using non-color-family color cords, too. Bee-you-tea-full!
October 13, 2012 at 8:18 am BWBecky
I wish I had a week of nothing to do so I could spend all my time making your cool jewelry. I tell myself I’m going to do this one or that and then something comes up…oh yea, 3 kids, aargh. I swear I will be bringing a trunk full of supplies for your crafts to BW in July and will spend that week crafting my a#* off!
October 13, 2012 at 10:46 pm Megan
Is there a way that we can make this without the button? I actually do have a button that fell off one of my jackets that I’ve been meaning to sew back on for a while now, but I don’t think the button would look right with that bracelet and the colors that I would choose.
Just wondering. Thanks a bunch!
October 13, 2012 at 10:57 pm Beth
You could make it with ties at the end; I would take the two lengths that you end up with (each with three cords) and braid each one. You could add a little bead at te end if you wanted. Then, to put it on you’d put one braid through the loop and tie it with the other braid. Make sense?
October 14, 2012 at 1:04 am Megan
Yup. Got it! Thanks so much!
October 16, 2012 at 6:26 pm RoselyC
Beautiful! Cant wait to try it although it looks kind of overwhelming (I’m not very crafty).
October 21, 2012 at 4:12 am Debbie
This is amazing! Oh my, looks insane, but have to try it now, LOL! Thank you so much for sharing!
xxDebbie
October 21, 2012 at 7:15 am Beth
Thanks for visiting, Debbie! Glad you liked it!
October 21, 2012 at 7:58 am Lorena
Thank you so much for this tutorial! It was so didactic! I tried to make a bracelet yesterday and it was good! I’m a brazilian and work with macramé. This kind of knot will be on my models now. Thank you for sharing!! You could visit my blog and Facebook page, if you wanna. xx
https://www.facebook.com/EntreNosMacrame
October 21, 2012 at 8:49 am Beth
Thanks for visiting, Lorena!
January 2, 2013 at 11:27 am Jodie
Would it be possible to make this same sort of bracelet using macrame cord or any other sort of cord instead of the medium weight Chinese knotting cord?
January 2, 2013 at 12:35 pm Beth
You could use macrame cord, depending on the weight. The Chinese knotting cord is a bit thicker than any of the macrame cords I’ve used, and it’s stiffer, too. I tried doing it with macrame cord but it’s difficult to get the knots to stay in their shape. With macrame, you tighten up the knots all the way, and here you are leaving them looser, so it works much better with stiffer and thicker cords.
January 15, 2013 at 10:07 pm Sonya child's
Where can I buy this cord and what is a button w a shank? Love love love this bracelet can’t wait to make it!!! Thank you so much for your time and effort!!
January 15, 2013 at 10:19 pm Beth
Hi there! Thanks for visiting. If you click on the link in the supplies list for “medium weight Chinese knotting cord,” it’ll take you right to the supplier! Also, a button with a shank simply means it doesn’t have holes; it has a little ring attached on the back to affix it to fabric. Hope that helps!
March 6, 2013 at 4:49 am Brooke
Hi- Love this bracelet! Found you throug Pinterest. I was wondering if you could tell me where you found your button and the size of it? Thanks!
March 6, 2013 at 10:16 am Beth
Hi Brooke! I can’t remember where I got the button; I feel like I ordered it from M&J Trim in NYC (mjtrim.com) but I don’t see it on their site. I found something similar on Etsy here: https://www.etsy.com/listing/74292647/set-of-3-vintage-hammered-gold-metal. You could try searching on Etsy for “hammered metal button” or even doing a Google search for it. There’s lot of stuff out there. My button is about 1″ in diameter.
Hope that helps!
March 13, 2013 at 4:44 pm Danny Colon
I wanted to thank you. I had a great time making my own creation with your help. It turned out great..
March 15, 2013 at 9:57 pm Vivian
I was wondering whether using leather cords would work as well – the flat kind. (Or if that’s not possible the ordinary round kind is good too).
But anyways, this is beautiful! The mix of the colors makes a really nice contrast!
March 16, 2013 at 1:02 pm Beth
Hi Vivian! I think the flat kind might be kind of hard to keep laying flat. I think using round leather cord would work great! Thanks for stopping by!
April 2, 2013 at 5:03 pm Carletta
Can u do the Shamballa bracelets?
April 2, 2013 at 7:17 pm Beth
Hi Carletta! There are a lot of good tutorials out there for shamballa bracelets; here’s just one I found: http://www.bead-workshop.co.uk/shamballa-tutorial-17-w.asp. If I can think of a new take on this bracelet that no one has done, I’ll be sure to post a tutorial. Thanks for asking!
April 14, 2013 at 2:49 pm Megan
Love this! Just made it with bright blue, orange, and purple for spring/summer. Thank you for a very comprehensive tutorial! I found it helpful to tape the three ends together, and I taped the top loop down to the counter to keep things straight for myself. Thanks again!
April 14, 2013 at 2:54 pm Beth
That sounds beautiful, Megan! Glad you liked the tutorial!