UPDATE: I’ve added some of these bracelets to the shop. Check it out here.
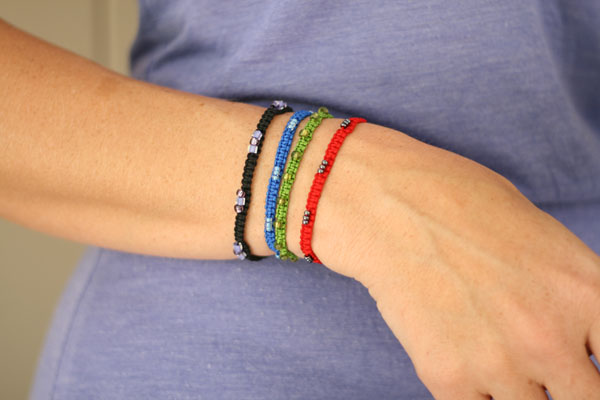
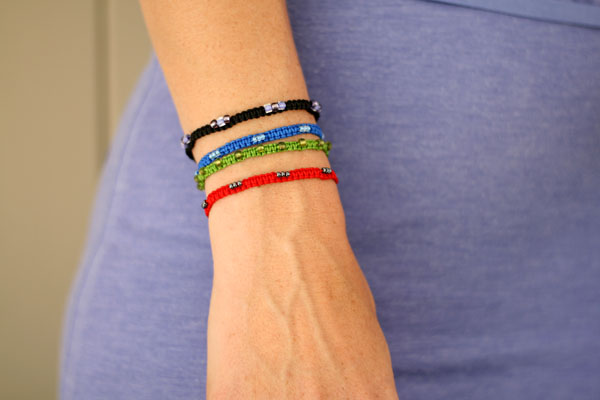
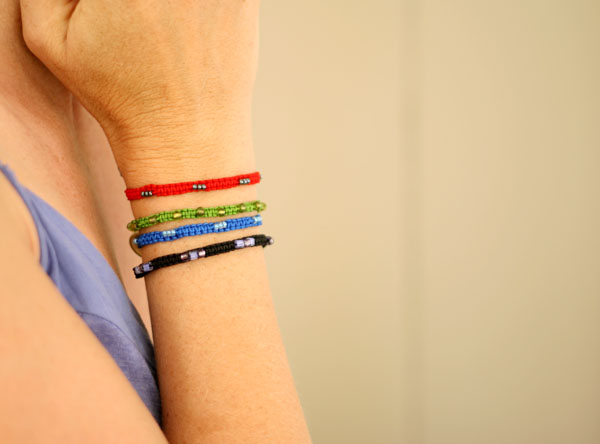
As you all know, I’ve been messing around making bracelets, and it’s kind of addicting. I ordered this micro Chinese knotting cord that I am in love with, so I’ve been creating my own patterns for some bracelets made out of them. Here are a few I made the other day, and I’m going to show you how!
Materials:
- micro (size G) Chinese knotting cord in desired colors
- beads (I used Gutermann size 9 seed beads on the blue and red bracelets; this is about the smallest size you will get to fit on the micro cord, and even then you might need to use a beading needle. Size 6 beads are quite a bit bigger but will be super easy to thread onto the cord.)
- a clipboard
- tape
- scissors
- optional: beading needle, if you are using smaller beads
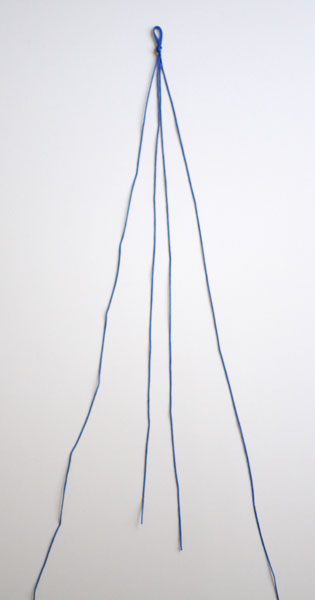
To start, you will cut two strands of your cord in one color. The first strand will be 2 yards long, the second will be 30″ long. Fold them both over in half and set them together by the loops, then tie them off in a knot with a loop on the end, like so:
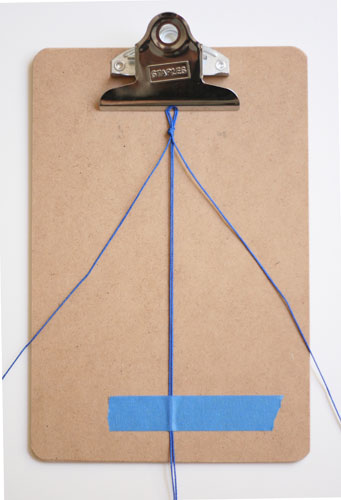
Attach it to your clipboard by clipping the loops at the top to the board, and then arrange the cords so the two small ones are in the middle and the larger ones are on the outside. Pull the smaller cords taut and tape them to your clipboard.
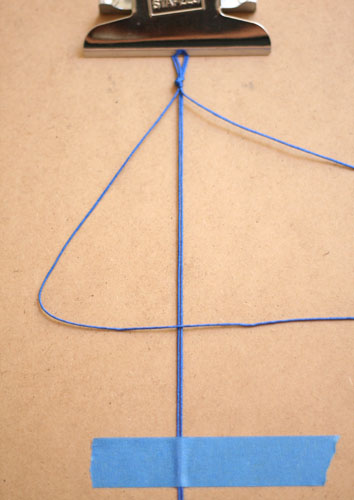
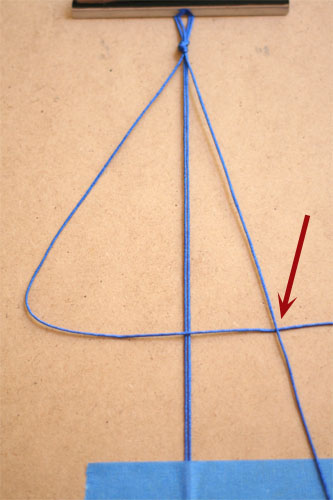
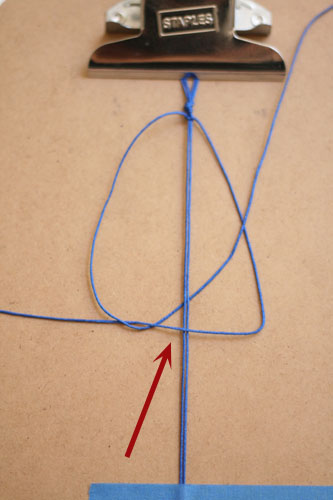
Now you’re ready to knot. You are basically going to be tying a square knot, which requires two ties to complete one knot. You start by bringing the left hand cord over the two middle cords in a 4-shape:
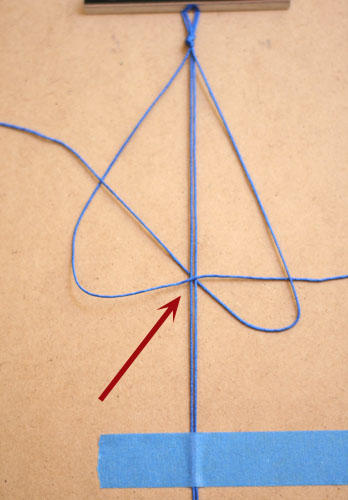
Then, you lay your right hand cord over the tail of the 4, like so:
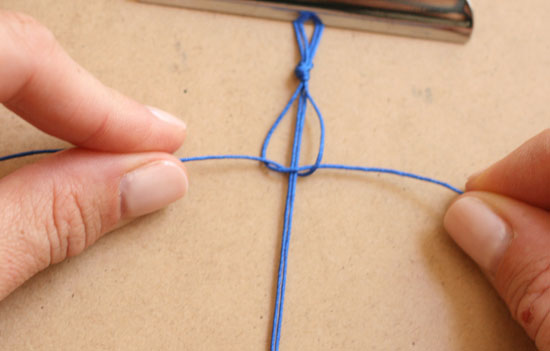
Now you are going to bring that right hand cord under both the two middle cords and the left hand cord.
And now, all you have to do is tighten.
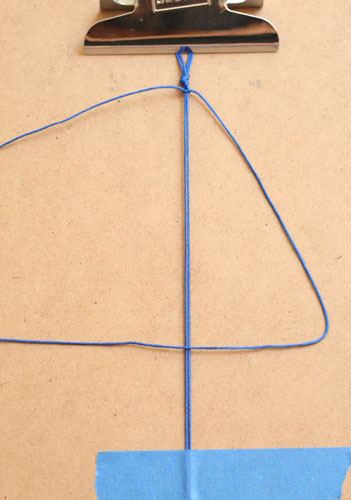
To complete the knot, you will do the same technique starting on the other side. So, take the right hand cord and make a backwards 4,
Lay the left hand cord over the right hand cord’s tail, and bring the left hand cord under the two middle cords and the right hand cord.
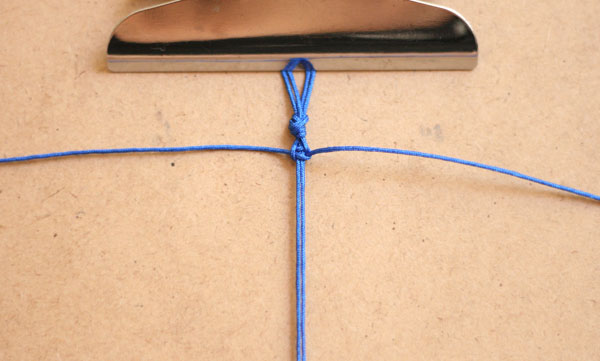
Tighten it up, and you’ve got your first knot.
Continue to knot in this manner. For this bracelet, I made 5 knots, which means I tied 10 times (once left and once right makes one knot).
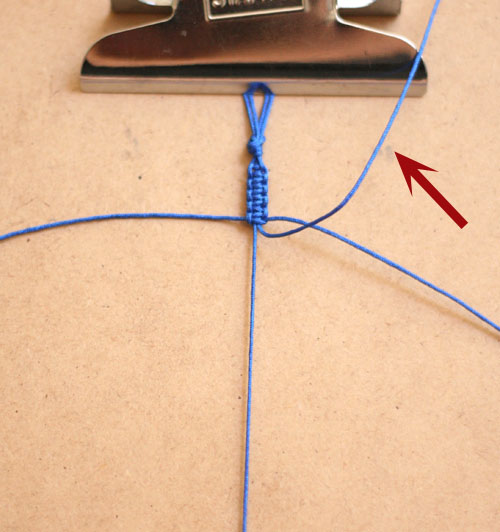
Once you’ve got these knots done, you will untape the center strings and bring one of them upwards, so it isn’t involved in any knotting.
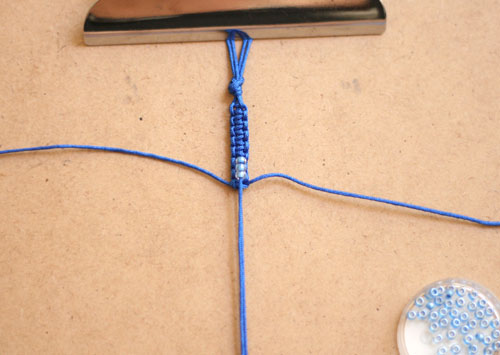
Now you will continue knotting, but over only the single center cord. To add 3 seed beads, I made three complete knots.
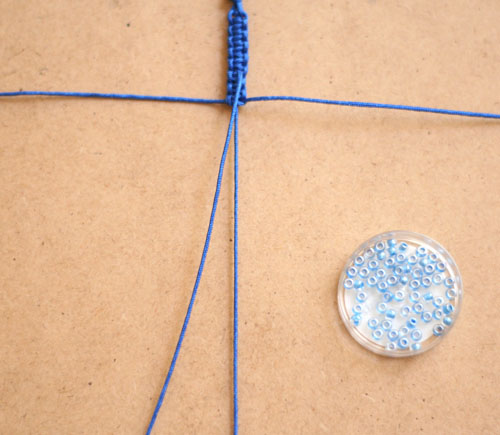
Now you have a cord sticking out over your new knots. This is where you put your beads. String the beads onto the middle string that you held out in the last step. Then, retape both middle strings down and start knotting again.
Knot another 5 knots (10 ties right and left) and then repeat the process, pulling out the cord, tying three knots over only one middle cord, adding beads, and then starting to knot over both middle cords again. Continue until the bracelet is long enough to fit around your wrist.
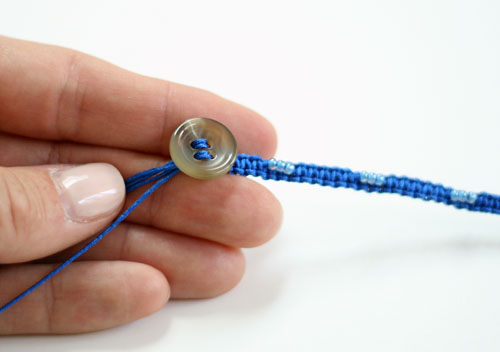
Now you’ll add your closure. Choose a button you like and feed two strings each through each hole or sets of holes (I chose to feed one long and one short strand through each side).
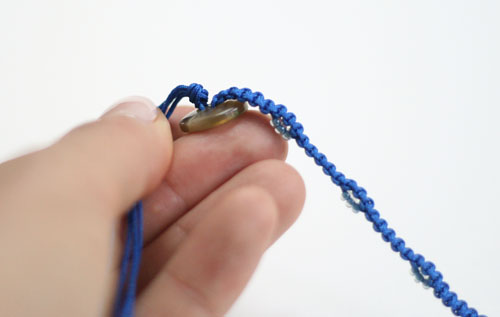
Tighten it up and then tie a knot on the backside of the button.
Clip off the ends of your cords and you are done!
The fun part about this pattern is that you can really customize it any way you want. I tried a few different things, and there are many more to be made. By varying the spacing in between beads, the kinds of beads, and the color of your cords, you can make endless combinations.
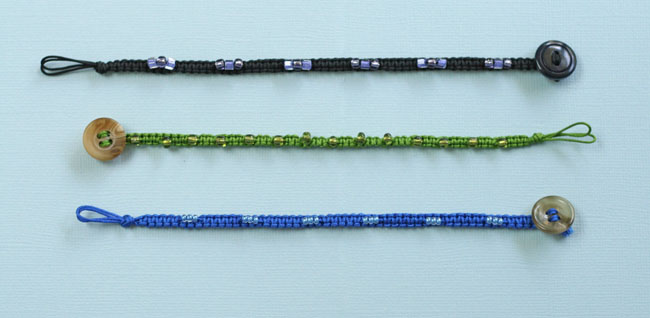
Here are the 3 varying ones I made here, and how I did it:
For the black bracelet: black cord with size 6 seed beads in purple and square beads in purple. 5 knots in between each set of beads, and 4 knots under each on.
For the green bracelet: green cord with size 6 seed beads spaced more closely together, one at a time. 3 1/2 knots in between and 1 1/2 knots under each bead.
For the blue bracelet: blue cord and size 9 Gutermann beads. 5 knots in between and 3 knots underneath each set of 3 beads.
I’m messing around some more and will post more variations when I have them done. Hope you enjoy!






Well done! Great photos! It is so nice to see others teaching macrame. We hope to start a blog on our website soon that will include techniques, but it is still a ways off. We are so busy traveling the art show circuit. One day…