I saw these neon beads the other day on P.S. I Made This, where Erica made beaded shirt pockets with rather large neon beads. True confesh? It seemed kind of clunky and overwhelming to me. But, the beads are super cool, so I ordered some up from Fire Mountain Gems.
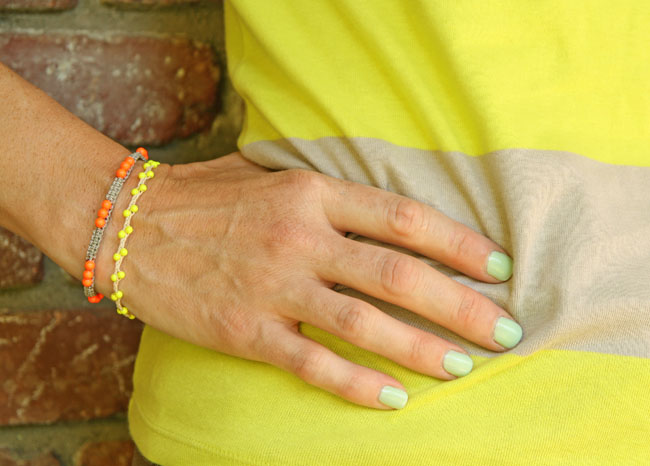
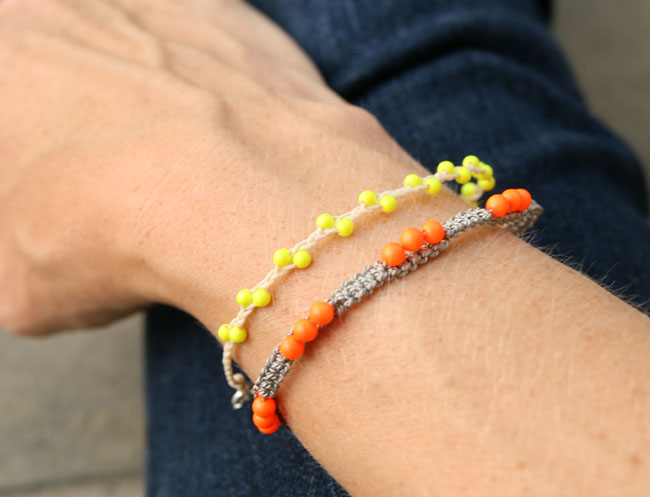
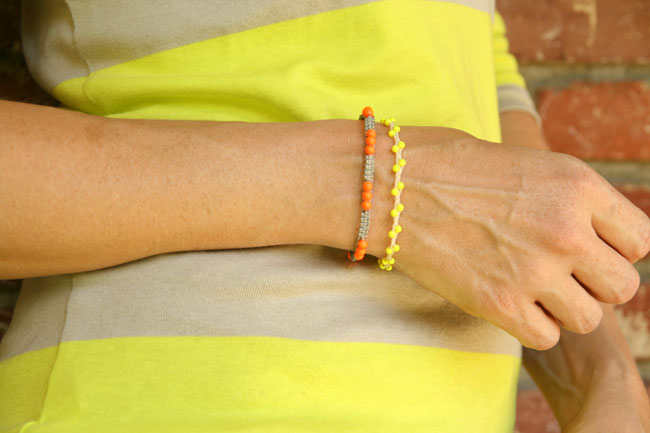
I wanted to make some jewelry for the fall with these fun neon colors. Even better that I have this cool sweater that’s a perfect transition to fall (see above!) that is neon yellow and tan. I decided to make two bracelets in different styles, but both styles I’ve featured here before. What’s new are the beads and the clasp. I wanted something a little more finished than the button-and-loop closure.
The main problem here is that the holes in these beads, even the larger ones, are very small. So it was hard to find string that would fit through. For the first bracelet, the neon yellow one, I used the waxed linen twine and the braiding technique I featured here. I used 3mm neon yellow Swarovski pearls, which was a little harrowing because they just barely fit onto the twine. Sometimes I had to try 3 or 4 different beads to find one that fit. But I managed to get them all on, and I think it looks pretty cool.
For the second bracelet, I wanted to do the beaded macrame. Problem was, I couldn’t get even the larger beads to fit on the Chinese knotting cord. So I mixed it up. I got some silk beading cord, which comes with the beading needle already attached. That’s the key to success, because you can’t add your own beading needle since doubled up cord won’t fit through these beads.
The macrame looks a little different in a twisted cord, but I think it still looks cool. Here’s how I did it, including how I attached a clasp instead of a button for the closure.
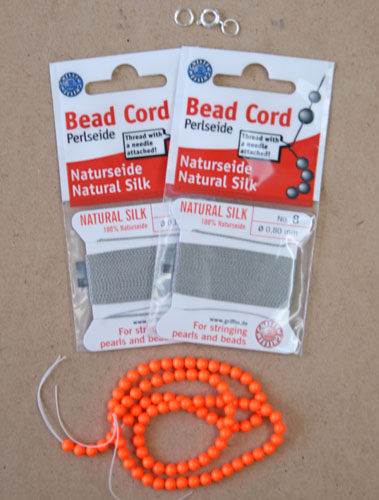
You’ll need:
- 2 packages of bead cord, size 8, in your desired color. Make sure they come with the needle already attached. This one by Griffin does.
- 4mm neon Swarovski pearls in your choice of color
- clasp
- Hypo cement jewelry glue (not pictured)
As I mention in my tutorial on how to make these micro macrame bracelets, cut your cord into two lengths, one 2 yards and one 30″. What’s important is that you cut the part with the needle into the 30″ length. The 2 yard length does not need a needle on it. These packages come in 2 meter lengths, so I used one for the 30″ length and the other to get the 2 yards.
One additional step you will need if you use this cord is ironing. When the cord comes off the card, it is bent into little segments. I ironed my quickly to take out the bends.
It’s much easier to work with once you’ve ironed it, and it takes about 10 seconds.
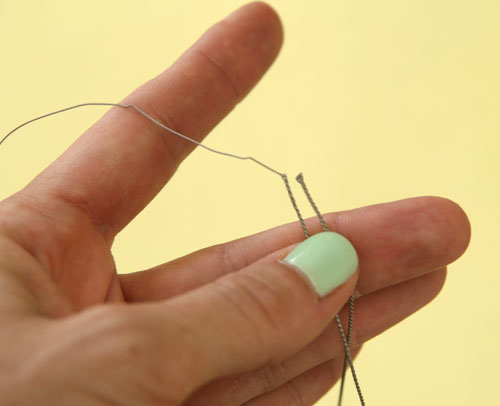
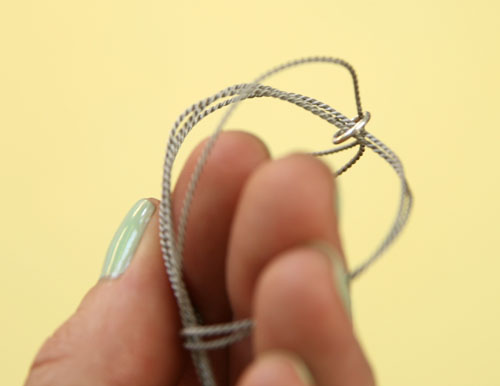
One other adjustment: since the 30″ cord has a needle on the end, make sure you don’t count the needle as part of the length. (That is, it should be 30″ of cord plus the needle.) Also, when you fold the cord in half, don’t count the needle. You should end up with the two ends matching up like this:
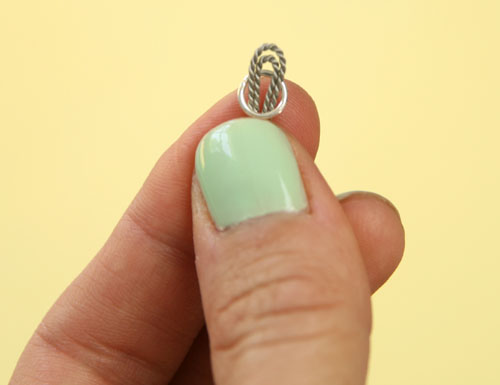
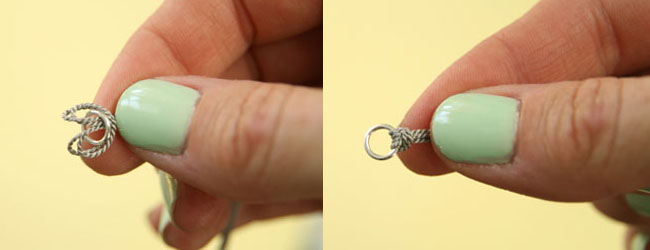
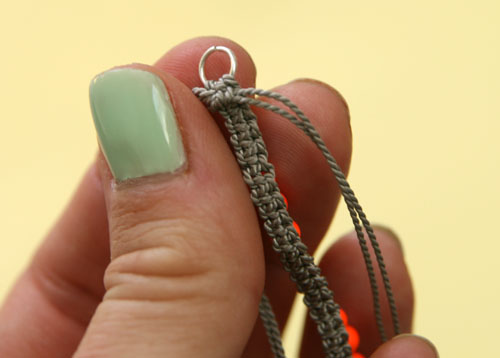
To attach the jump ring for the clasp, you will fold the cord over as in the original tutorial, but instead of tying a knot and leaving a loop, you will thread this loop through the jump ring.
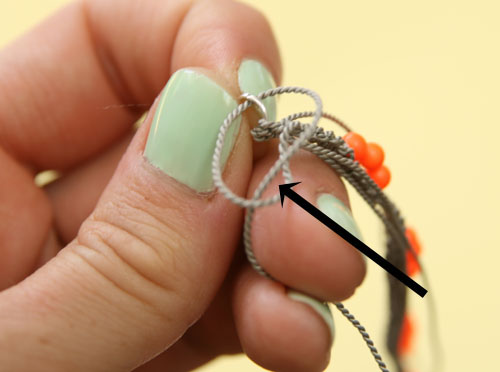
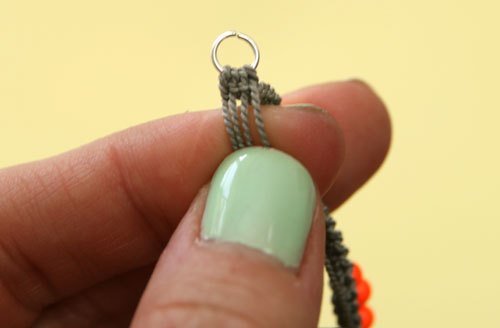
You are going to make a Larkshead knot here by bringing the ends of the cords up and through the two loops of cord.
Now you are ready to start knotting. Follow the instructions for the beaded macrame bracelet on my tutorial. You can choose whatever pattern you want; I used the 3 beads at a time pattern. You will always use the end of the cord with the needle on it to add beads.
Once you’ve got your bracelet to the right length, it’s time to add the clasp. You will be using another jump ring and attaching the clasp to that. Take each cord (you will have four) one by one and tie a half hitch like this: with the wrong side of the bracelet facing you, bring one of the cords through the jump ring from front to back.
After you bring the end of the cord through, bring it around and through itself on the front side of the jump ring.
Pull it tight.
Repeat the same procedure with all four of the cords.
Now, take the left two cords and the right two cords and tie a knot.
Tie another knot the opposite way to complete a square knot. Add a little jewelry glue over the knot to secure it. When it dries, you can trim the ends of the cord off. Add your clasp and your bracelet is complete.
I have one more neon jewelry project to show you, so stay tuned!
Pin It









love your ideas. Can you share the tutorial?