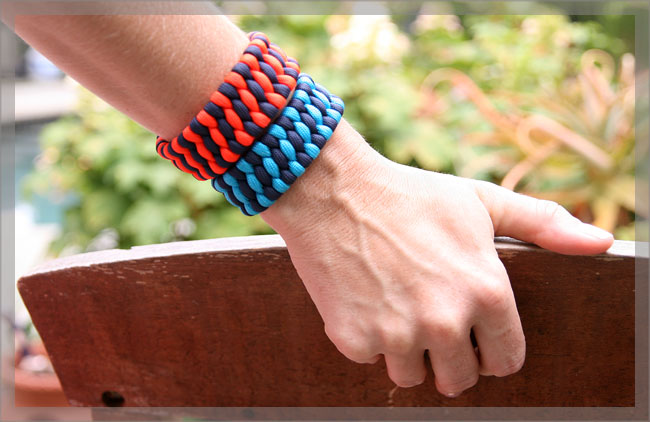
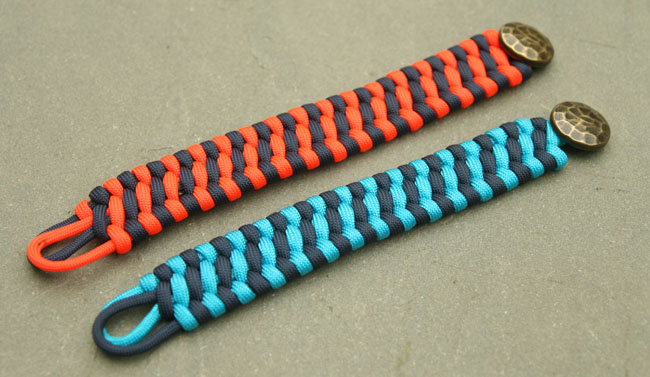
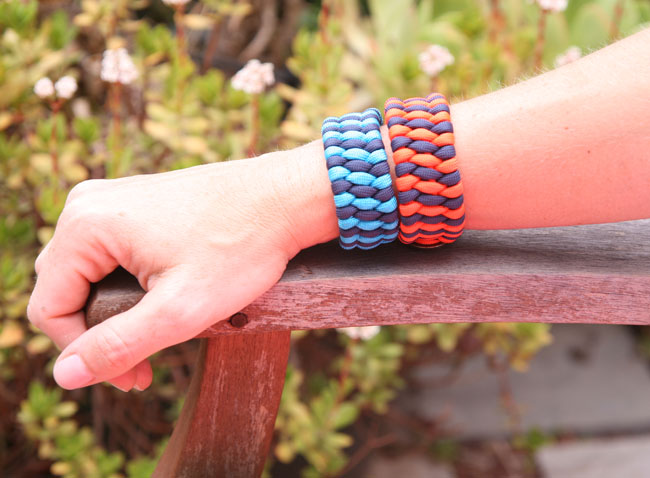
I’ve been looking into more and different kinds of knotting for bracelets lately, and I found this pattern that works nicely for a cool cuff bracelet. I used paracord (utility cord originally used for parachutes, now widely used for other applications) and a brass button for closure. The paracord is relatively thick, which makes this bracelet more of a cuff.
I found a video tutorial for this pattern on YouTube from a guy who calls himself “Tying It All Together.” Those of us who watch him know him as TIAT, too. If you want to see a nice video tutorial for this pattern, you can check his out here. I simplified the steps a bit, and his doesn’t include the finishing of the bracelet. Oh, and he doesn’t talk in his videos, but they are very easy to follow. He goes slowly.
(For those of you who like useless cocktail party trivia, this pattern is apparently called a trilobite bar. Wow!)
For the project you’ll need:
- two 5 1/2′ lengths of paracord (550), in whatever colors you choose. I ordered mine from Etsy seller HomerPelican.
- a lighter or match
- needle and thread
- a button with a shank for the closure, preferably a slightly larger one (a shank means there are no holes in the button, but a little loop on the back of it)
- pliers (optional)
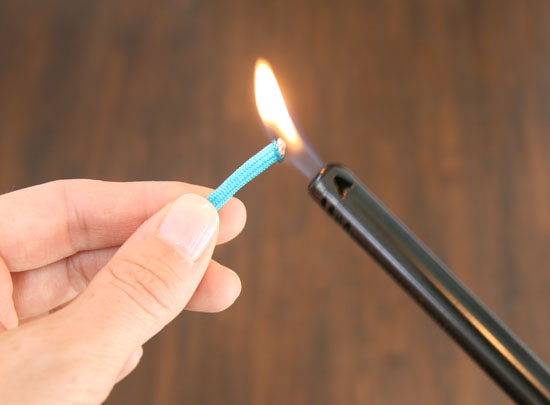
To start, you’ll need to cut your cord to the right size. Paracord is a little finicky since it will fray and separate if you don’t seal it. So, once you’ve cut your 5 1/2 feet, you’ll want to burn it to melt the fibers together.
You’ll need to hold the flame on it for about 10 – 15 seconds, until both the inner and outer fibers melt a little.
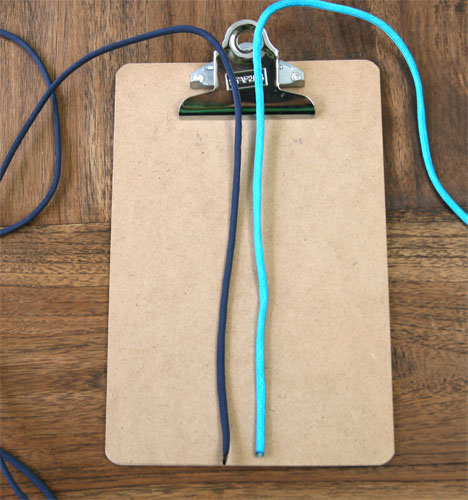
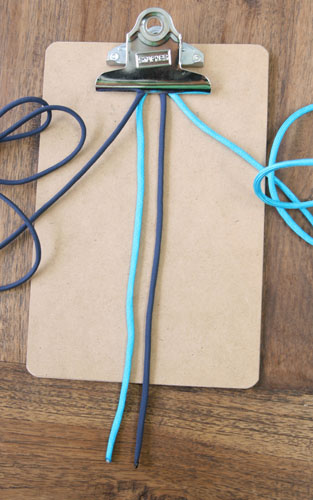
To set up the bracelet, you will put the two cords together and fold them over, with a short end and a long end. The short end should be about 2″ longer than you want the finished bracelet to be (so if your bracelet will measure 7″, make the short end 9″).
Then, you’ll stack the cords on top of each other and attach them to a clipboard (or you can use tape and attach it to a table).
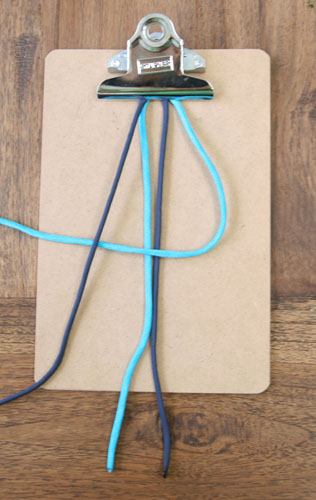
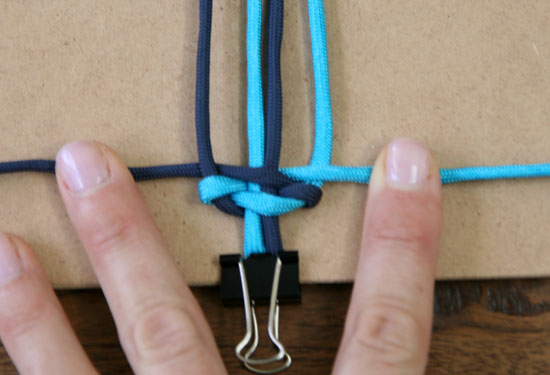
To start, you will take the long cord on the right and lay it over the middle cords, perpendicular to them. Then, you will lay the long left hand cord over the right hand cord.
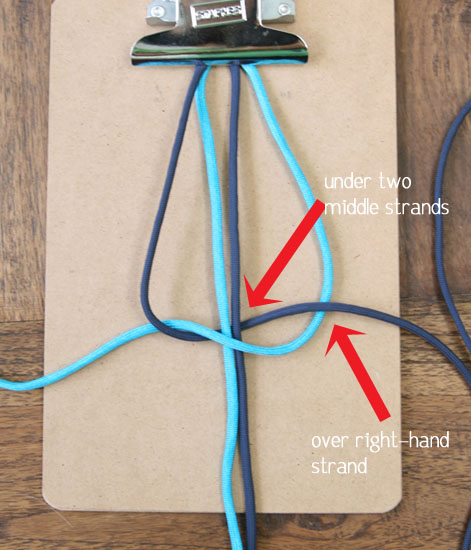
Easy peasy. Now, bring the long left hand cord under the middle cords and over the long right hand cord.
This is the foundation for the bracelet. To make things clearer, from here on out I will refer to the far left cord, the one that you will be moving, as the “left working cord,” and the far right one as the “right working cord.” I will refer to the left cord (above, the navy cord) as simply the “left cord” and the right one as “right cord” (above, the neon teal cord). The two center cords are the “middle” or “center” cords. Hope that makes sense.
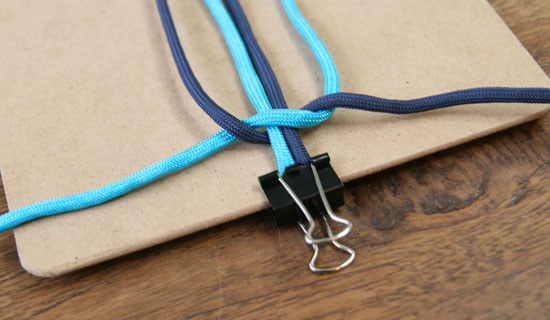
Now, you want to move the very simple knot you’ve made above down the two middle cords a bit. You want the distance from the top of the cords (the bend that you’ve attached to something) to the knot itself to be the length of your finished bracelet.
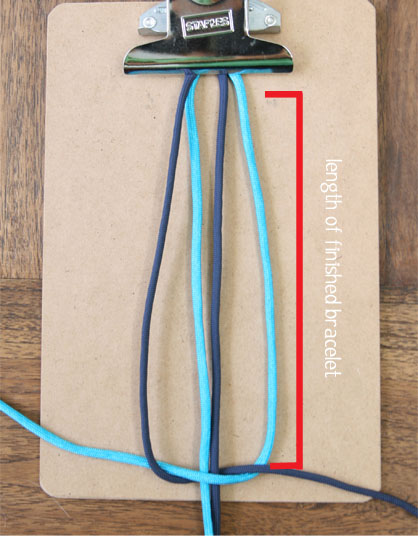 As a final bit of set-up, you’ll want to secure your middle cords down so they don’t flop around. This allows you to keep tension and not worry about so many cords. I’ve done it with a binder clip, but you can also use tape.
Okee doke? Now it’s time to weave!
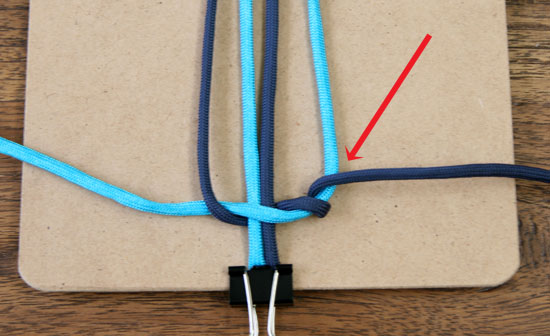
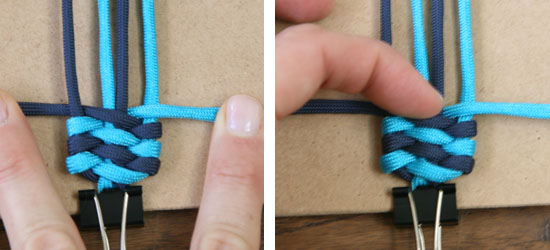
First, take the right working cord and wrap it around the right cord.
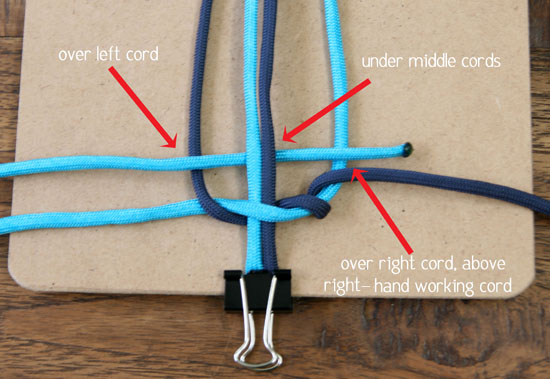
Now, take the left working cord and lay it over the left cord, under the middle cords, and over the right cord, placing it above the wrap you did in the last step.
Now pull the left working cord tight.
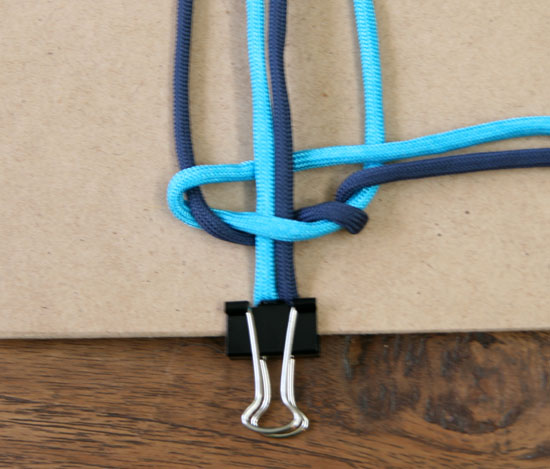
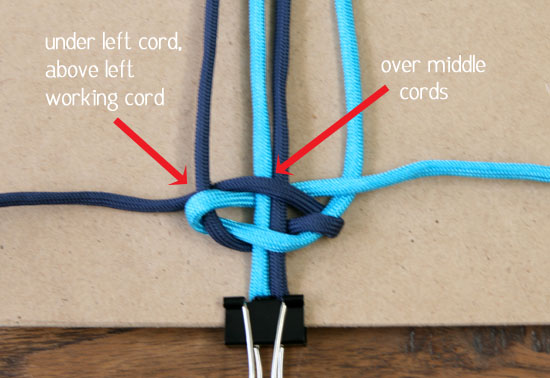
Take the right working cord and put it over the middle cords and under the left cord, above the left working cord.
Now, tighten both working cords.
This is the basic sequence for weaving. You will continue to cross over the cords. So, here’s the next set of weaving:
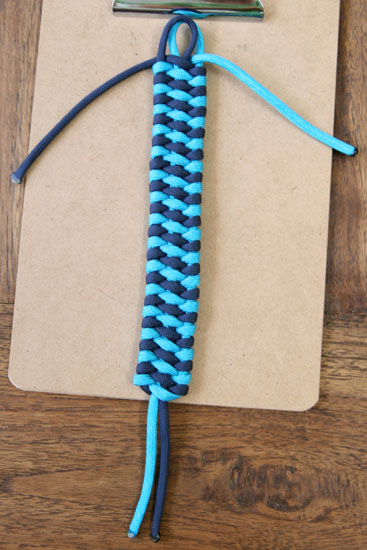
As you go, tighten up both horizontally and vertically.
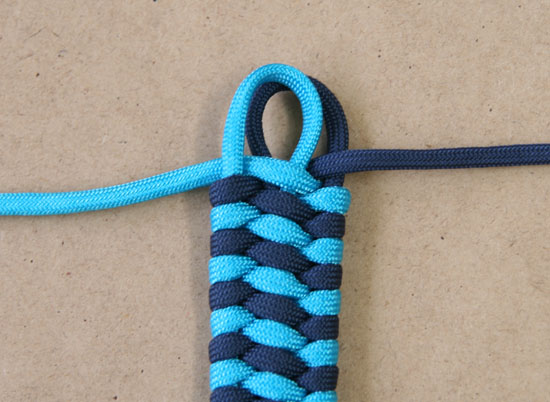
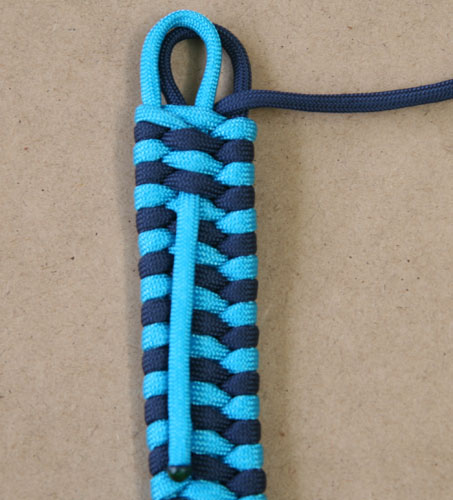
Keep weaving until you have a loop at the top that will fit your button.
Now you are going to tuck the tails from the top into the back of the bracelet’s weave. First, flip the bracelet over.
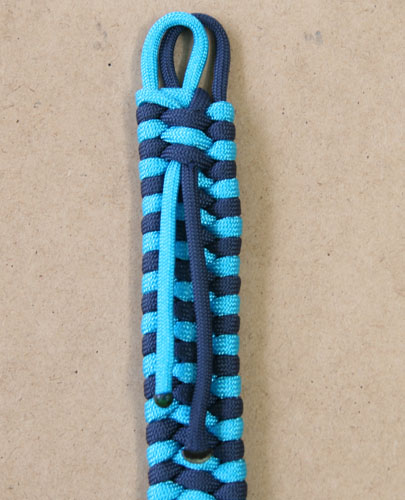
Now, take the left hand cord and thread it under 3 – 4 of the middle weaved cords:
Do the same with the right hand cord.
We’ll come back to trim these later. Now your bracelet looks like this:
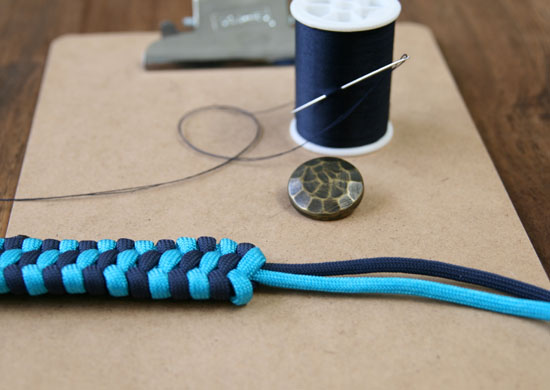
Time to attach your button. For this you will need thread, a needle, and your button.
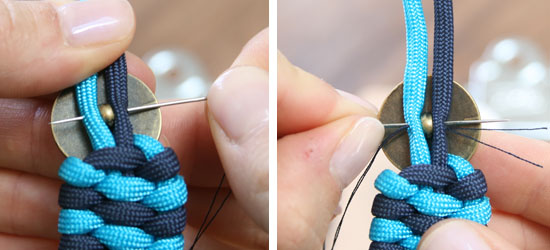
Place the button’s shank in between the two cords, with the face of the button on the front side of the bracelet.
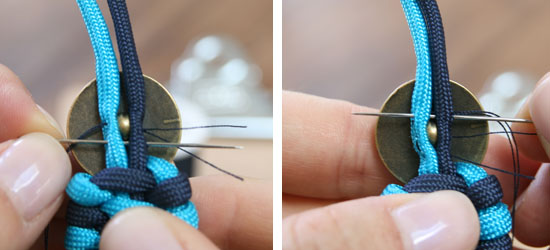
Now you will sew the button on by threading the needle through both the cords and the hole in the shank, back and forth.
Once you’ve got some good stitches through the shank, you should sew the cords together both below the shank and above it.
Your sewn button will look like this from the back:
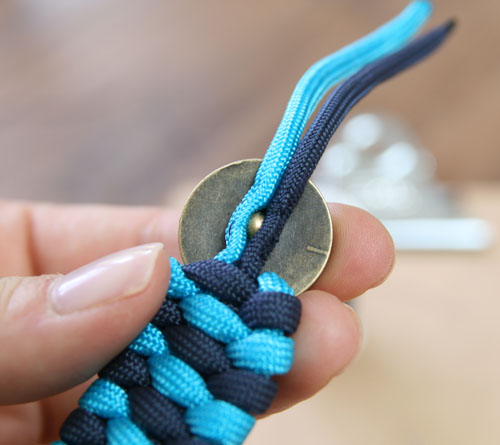
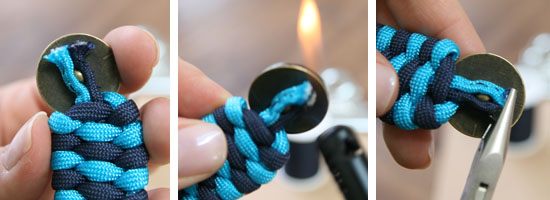
To finish it off, cut the cords underneath the button and melt them to seal. While they are still hot, you can use pliers to squeeze the ends to make them flat, so they lay a little better under the button.
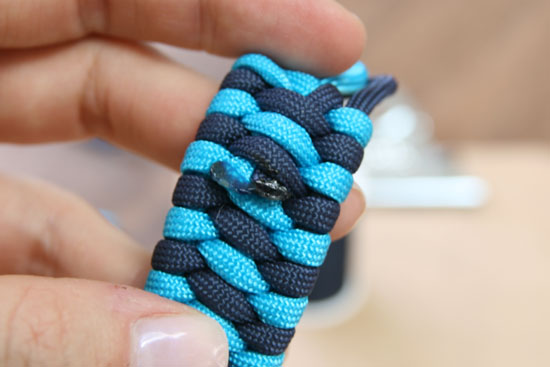
Now you’ll want to cut the top cords as well, and melt them. Be careful not to melt the bracelet itself; it helps if you bend the bracelet so that the cord ends are pointing upwards and are not flush on the bracelet.
You can tuck these little melted ends inside the next woven cord; it’s easier to do if you smoosh them with the pliers while they are hot.
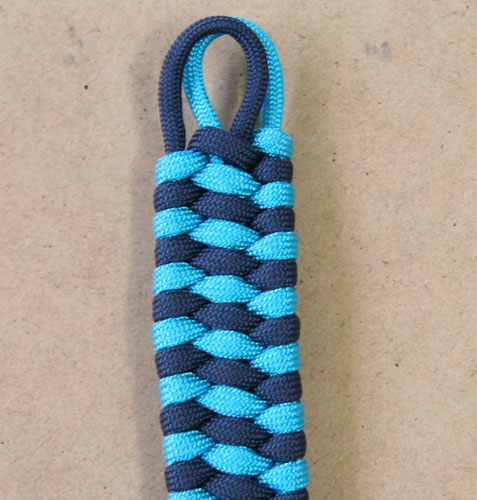
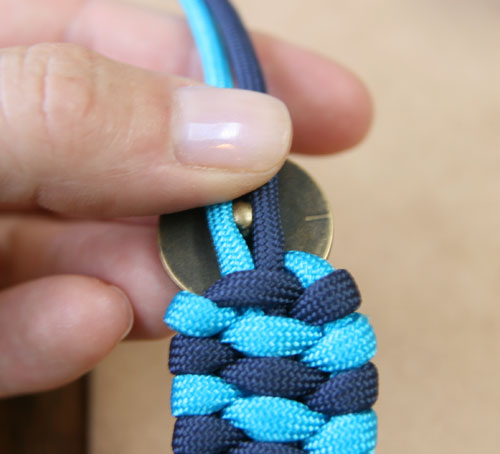
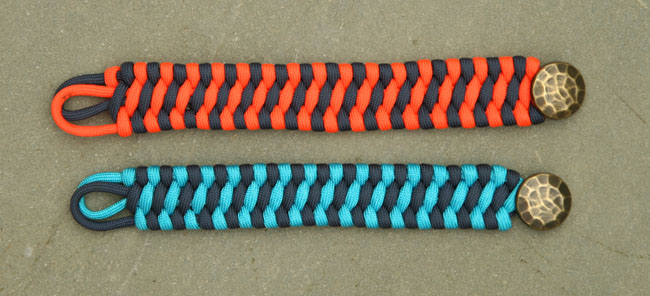
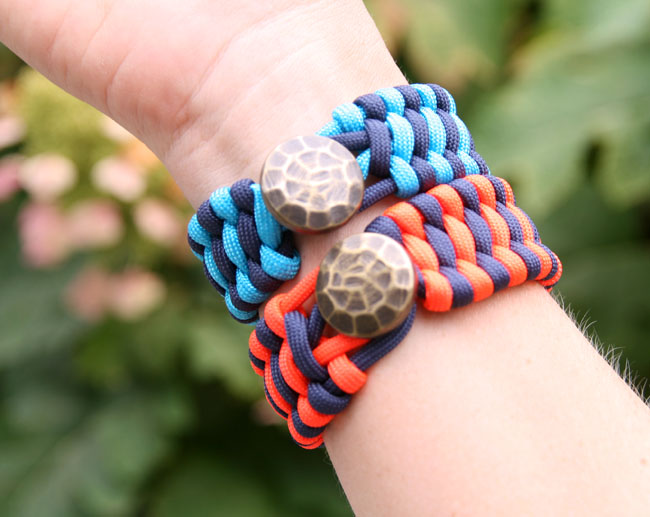
Done! I think they are pretty cute.
Let me know if you make any! Happy day!








Love love love LOVE this and can’t wait to try!