


This idea originally came out of my hoarding instincts. I bought a few new shirts, and they had those straps on the inside shoulders that you use to keep the shirt on the hanger. By the by, did you know those little strings have no proper name? I think we might need to come up with one and see if we can get it going around the web. Know your meme!
Also, I read once that when you bring a garment with said strings (hanger loops? security straps? shoulder strings?) home, you are supposed to cut them off. Apparently they are really for store display, and since they often end up showing when you wear the garment, it’s advised that you remove them.
I cut a bunch of them out some time ago, and they were made from satin ribbon. And I thought, “ah, they’re quite pretty, and they perfectly match my shirt(s). Shame to throw them out!”
Thus was born the idea: use them to create a perfectly-matched accessory. I decided to go with bracelet, since the ribbons weren’t all that long and it’s pretty simple to make a bracelet.
I’ve come up with several ideas that I’ll be showing you over the next few days. So come along and, if you have some garment ribbons laying around, consider making yourself a matching bracelet. Unless your apparel harness is made out of plastic, in which case, go on ahead and throw that puppy out.
Here’s what you’ll need to make this first one I came up with:
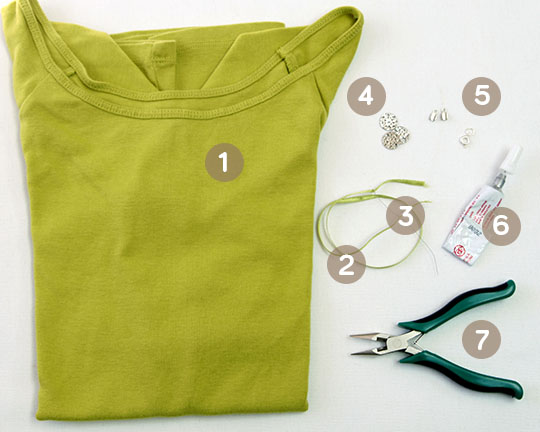
- a shirt or dress with clothing cords
- the ribbons from your shirt, cut out
- a beading needle
- several small metal discs, with 2 holes on each side, like these or these
- clasp, split jump ring, and 2 foldover cord end caps
- jewelry cement, or another strong glue (optional)
- jewelry pliers
To start, thread your beading needle onto one of your strings. You’ll only need one string for this bracelet, so you can save the other for another accessory!
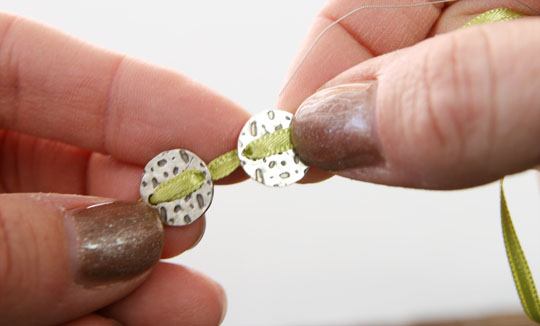
Feed one of the discs onto the ribbon by sending the beading needle up through one hole and down through the other.
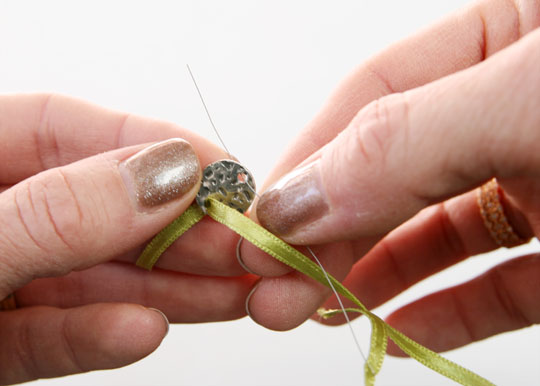
Pull the ribbon through, making sure that it doesn’t get twisted.
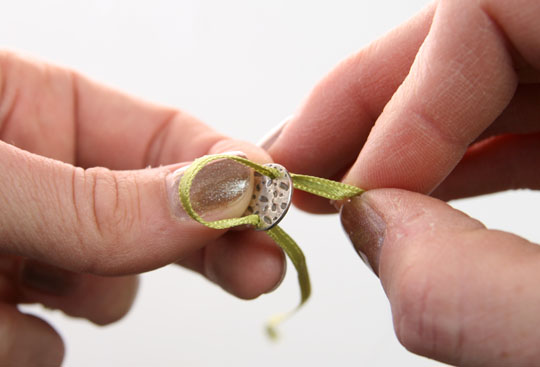
Add your other discs, lining them up and spacing them how you’d like. Make sure that the ribbon doesn’t twist and that all the discs are facing the same way.
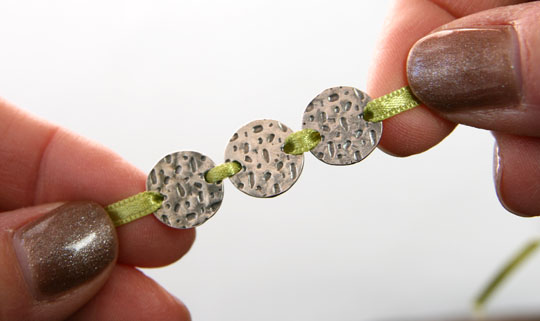
When you get all your discs together, they will look something like this:
Now it’s time to add the clasp. First, measure your bracelet around your wrist according to how tightly you’d like it to sit. Mark where the ends of the ribbon should meet with a Sharpie.
Lay the ribbon in the foldover end cap, making sure the mark you made falls where the clasp or jump ring will be. This means that the ribbon sitting directly in the end cap will be closer to the center of the bracelet, with your mark falling outside of the folding part. If you line up the end cap with the mark, you will end up with another inch (or more) to the length of your bracelet. (Optional here: add a little jewelry cement to the inside of the end cap, to make certain the ribbon doesn’t slip out.)
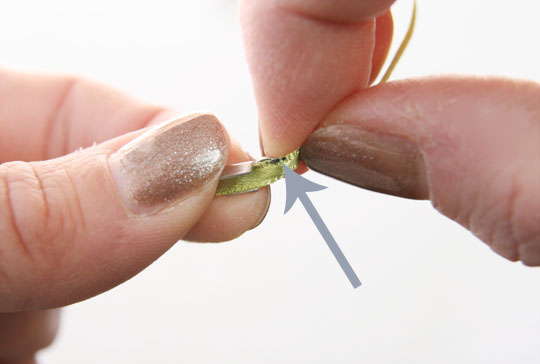
This is where my mark is.
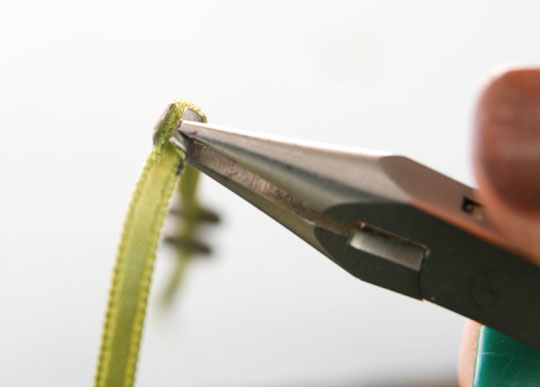
When you’ve got the ribbon where you want, cut the end off so that the ribbon sits flush in the foldable part of the end cap.
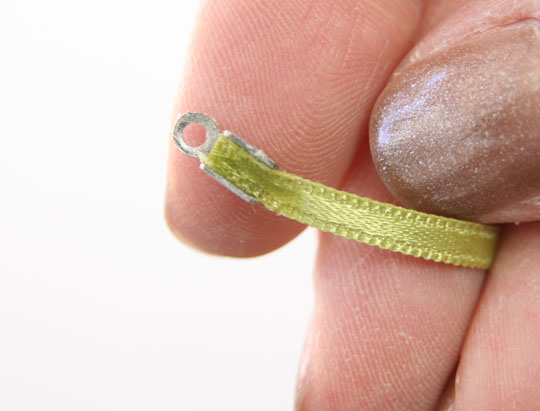
Now you can crimp down the sides, one at a time, with your pliers.
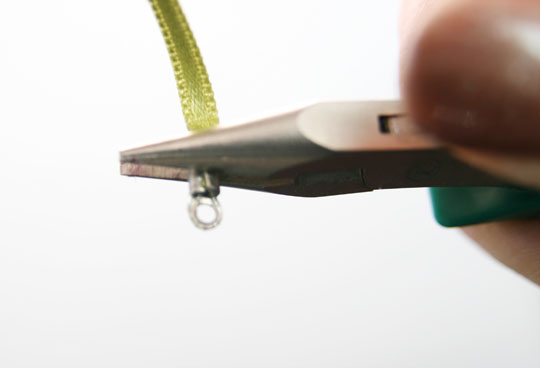
Repeat this process on the other side. Then, attach a jump ring to one end and the clasp to the other.
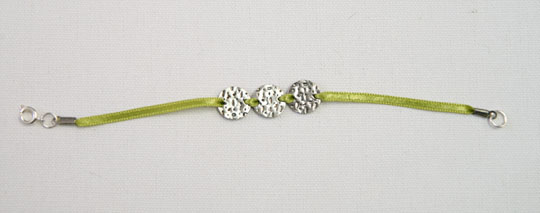
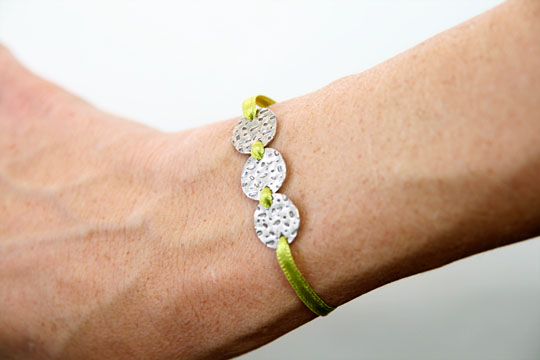
And there’s your perfectly matching bracelet.
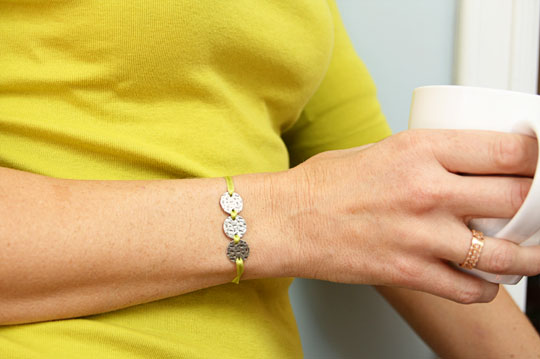
I have several more to share with you, so stay tuned! And start saving your hanger hoops.


What a clever idea! But now, of course, I want to challenge you to do something with the clear plastic … um, I’m going with “hanger hoops!”