I recently did a roundup of fairy gardens on Apartment Therapy, and so I’ve been thinking about things that are miniature and twee and sweet and all that. I’ve also been working in my garden, so I decided maybe it was about time I had a small corner that had something that could vaguely be construed as fairy.
But I like me some castles, so I wanted it to be a castle, with stones and mortar and the whole medieval shabang. I’ve never grouted before (can you use grout as a verb? I appear to have just done so!), but I’m game for anything and as soon as I saw that you can buy “pre-mixed grout” I was all in.
Here’s what you need for your fairy castle, and all of these things are available at home improvement stores like Home Depot:
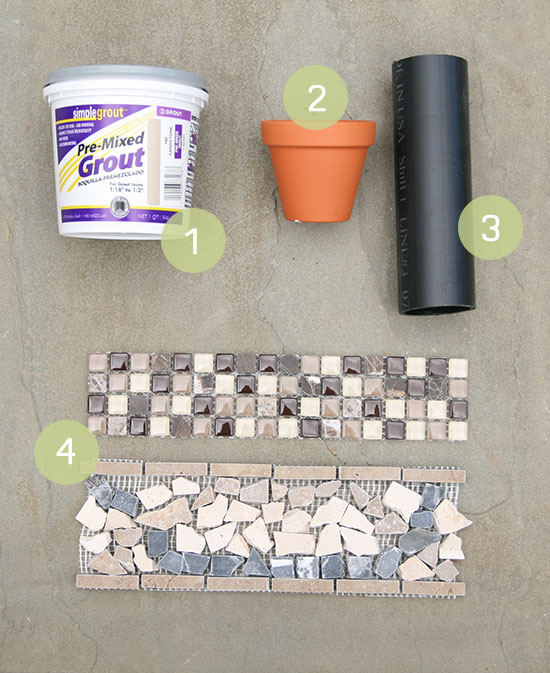
- Pre-mixed grout. I would get a darker color if I had to do it again.
- A small flowerpot whose mouth will fit over your PVC pipe (see #3).
- A length of PVC pipe, whatever height you want your castle to be. Add about 4 extra inches for the roof line and for plunging in the earth.
- Small tiles, rocks, pebbles… whatever you want your castle to be made out of.
- Tools not pictured: hot glue gun, craft stick, rags
I bought those tile slabs at Home Depot along with a few more. They have a good selection and the sheets are relatively cheap.
To start, think about the pattern you want to build. I knew I wanted some rows of tiles, so I cut my tile sheet into rows of 2 tiles and wrapped it around the pipe. As you start your pattern, make sure you leave about 2 – 3″ of the bottom clear so that you can stick it into the ground.
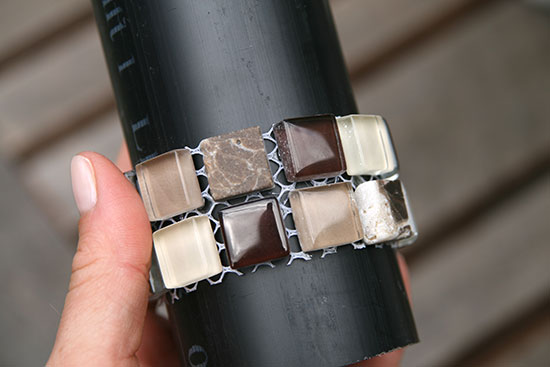
To secure it, I used a little hot glue on the back, knowing that it only needed to be secure enough to hold until I got to the grout.
After these tiles, I picked off these flat stones from another tile sheet I bought, and I started adding them one at a time, arranging them as I imagine some fairy construction crew would do it. I secured each of these with a little hot glue.
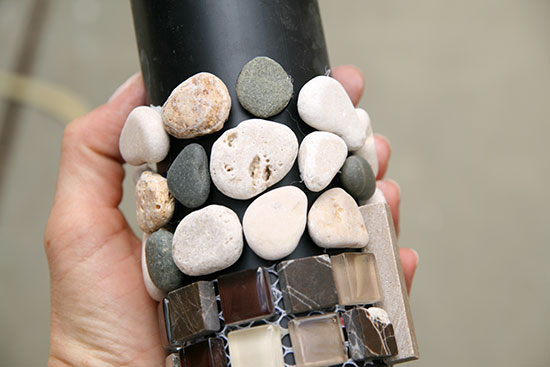
As you approach the top, stop adding rocks or tiles when they will interfere with your flower pot sitting on top of the pipe. I left enough un-tiled space so that the flower pot would sit flush on the pipe, not on top of the stones (since the stones made the pipe wide enough that the flower pot didn’t sit properly).
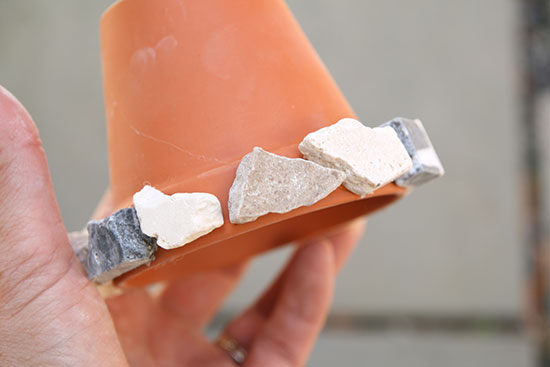
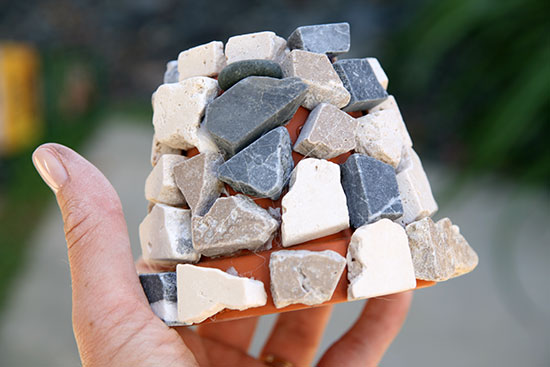
Now, do the same with your flower pot, knowing that this part will serve as the roof. I used some different tiles/rocks on this section, you know, just for fun.
Once you’ve got your rocks on, it’s time to start grouting. Be prepared with a craft stick or some other tool to slather on the grout, and a few damp rags to wipe the grout off of the rocks and tiles.
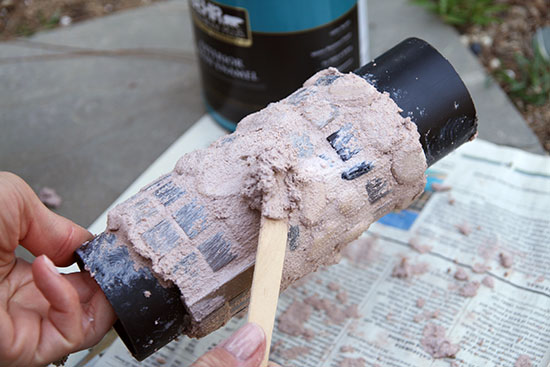 Slather on the grout one section at a time, making sure you are pushing it into all the nooks and crannies. The top and the bottom pose a little problem; I free-handed adding a small lip of grout to the bottom, underneath the tiles that end the pattern.
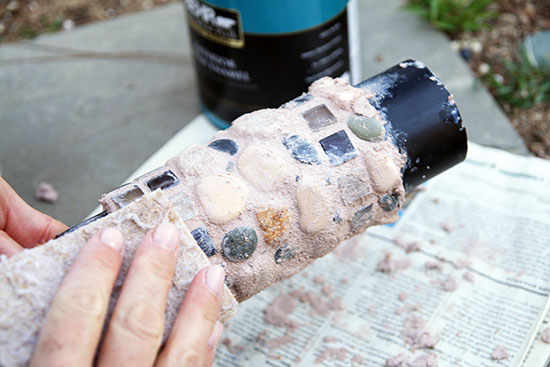
Once you’ve got a section done, use the damp rag to wipe the excess grout off of the tiles and rocks. This part is tricky, too, because you don’t want to pull the grout out from between the rocks, but you do want to get it off of their faces.
 You can use a sponge, too, if it works better for you. This step is probably the hardest.
Once you’ve grouted your whole cylinder and flower pot, let it dry. After 4 hours, you can go back and touch up anywhere there’s still grout film left on the tiles or rocks; I used the scrubby side of a sponge and my fingernails to chip off any excess.
Let your pieces dry over night to fully cure them.
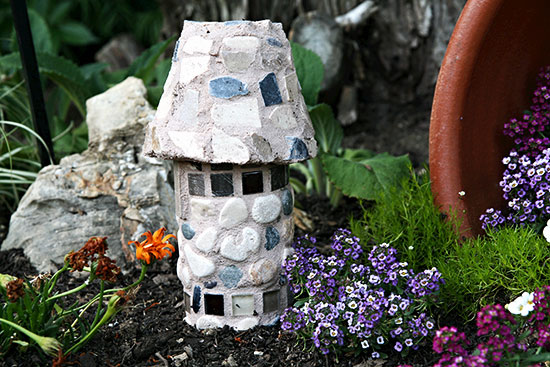
To place in your garden, choose the right fairy spot, and then push the cylinder’s bare 2 – 3″ into the dirt. This will stabilize the tower. If you want more stability, you could add some dirt inside the cylinder. Place the flower pot upside down on top of the tower, and your fairy castle is complete!
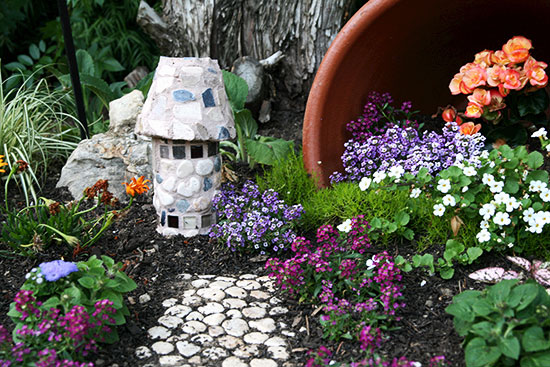
I made an entire fairy neighborhood, sort of. I hesitate to call it a fairy garden. But I added a small cobblestone walk; I simply took one of the sheets of tile (this one has river stones that I used on the castle), laid it in the dirt, and covered over the seams with soil.
I also saw this cute idea on Pinterest and copied it; I turned a large pot on its side and planted some plants inside of it, so that they are kind of spilling out of the pot. I thought it was cute enough that it deserved to be in this ‘hood.
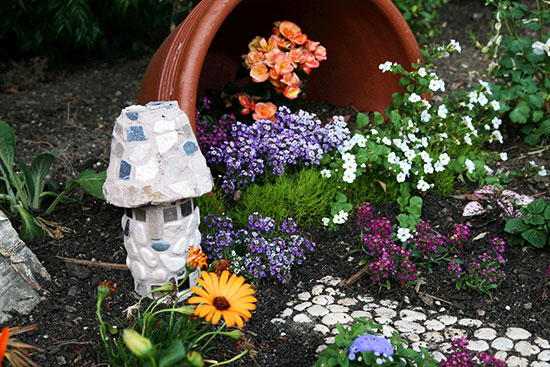
As soon as all the plants grow in and smoosh up against each other, I will be delighted with the results!


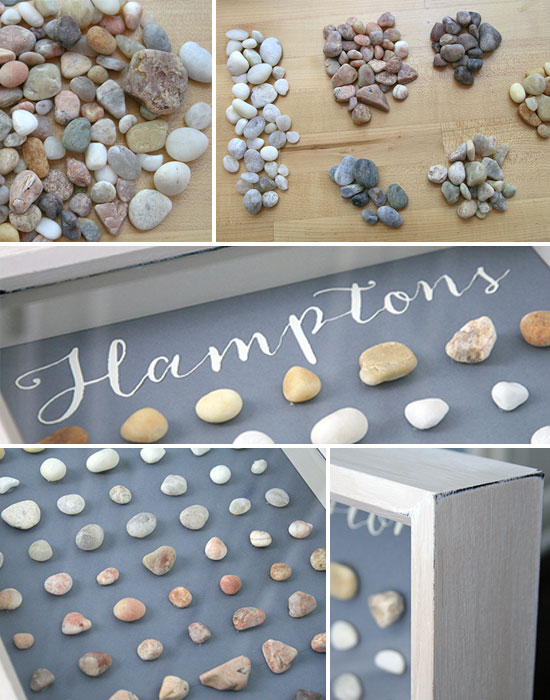 Now it sits on my mantle and every day it reminds my of those lazy days walking the beaches of Ditch Plains and Sag Harbor! What I like about this idea is that you could use a lot of different souvenirs, like seashells, or pressed flowers, or even things like ticket stubs. It’s just a matter of arranging them in very clean, modern lines and creating a color palette that you love.