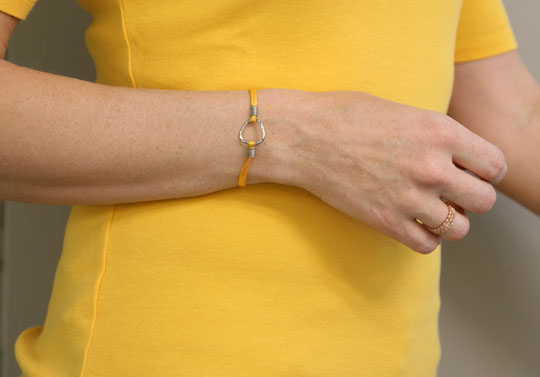
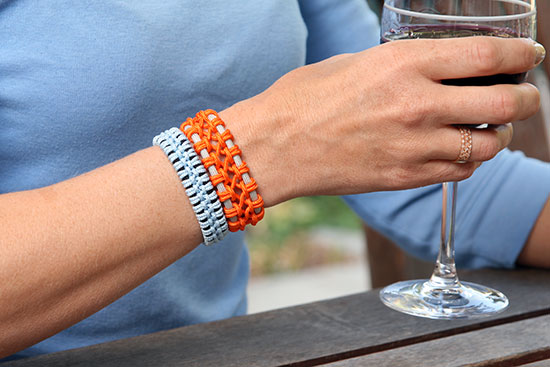
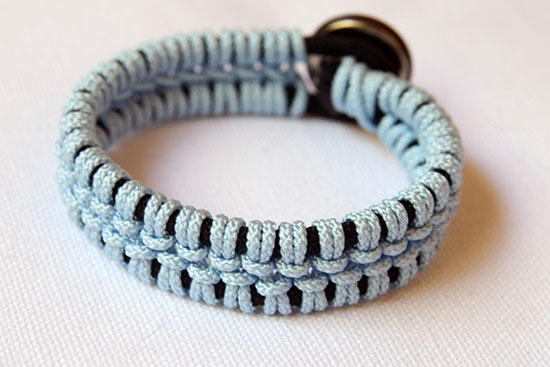
 I’ve got a new tutorial for you for these kind of lacey macrame bracelets. As always, they are infinitely customizable and they go great with red wine.
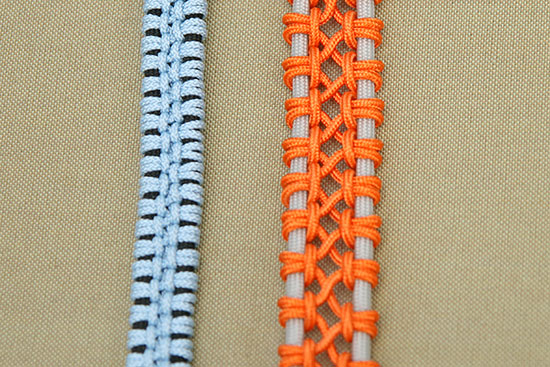
The two bracelets I’ve made here use not only different colors, but slightly different size cords. You can see how the thickness of the cord will dictate the size of the bracelet and how delicate it might look. Depending on how tightly you weave your knots, you can achieve different looks as well. More on that in a bit!
Here’s what you need for this project (and note, the hyperlinks in the supplies list will take you to the suppliers I use):
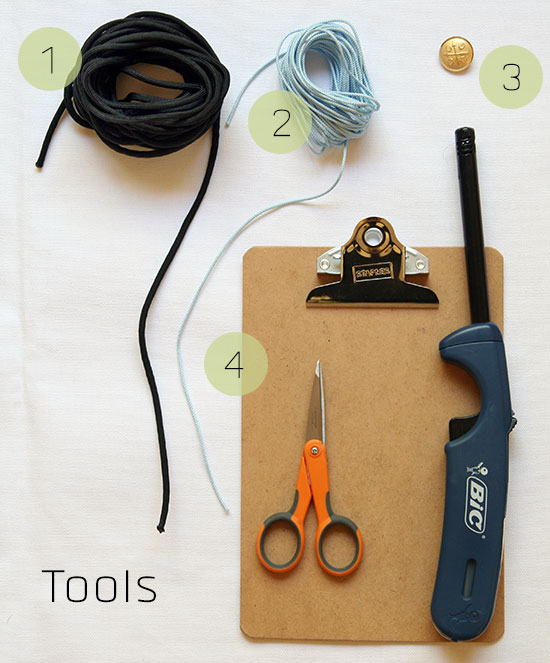
- 20″ length of 550 paracord in your choice of color (This is the thicker cord, and will form the long edges of your bracelet. I’ve used black.)
- 3 1/3 yards of 1.5mm or 2 mm Korean knotting cord (the light blue bracelet is 1.5mm; the orange is 2mm)
- a button of your choice for the clasp (a button with a shank is easiest)
- scissors, a small clipboard, and a lighter for burning the ends of the paracord, and, not pictured: a binder clip
Let’s get started!
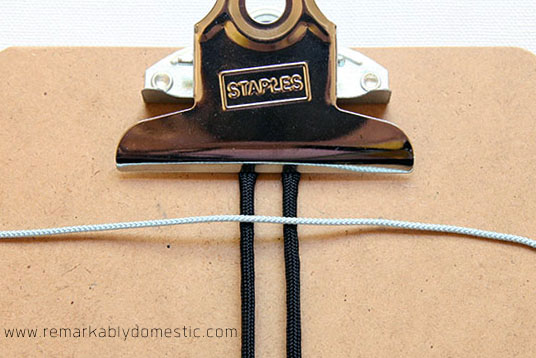
Cut your length of paracord and burn the ends to prevent fraying. If you are unsure how to do this, check out my post here for instructions. Cut your Korean cord as well; you don’t need to burn the ends of this cord.
Start by setting up your cords. Fold the paracord in half and secure the folded end under the clip of the clipboard. Pull the strings taut and secure the cut ends to the bottom of the clipboard with a binder clip, as seen here in another project:
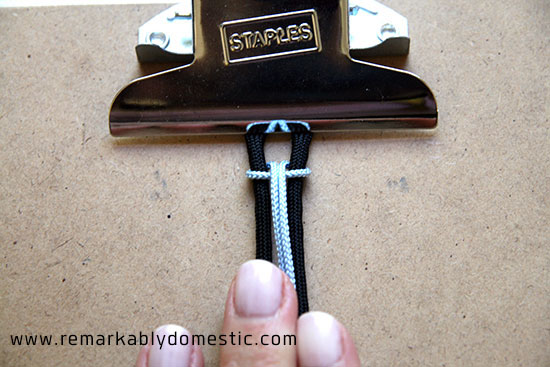
 Now, you’ll find the center of your Korean cord and lay the center point over the paracord, towards the top.
 Now, bring the end of the left Korean cord, which I will refer to as your working cord, under the left paracord, and the right under the right.
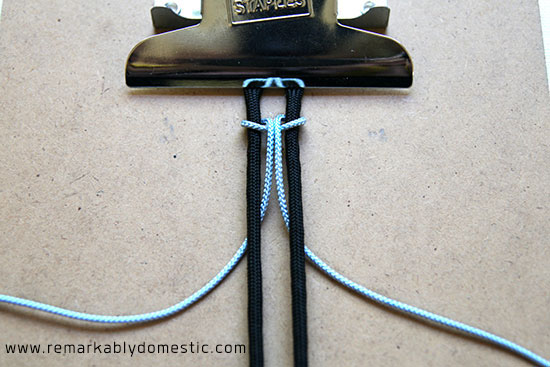
 Now, bring the ends of the working cords straight down.
 Bring each of the working cords underneath the paracords, like so:
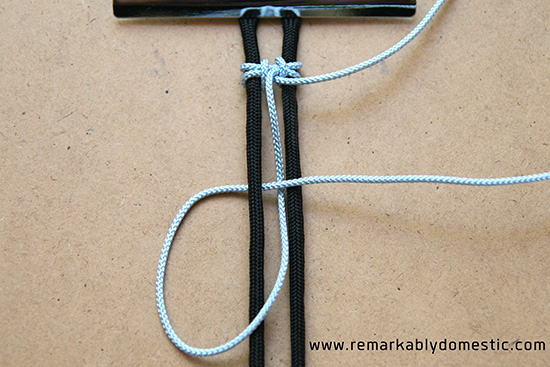
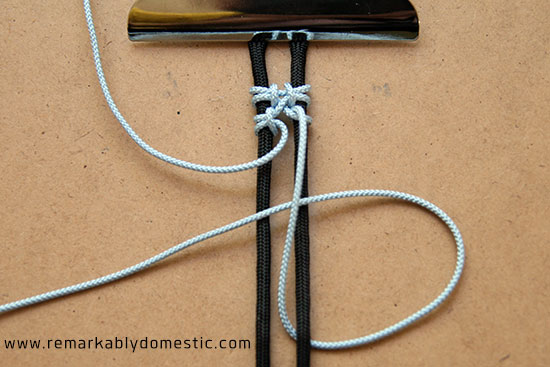
 Now, bring the left working cord over the paracord and under itself, as pictured below. Do the same on the right side, bringing the working cord over the paracord and under itself.
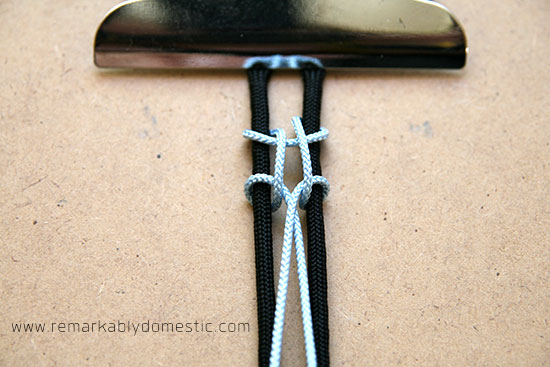 This is your initial knot. Tighten it up and you are ready to start knotting in earnest.
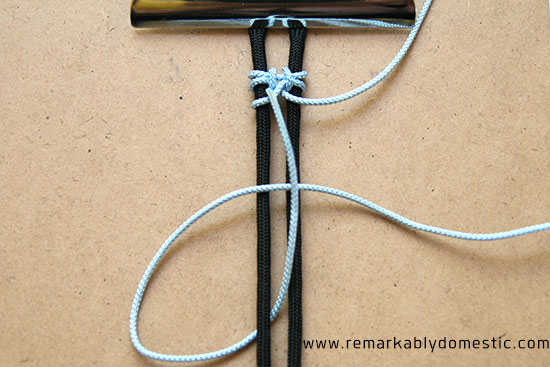
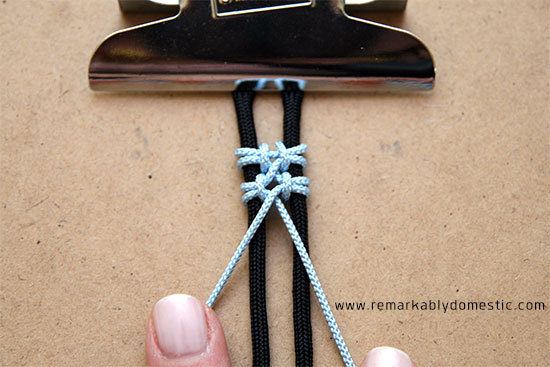
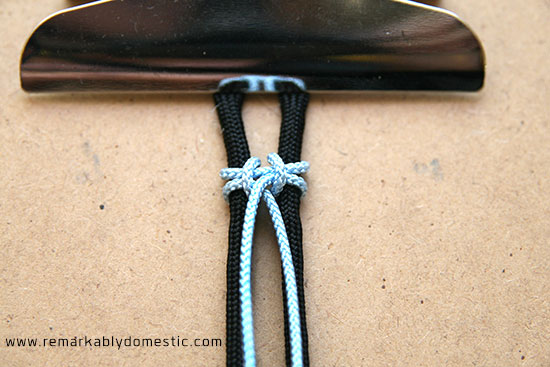 Now, you’ll notice above that the working cords naturally want to switch sides. That’s good, because that’s exactly what you want. In my example, you’ll see that the right cord is laying over the top of the left cord. You can switch this so that the let cord lays over the right, but the important thing is that you are consistent: every time you start a new knot, make sure that the cords are laying the same as the previous knot (so if you start with the right laying over the left, make sure you always have the right laying over the left).
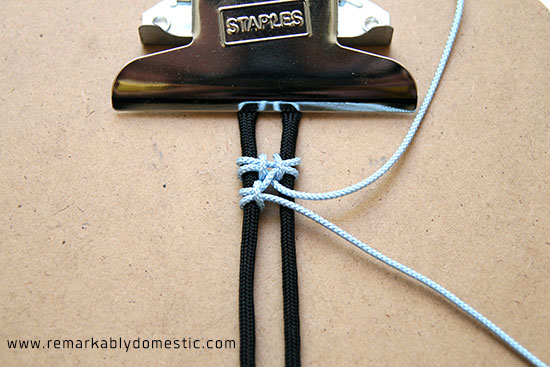
We’ll start on the left side. Take the cord that is coming from the right, which will be your left working cord, and bring it straight down in between the two paracords. Then, cross it over the left paracord, bring it up and under the left paracord, and over itself. I got into a rhythm where I’d tell myself, over… under… over. Tighten up this first half of the knot.
 Now you need to complete this knot. Using the same cord, come straight down through the two paracords, and this time go under the left paracord, back around and over the left paracord, and under itself. For this half, I tell myself under… over… under.
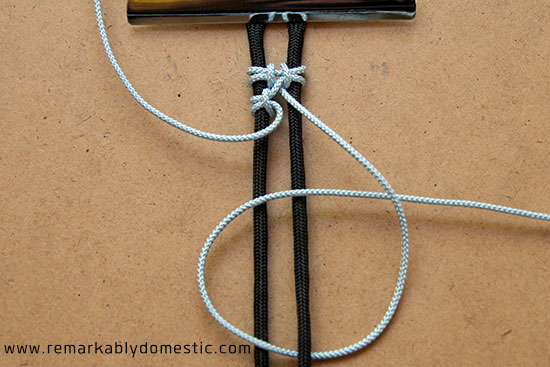
 You can get into a good rhythm here by telling yourself for each full knot, you first go over, under, over, and then under, over, under.
Tighten it up, and you’ve finished your first left-side knot.
Now you need to do the right side. Move the working cord you just used out of the way. Start by bringing the other working cord, coming from the left, which will now be your right working cord, and bring it over the right paracord. Now, bring the working cord under the paracord towards the center, up and over the right paracord, and under itself. Under, over, under.
 Tighten it up. Now, bring the working cord straight down between the two paracords, under the right paracord from the inside to outside, up and over the right paracord, and under itself.
 On this side, the rhythm is slightly different because you aren’t switching the over/under, you are switching from going from the inside to the outside and vice versa. So you are always going under, over, under, you are simply starting from the outside and then coming from the inside.
Tighten up this knot, and you will have completed your first cycle of knots.
 Notice here that to begin my next cycle, I will need to bring the left cord OVER the right cord to be consistent with how the knots begin.
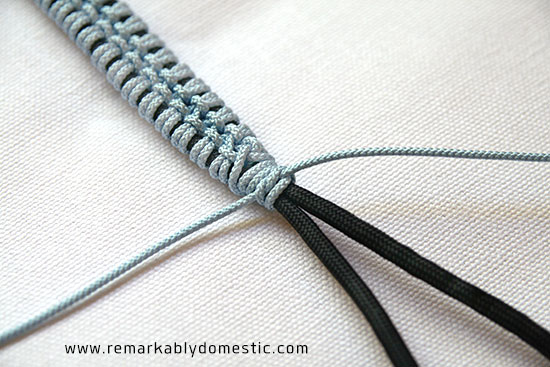
Continue knotting and measuring the bracelet on your wrist until you reach a desirable length. Then it’s time to finish off the bracelet.
Take each working cord and wrap them a few times around the paracords, tying them in the middle.
 Now, thread the working cords through your button and tie them a few times.
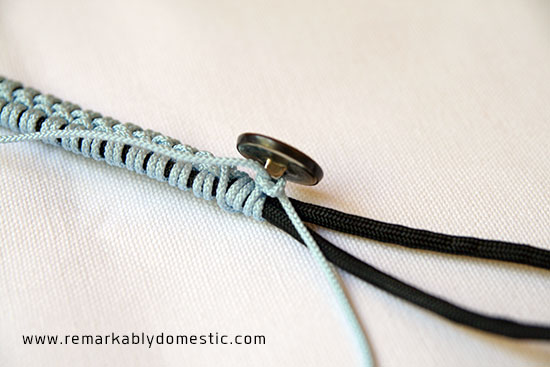 Cut the ends off of the cords. You can add a little glue to the ends if you are worried that they will untie themselves. At this point, you will also want to cut off the excess paracord and burn the ends. Make sure you cut them so that they are hidden beneath your button.
 There you go!
Now, by changing up colors, the size of your cords, and the tightness with which you knot, you will get very different looking bracelets. For the orange bracelet, I used a 2mm Korean cord, and I didn’t pull my knots as tightly, so there’s more openness in the look. To knot less tightly, you will want to start, with your very first knot, by leaving some distance between the two paracords, and continuing only to tighten to this distance throughout your entire knotting.
 Hope you enjoyed! Let me know if you have any questions, and if you make any I’d love to see pics!


 I am not kidding with that title! You can make these cute chain earrings in less than 5 minutes. Check it out!
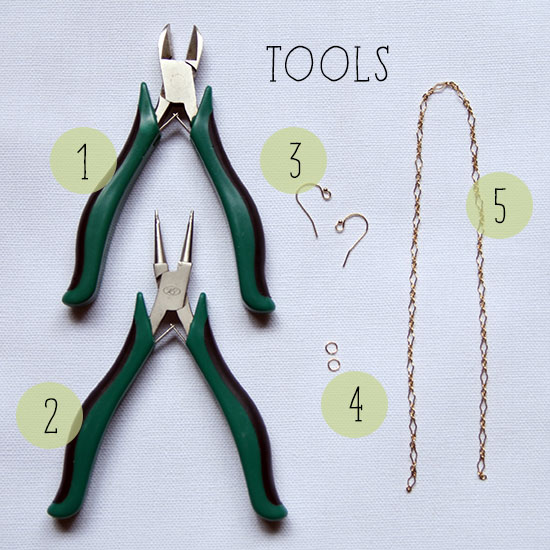 You’ll need:
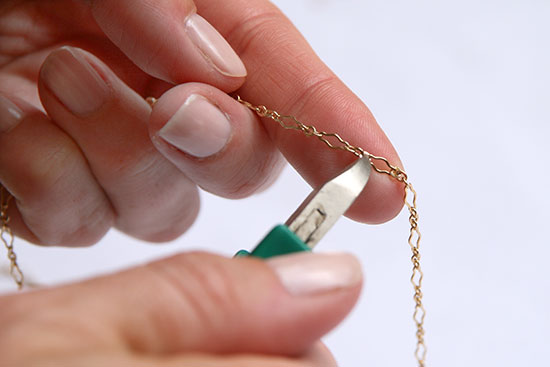 Open a jump ring and slip the chain on, and then slip the earring wire on.
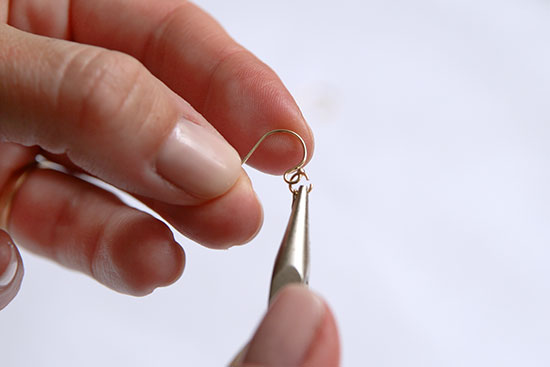 Close your jump ring. Repeat with the other earring. Guess what? YOU’RE DONE.
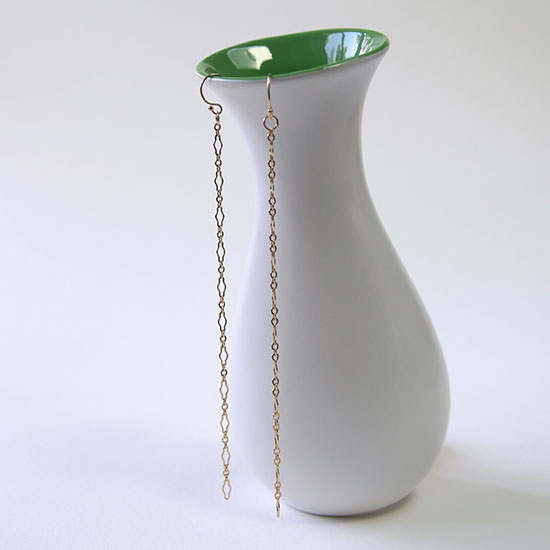
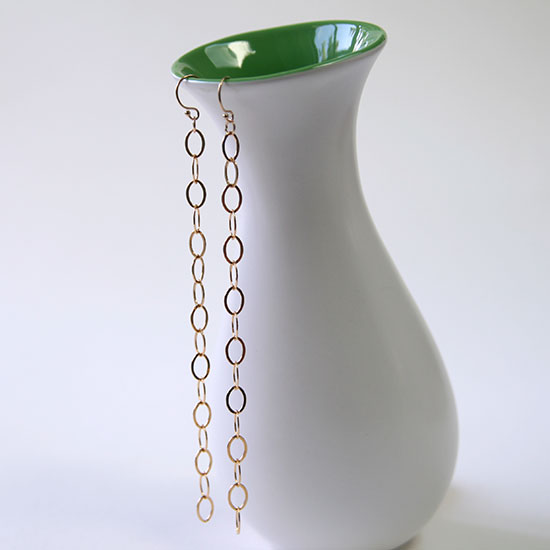 Or try two or more chains together, like this:
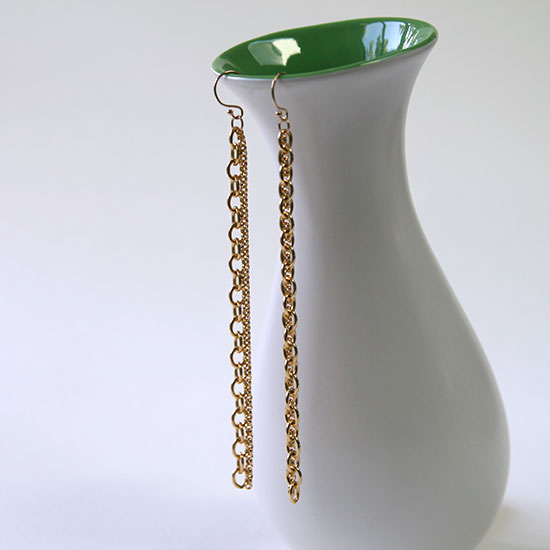
 I’ve already made 4 pairs for myself. In less than 20 minutes!