Good grief, people.  I haven’t been this terrified of a craft since candlemaking threatened to set my curtains on fire.

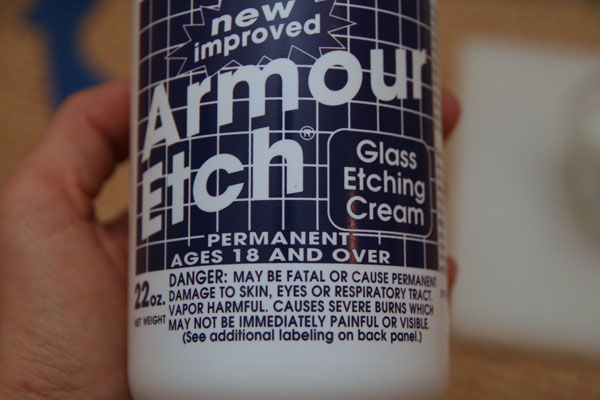
Etching cream is like strychnine or Cobra venom or Pufferfish.  This crap can kill you pretty easily, if you believe the label on the jar.

When the first four words you encounter are “DANGER: MAY BE FATAL,” you get a little jumpy.  I’ve never seen a craft product with an age minimum on it, either.  Not only is the vapor harmful (and vapor seems so insidious, too!), but you may even get a severe burn without even knowing it. Holy bananas, what have I gotten myself into?

But there’s more.

You’d think this stuff was Happy Fun Ball.  You must:

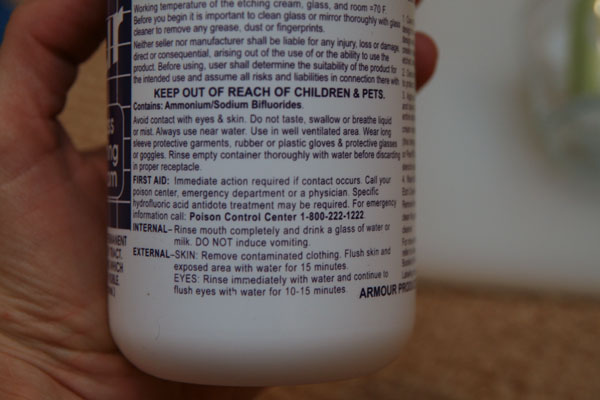
  • avoid contact with eyes
  • avoid contact with skin
  • always use near water
  • use in a well-ventilated area
  • wear long-sleeve protective garments
  • wear protective glasses
  • wear gloves
  • rinse the container before throwing it out
  • take IMMEDIATE action if you come into contact with the stuff, ’cause you might need AN ANTIDOTE

And, just to up the ante a little more, up above they relinquish all their liability:  ”Neither seller nor manufacturer shall be liable for any injury… arising out of the use of the product…. Before using, user shall determine the suitability of the product for the intended use and assume all risks and liabilities.”

Bloody Hell, I am afraid to be in the same zip code as this stuff.  And by the way, this junk is expensive.  Probably to fund their lawsuit-defense account.

But, spare no risk for Martha, so off I go.

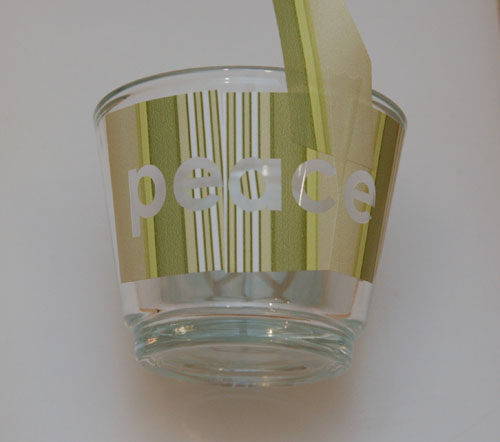
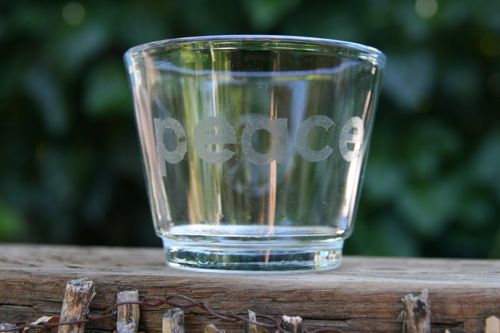
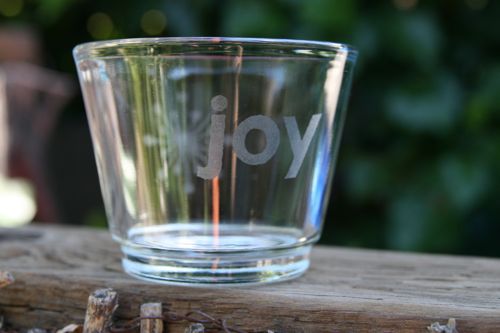
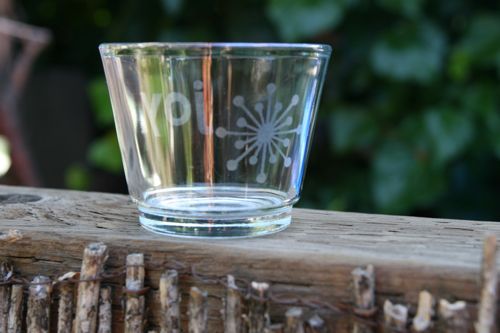
I bought some tea light candle holders at Ikea and some glasses at Crate and Barrel.  I decided to start with the candle holders, and I designed each one to have a word on one side and an image on the opposite side.  So, “peace” with a peace sign, “joy” with a little starburst, and “love” with, obviously, a heart.

I cut these out with my Silhouette, which allowed me to make some more elaborate designs.  I used some Contact paper that I bought at the drugstore to make the stencils.

Once you’ve got your stencil on there, you paint the etching cream on and hope it doesn’t kill you.

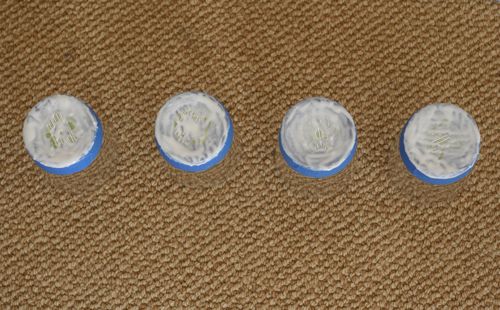
Martha recommends that you simply “follow the manufacturer’s instructions,” which I did.  It tells you to paint it on and then let it sit for five minutes.  The result was not as profound as I expected:

See how there are some areas that didn’t quite get etched?  And it isn’t etched very deeply or darkly.

The “peace” looks a little better, but it still has some areas that got missed.  And I think I painted it on pretty evenly.

For the “joy” one, I decided to leave the cream on for thirty minutes.  I fully anticipated that blatant disregard for the instructions to bite me in the ass, but it seemed relatively harmless.

And this time, the etching did seem to come out more evenly, although it still didn’t seem all that dark.

So, for my next set of etching, I went CRAZY and let the cream sit for TWO HOURS.  It seemed to work better.

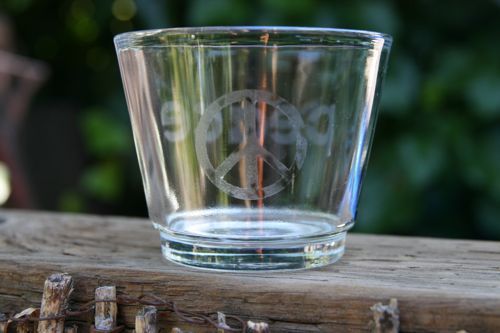
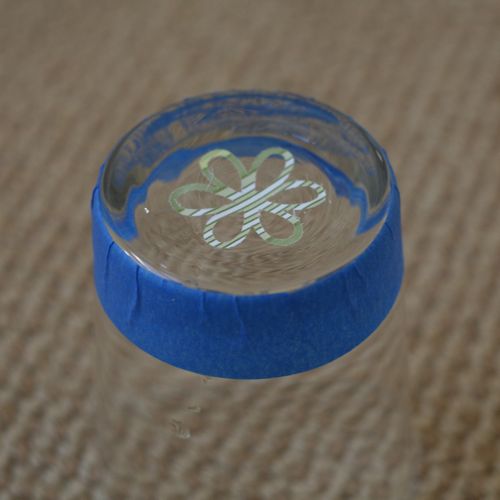
The drinking glasses I etched are in reverse stencil, so that everything but the image is frosted. This is per Martha’s example.  And I did it, like she did, on the bottom of the glasses, so you can see it when you look in the glass.

What Martha did NOT suggest, and I recommend, is that you tape off the bottom of the glasses so that you don’t get any cream on the sides.

Slather on your cream and you are good to go.

This time, I think they turned out pretty well.

TIME INVESTED

It took about an hour to set up the stencil, put it on the glasses, tape the glasses up and apply the etching cream.

Active time: 1 hour

Inactive time (letting the cream sit): 2 hours

Total time: About 3 hours

DIFFICULTY

Moderate

TOTAL COST

This etching business is expensive.

  • etching cream, 22 oz, $36.25
  • Crate and Barrel Biggs Double glass, 13 oz, $3.95 each x 4 = $15.80
  • Contact paper roll, $9.95

Total cost = $62.00

Caveat here: I have enough etching cream to frost all the windows in the White House, I fear.  I bought the 22 oz only because it was the only option at Michaels; it does come in smaller sizes. I also have Contact paper coming out the wazoo.  So, if you invest in these items, you can etch til doomsday, probably.

WAS IT WORTH IT?

Well, that’s tough.  I’m not sure if I’m going to have any long term injuries from the project.  I have a cough right now, that, granted, started before I was etching, but now I’m freaked out that I’ve etched my lungs or my esophagus or something.  So, if you are not willing to take on the liability that Armour Etch lays on you, no.  But the glasses look pretty cool, and you could make some nice wedding gifts with the technique.  I think the glasses I made were worth it.

One more etching project and then we move on.  I hope I can survive it with all my body parts intact.

{ 7 comments }

Last decoupage project!

Which is good, because I was getting a little tired of the Mod Podge.  Although it is fun to do that thing that you probably did in elementary school with Elmers, where you smear some Elmers on your hand and let it dry, and then you can peel it in one sheet like your top layer of skin was coming off.  Did you ever do that?  No?  Just me?  Well, the Mod Podge works for that, too.

Here Martha took two little kiddie chairs and decoupaged a cat and dog on each chair back.  I happened to have two little kiddie chairs that we bought way back when at Ikea.  They’ve been banged up and heavily used for a while, so I decided that a little decoupage wouldn’t hurt them. The backs, however, are too skinny to effectively decoupage, so I did the seats.  No big whoop.

Some similar issues here to what we saw with the whale stool.  You need to completely deconstruct the image in order to cut all the pieces out of the pattern.  For the dog, I ended up with this:

I did the same thing with the cat image, which you will see later.

Also, the enlargement information in the Encyclopedia is way off again.  Instead of enlarging 113%, which was super tiny, I did 150% and then another 165%.

One note, here: the artwork for these images isn’t great.  The dog is ok, but you’ll see that the cat is really kind of wonky.  You could probably find some better artwork with a quick search on the web.

Here’s the cat:

See what I mean?

When all was said and done, the chairs looked like this:

Meh.  They’re fine.

TIME INVESTED

Active time: about 1 1/2 hours

Inactive time: (drying) about 2 days

About 2 days

DIFFICULTY

Easy to Moderate

TOTAL COST

  • Mod Podge satin, 4 oz, $6.80
  • papers, $0.33 each (4 papers here)
  • Leksvik chairs, IKEA, $19.99 each

Total cost = $48.10

WAS IT WORTH IT?
Nah.  The artwork is pretty mediocre, and I’m not sure these little images did all that much to perk up the chairs.
Next up: glass etching!  In which I become terrified of etching cream.  Stay tuned!

{ 1 comment }

Two more decoupage projects to tell y’all about.

This first one is the whale step stool.  Get yourself a wooden stool, paint it to look kind of like an ocean, then decoupage a whale on it, BAM! you’re done.

I had some trouble finding a plain wooden stool (unpainted) that didn’t cost a bajillion dollars.  I finally settled for the next-best thing at Ikea:

So, it’s not so much a step stool as a sitting stool, and my biggest challenge was that it has a hole in the middle.  But you know, I’m adaptable.

First, I painted it a lovely blue.

Nice, huh?  The next step is to paint an ocean outline along the bottom of the seat.  Martha suggests that you put the whale image on the stool and then “extend the waterline that runs through the whale’s body to the edges and down the sides of the stool.”  So, essentially, freehand it with a little guidance from the template.  I figured that was not going to go well for me.  So I devised a little system, whereby I made two copies of the template, and on the second, I cut out only the waterline so I could use it as a guide to draw the perfect ocean.  Like so:

You can see in the first photo that I’m supposed to freehand off to the sides of the whale, but I was certain that my waves wouldn’t be as perfect as the ones on the whale.  So the second two photos show how I used the waterline on the whale as a template to draw my water.  And it came out like this:

Much better than freehand.  After I painted it a darker blue, I had this:

All that work, and I haven’t even started the decoupage yet.

Here’s where I encountered another problem.  When you turn to the back of the Encyclopedia for the templates, it tells you exactly how much you are supposed to enlarge the image when you photocopy it.  In this case, it called for 113% enlargement.  But when I did exactly that, the image was still really small.  It would’ve been much smaller on even the little step stool than the example in Martha’s book.  Witness:

It’s a bit hard to tell here, but the whale on Martha’s stool is about twice as big as the 113% enlargement.  So I enlarged mine a lot more.  First, I did it to 135%, and then I took that one and enlarged it to 165%.  I don’t know what that adds up to, but it’s a lot more than 113%.  Right?

Once you’ve got your template, you have to cut it out.  And again, there’s a bit of a challenge here with the Encyclopedia’s instructions.  At the beginning of the decoupage chapter, there are general instructions for decoupaging furniture, which explains, “using a craft knife, carefully cut out the motifs.”  This project just tells you to “cut out” the template in two colors.  I highly recommend NOT using a craft knife for this procedure—it’s way too hard to control. I used a pair of scissors, and it worked much better.  In addition, what the instructions don’t tell you is that you will have to cut out all the different parts of your template, so you really have to deconstruct the image.  You need to cut them all out so you can trace them all onto paper.  If you have carbon paper or transfer paper, you could skip this step and simply trace over them, but I don’t have any of that and I’m not sure it’s a common household item.

Here’s the template enlarged enough and deconstructed:

I traced everything on the backside of my papers, which requires that you trace them backwards (that is, flip them over to trace on the back so they are facing the right way when you have them cut out.  Here are the patterns I chose:

I also made my spout bigger since I had the hole in the stool to contend with.  You’ll see how that kind of solved my problem.

The decoupaging was uneventful and very easy.  I put the layers of Mod Podge and then covered it all with a coat of sealant.  And…

I think it’s super cute.

TIME INVESTED

Active time: about 3 hours

Inactive time: (drying) about 3 days

About 3 days

DIFFICULTY

Easy to Moderate

TOTAL COST

  • Mod Podge satin, 4 oz, $6.80
  • papers, $0.33 each (3 papers here)
  • stool, IKEA, $14.99
  • paint, OSH, $9.99 each x 2

Total cost = $42.76

WAS IT WORTH IT?
If you can find a cheap stool, it’s a pretty cute project.  The artwork is nice, and it makes a sweet image.  You can tailor the colors to a child’s room, or you could just leave it wooden and save some money on the paint.  (Paint is expensive!  It could make a nice baby gift.
Last decoupage project coming soon!

{ 2 comments }

It’s Project 50, yo!  That means I’m just about one quarter of the way there.  Wha?

For this decoupage project, I decided to go ahead and deface decorate a piece of my own furniture.  I chose my file cabinet, since it’s kind of low stakes and it’s a nice enough piece to show the effect.  Here’s what it looked like pre-decoupage:

I actually have it sitting in a shelf so that it doesn’t take up floor space.

Martha has some cute little bird decals, for which she provides a template.  Here’s what hers look like:

Cute.  But I figured since I was going to be putting this on something in my “office,” I wanted to use the birds that are part of my logo for my craft business.  These guys:

So I used my Silhouette machine, traced these little dudes on their software, and printed them out.  It was a little harrowing, the tracing and all, but I managed to figure it out.  I cut out a few different colors for different parts of the birds, and when I was done decoupaging, it looked like this:

So, kinda cute.  Here’s a close up of the birds:

What do you think?

TIME INVESTED

About an hour

DIFFICULTY

Easy

TOTAL COST

  • Mod Podge satin, 4 oz, $6.80
  • papers, $0.33 each (3 papers here)

Total cost = $7.79

WAS IT WORTH IT?
Meh.  Sure.  I know that’s high enthusiasm, but it was just fine.  If you are looking to fancify your kids’ dresser or some other piece of furniture, and you don’t want to take the time to do the whole prints thing like in project 48, then it’s a good alternative.  Inexpensive, and it looks cute.
More decoupage to come!


{ 3 comments }