For this Martha fabric flower project, you… zzzzzzzz… *snort* *cough*… what?  Oh, I’m so sorry.  I fell asleep there for a second.

Fabric flowers are so boring.

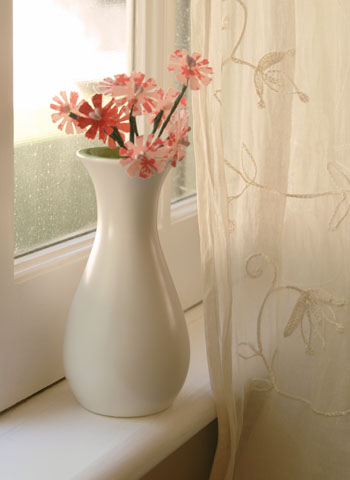
Punched fabric flowers gathered into a bouquet.  An everlasting bouquet, I might add.  It will never go away, even though you might want it to.

That’s it!  Lovely, huh?  OK, granted, I did kind of phone it in on this one because I was so bored, making flower after flower with the pips and the wires and the floral tape.  I can’t go on or I’ll fall asleep again.  I suppose it would’ve looked nicer with three times as many blooms, but I just could not continue.  It was draining my will to craft.

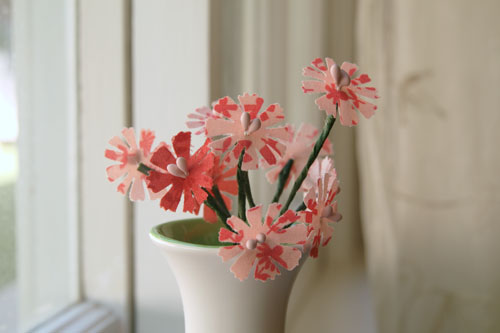
Here’s an up close shot for your viewing pleasure:

Yep, there are the pips!

Here’s the thing.  Of course the Martha examples in her book look more professional than mine, but even those resemble something you’d find in Satis House, left over from Miss Havisham’s aborted wedding.  It’s hard to do a fabric flower floral bouquet right, I think.

TIME INVESTED

About 3 minutes for each flower, with the punching, the hole in the center, adding the pip and, the worst of all, floral taping the wire.

About 45 minutes for a small bouquet of 10 flowers

DIFFICULTY

Easy to Moderate

The taping with the floral tape is a little fussy.

TOTAL COST

  • floral tape, $1.59
  • floral wire, $5.31
  • fabric charm pack, $9.99
  • pip collection, $2.29
  • fabric stiffener, $5.00
  • Martha Stewart flower punch, $9.99

Total cost = $34.17

WAS IT WORTH IT?

Good grief, no.

People, I barely have the heart to tell you that there are several more fabric flower projects.  I will try to get through them with as much humor and high spirits as possible.

{ 0 comments }

With the disappointment of the blooming branches project, I had slightly higher hopes for this one. Spoiler alert!  It is a much better project.

Instead of gluing punched flowers to sticks, here we make some bobby pins with them.  The ones Martha has in her book are kind of meh, but I thought they could turn out pretty cute with the right fabric and punch.

In case you were jonesing for some fruitless shopping, I can hook you up.  This particular project calls for floral pips.  Floral pips, you say?  What is a pip, you say?  Oh, you are such a pip!

A pip is a wire with a bulgey, colored end that is used as a stamen in making fake flowers.  Every time I go to Michaels, I marvel at their fake flower assortment.  Now, granted, I’m not really a artificial flower kind of girl, but is there really that big of a market for all those different kinds of fake flowers?  I always considered it a waste of a few aisles of space.

So naturally, I figured there would be rows and rows of pips there, too.  Guess what?  NO PIPS.  They sell the flowers, but not the parts to make the flowers.  Oh good grief.  Where on earth do you find the parts to make artificial flowers?  Even if I knew, I wasn’t about to go to another store, so I bought a bunch of fake flowers meant for some kind of wedding project, and they had lots of pips in them that I decided I could dismantle.  Turned out to not be that easy, but I digress.

Punch the flowers out, then make a hole in the center for your pip(s), and then “hand-stitch blooms to bobby pins or combs.”  Alright, hold the phone.

Backing up to our definition of pips, we see that they are wires with a tip.  And if I’ve just stuck said wire through the middle of the flower, why can’t I just wire the flower to the bobby pin?  Why the hand-stitching?  And how exactly am I supposed to stitch the flower without leaving unsightly stitches on the front?

Again with the extra work, Martha.  Sheesh!

I just wired mine on.  Here’s a little collage of the progress:

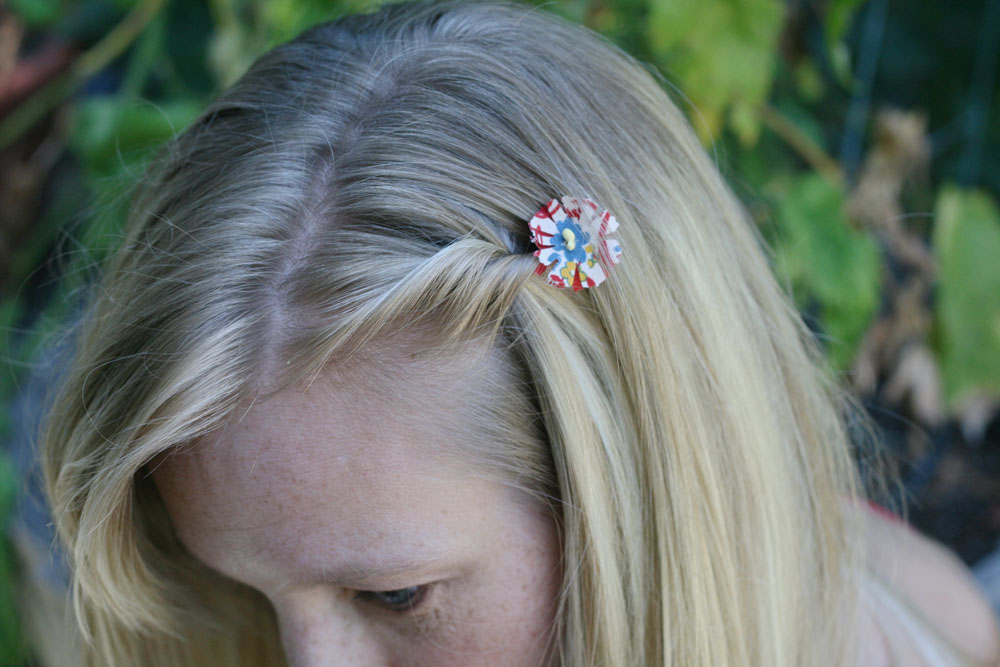
Finished product:

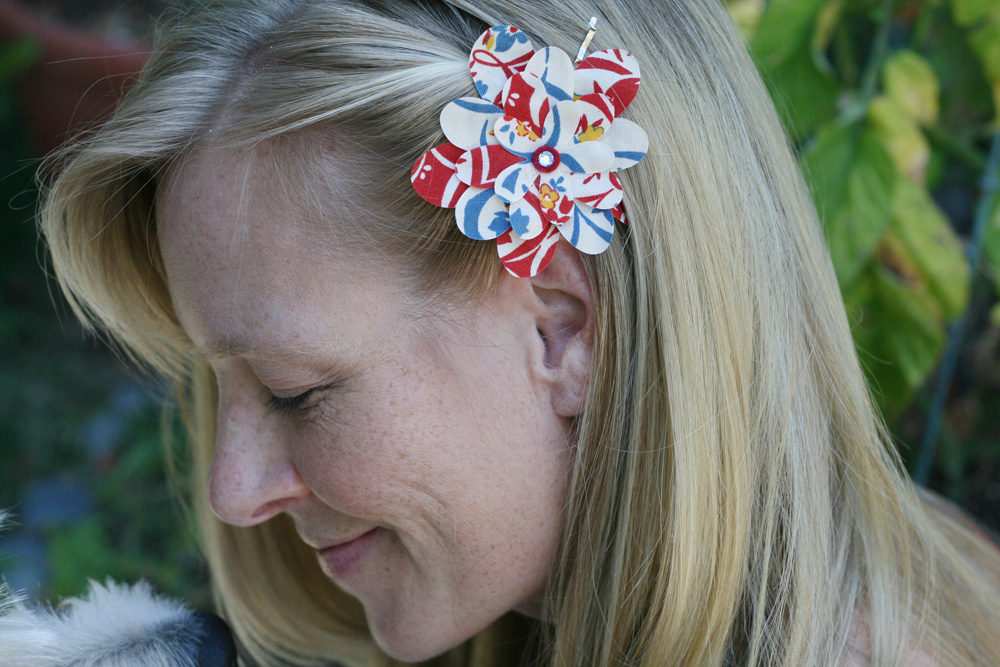
So, like, still kinda meh.  I used one of Martha’s own punches.  I felt, though, that I wanted it to be bigger, bolder, something more interesting.  So I used some of the die cuts I use for my hair clip business, and I went to town with my own take on this project.

Much better, in my opinion.  I think the pips are a bust.  They are very old fashioned looking, hard to find, and just look cheap.  I like my version with a nice little Swarovski crystal in the center much better.  And those you can find easily at Michaels.

Did you notice Caesar got in this photo?

I liked this clip so much that I’m selling versions of it in my shop!  For the fall, I’ve added suede and leather options and some other fun patterned fabric.

TIME INVESTED

About 30 minutes (plus a minimum 1 hour dry time for the fabric stiffener)

DIFFICULTY

Easy

TOTAL COST

  • fabric charm pack, $9.99
  • pip collection, $2.29
  • fabric stiffener, $5.00
  • Martha Stewart flower punch, $9.99
  • bobby pins, $1.75

Total = $ 29.02

WAS IT WORTH IT?

Definitely, if you do it your own way.  You could easily hand-cut some funky flower shapes in a bigger size.  I think the punches don’t work that well because most of them are relatively small.  You need something a little more substantial, I think, when you are using thin fabric as a medium.  But they would make great gifts or you could make a ton of variations for all your outfits.

See ya at number 57!

{ 4 comments }

We now move from etching to fabric flowers, which are much, much less dangerous.

But definitely more frustrating.

You’d think this would be an easy craft.  Cut flowers out of fabric.  Seems so easy, doesn’t it?  Ah, Martha, you deceive me with your simple-looking projects.

All you have to do here is find some fabric, and preferably thin fabric.  Martha calls this “thin shirting” or “Indian cotton.”  Now, we all know what happened last time I went looking for a very specific fabric, so I figured I’d take it easy and buy some pretty fabric that was reasonably thin.  I found some “charm packs,” which are stacks of 5″ x 5″ pieces of coordinating fabric (usually used in quilt making), and they were super cute patterns, so I bought two.  And, I mean, it wasn’t netting or anything, but I figured it was thin.

Next, you take your fabric and coat it with fabric stiffener.  No big whoop.  I did that and let it dry.

Then, you take your stiffened fabric and you punch it with a flower-shaped punch.

Oh, ho, ho, not so fast, sister.

I had quite a few of Martha’s OWN punches to use in various flower shapes.  And you know what? They wouldn’t punch through that freaking fabric for anything.  You should’ve seen me, squeezing the living daylights out of those punches, in vain, people, in vain.  Then, one would punch kind of halfway through a piece of fabric, and then it would get stuck, since the punched part wouldn’t come out, being, you see, still attached to the sheet of fabric, but it was also all tangled up in the punch itself, so then I had punches I could not remove from the fabric.

I tell ya, I was about ready to burn the Martha Stewart Encyclopedia of Crafts.

I do not know if this is some kind of problem with the thickness of my fabric, but it was thin!  It really was!  Finally, finally, I used a few older punches I had and eked out a few flowers.  Then, I sharpened one of the Martha ones by punching aluminum foil a few times, and I squeezed out a few more.  And then, do you know what I did?  I piled the four year old into the car and dragged  him to Michaels to buy another Martha punch.

Why?  Well, there are about forty-seven different flower punch projects in this book, and while I could’ve used my die cut machine to cut the fabric, I just figured I shouldn’t have to.  And many people possibly attempting this craft likely won’t have a die cutting machine, so that isn’t really fair.  I should be able to do this project with the materials the Encyclopedia lists.

So I decided to give it a fair go and buy a brand new Martha punch and see if it made a difference. And, well, it kinda did, but not that great of a difference.  It was still a bloody bitch to punch out those flowers.

Another side issue here is that the fabric gets awfully wrinkly when it dries.  I don’t imagine you can really iron it with that stiffener in it, so, not sure what to do about it.  It didn’t really matter for this project that required only small punched flowers.

So what is this amazing, fantastic project that necessitates such feats of punching prowess?

I give you: Blooming Branches.
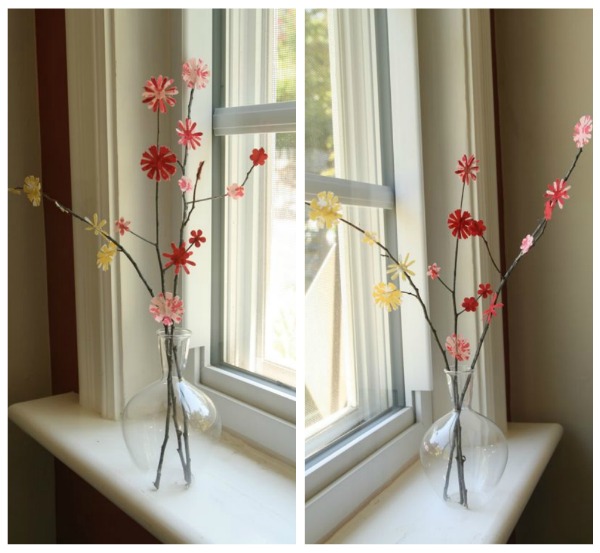
Oh yes, people, THIS IS IT.

Yup.  Spend your energy and frustrations punching out fabric flowers, then hot glue them to a few branches you found in the back yard.  I kid you not.

These look redonk, don’t you think?  I mean, in a bad way, not in the CuteOverload kind of way. Yes, it might have looked more natural had I used all the same shape flower, I agree.  Are you judging me?  Don’t judge me.

Oh yeah, and maybe the same color.

But even, EVEN if I made them look all snazzy like Martha’s, which by the way requires three shades of pink fabric and three different sized punches of the same shaped flower, why would I do this?

TIME INVESTED

About 3 hours (1 hour drying time)

DIFFICULTY

Moderate, unless you have really bad punches, and then it’s epic.

TOTAL COST

  • fabric charm pack, $9.99
  • fabric stiffener, $5.00
  • Martha Stewart flower punch, $9.99 (that’s just for ONE!)

Total cost = $24.98

WAS IT WORTH IT?

As far as I can remember, this is the single worst project in the book.  So far.  Is there really a need for a custom branch of fabric flowers?  If you want something like this in your home, you really can’t find anything at Crate and Barrel or Pottery Barn or Pier One or Ikea?  I can’t imagine any reason why you would want to make this project.  Period.

That’s partially because I’m still annoyed with the punch fiasco, but really, Martha.  Really!?!

{ 10 comments }

RD Husband is probably going to have a stroke if I have to etch any more.  Thank goodness this is the last project.  He’s even more terrified of the etching cream than I am.

Here Martha presents you with a way to make your own privacy glass bathroom window, by etching most of your window pane and leaving a small design clear.  Y’all know I wasn’t going to etch my actual bathroom window, but I came up with a suitable solution: I etched the glass from a picture frame that I didn’t need anymore.

This is one of those cases where I think Martha is making it much more complicated than it needs to be.  She wants you to make a whole template of the design you want (hers is just dots in a wavy line), using a circle stencil on a piece of paper cut to the size of your window.  Then, you tape that to the outside of the window and get yourself some clear Contact paper, attach that to the front, and then take your stencil and re-copy all the circles onto the Contact paper by lining up the stencil with the circles on your template, which you can see through the window.

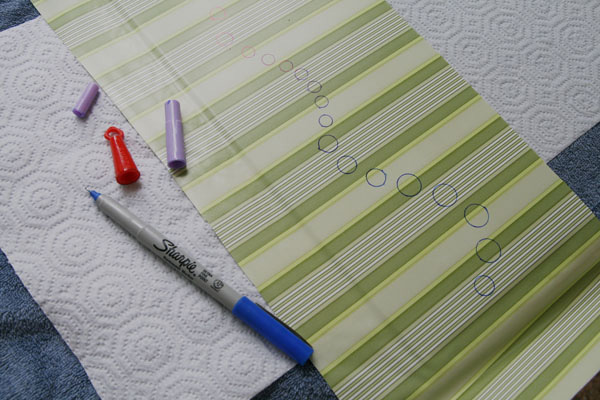
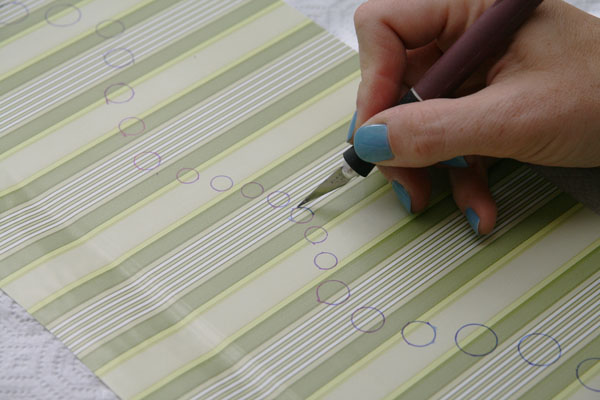
This all sounded very complicated and unnecessary to me.  And also, I didn’t have clear Contact paper.  So I just put my patterned Contact paper on the glass and drew my template right on.  Why not?  If I mess up, I can always re-draw.  I don’t see the need for the double work.

I also didn’t have a circle stencil, so I just found several pen caps in different sizes and used them as stencils.

I drew my meandering circle pattern on.  Next up, you use a craft knife to cut out all these circles. I was super skeptical of this, too.  First, won’t the knife scratch the glass?  And second, my circles are going to be incredibly wonky!  I can’t really cut very precisely with a craft knife.  Can you?  And in a small circle?  I was scoffing the whole way through.

So, I have to say, it wasn’t nearly as bad as I thought it would be.  The knife, in fact, did NOT scratch the glass, so that was good.  My circles were totally wonky, though.  I do not know how you would do this without them coming out uneven and cattywampus.  Ultimately, it didn’t matter all that much after the etching, but when you looked closely it was kind of weird-looking.  But I’m getting ahead of myself.

Before I had read the instructions on this project, I just figured you got some circle stickers at the office supply store, stuck them on, and then BAM!  Done.  Wouldn’t that be much easier, Martha???

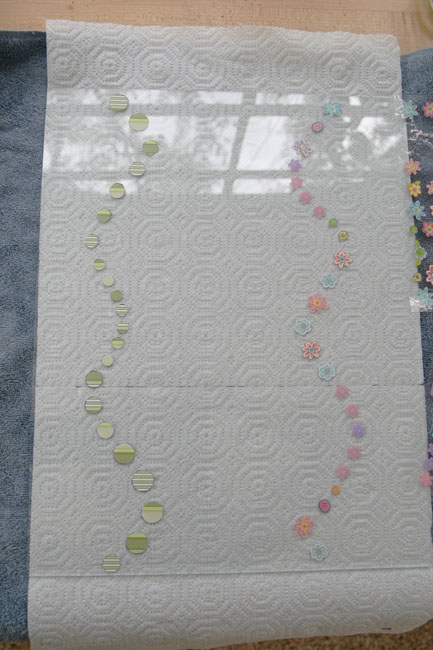
I went out to get myself some circle stickers, and wouldn’t you know it, FRUITLESS SHOPPING blah blah, I couldn’t find any I liked.  None that were of varying sizes.  So I bought some flower ones that I did like that had different sizes, and I figured they’d be cute, too.

I stuck them on the glass in a similarly meandering pattern.  So here are the two versions side by side:

And then I put on my gloves and my mask and got to etching.

I smeared a good layer on and let it sit for about two hours.  And wouldn’t you know, some of the areas didn’t etch!  SO bizarre.  I have no idea why.  I made sure there was a good, thick coat across the whole thing.

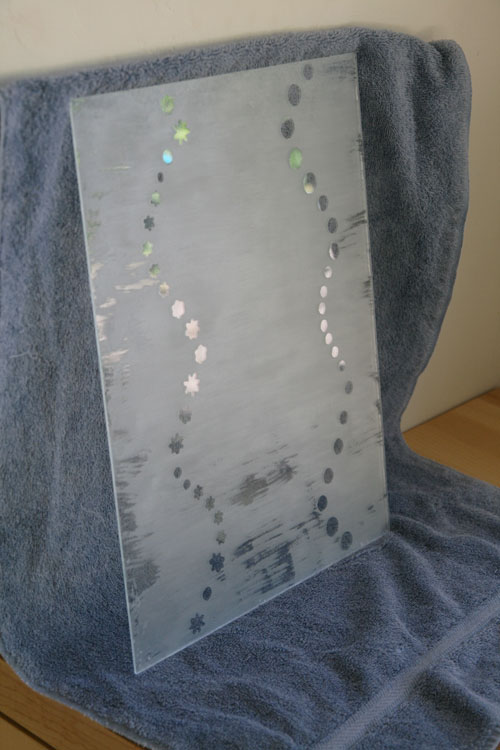
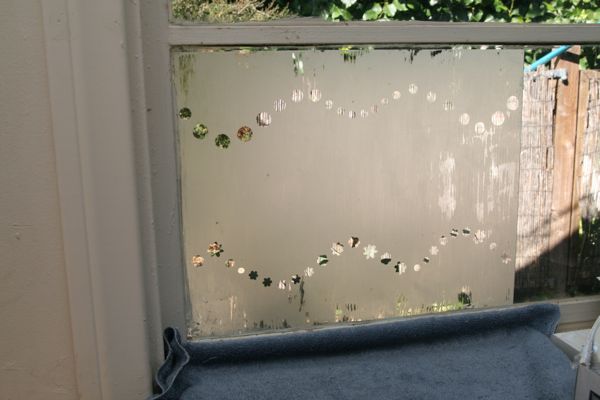
See those streaky spots?  That’s where the etching didn’t really work.  I’m baffled.

I do have to say, though, that the flowers really worked just as well as the hand-cut circles.  The one caveat is that it works better if you have a plastic-y kind of sticker, instead of a paper one.  Some of the paper ones kind of dissolved a bit, which wasn’t a surprise, I suppose.  It sill worked, but the stencils with the plastic-y stickers were a little sharper.

I put the glass up to a window to see if it really would provide privacy.  Here’s what it looked like:

So, yeah, I suppose, privacy.

TIME INVESTED

Cutting the circles took about 30 minutes for one row, while placing the stickers took about 5 minutes.  I left the cream on for a good two hours.

Active time: 1 hour

Waiting time: 2 hours

About 3 hours

DIFFICULTY

Moderate

TOTAL COST

  • Contact paper, $9.95
  • stickers, $0.99 each (2 packs) = $1.98
  • etching cream, $36.99

Total cost: $48.92

WAS IT WORTH IT?

No.  Buy yourself a nice curtain instead.

Especially, y’all, since you are supposed to be working with this crazy, toxic, highly dangerous material on your window.  You can’t just wash the stuff off your window.  So you know what Martha wants you to do?  Use a squeegee.  Seriously?  That does not seem adequate.

Thankfully, the etching is over, and we’re moving on to the much safer “fabric flowers.”  Woot.

{ 5 comments }