Embroidery Hoop Spider Web

It’s almost Halloween! I’ve made virtually no progress on the costumes, except to purchase all the supplies. Shopping is easy.

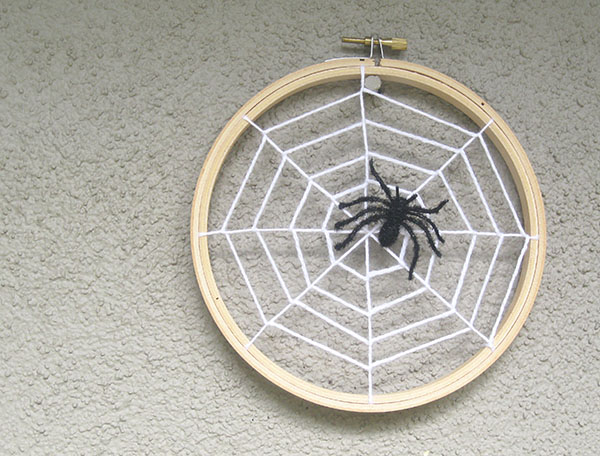
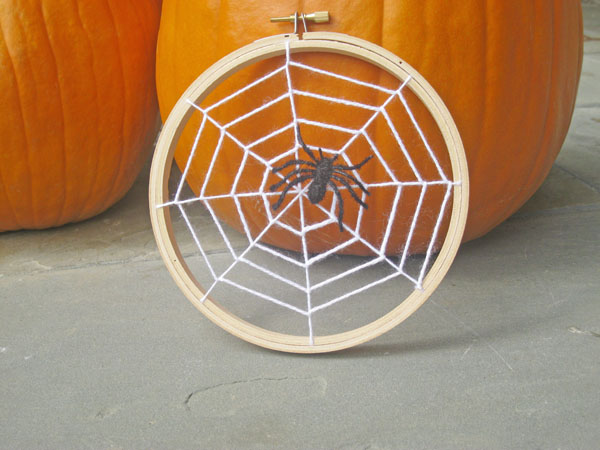
But I did make this cute Halloween decoration I saw in Parade magazine. I know, Parade magazine. I’m linking here to give the designer props, but there really wasn’t much of a tutorial to speak of, so I put my own together. In making it, I discovered a few tricks to make it turn out really well.

You’ll need:

  • an embroidery hoop in the size of your choosing
  • thin white yarn (I suggest baby yarn)
  • double sided tape
  • a bit of glue (I used a glue gun)

To start, cut 7 – 8 yards of the yarn and wrap it up into a ball. This much yarn will allow you to work with a large size hoop, so if you are using a smaller one, you can reduce your yarn a bit.

Open the embroidery hoop and set the outer ring aside.

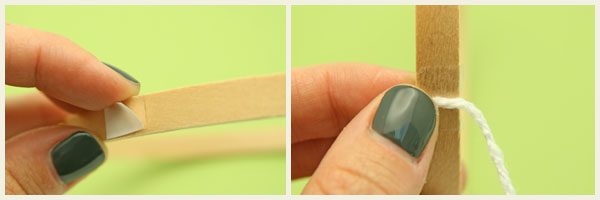
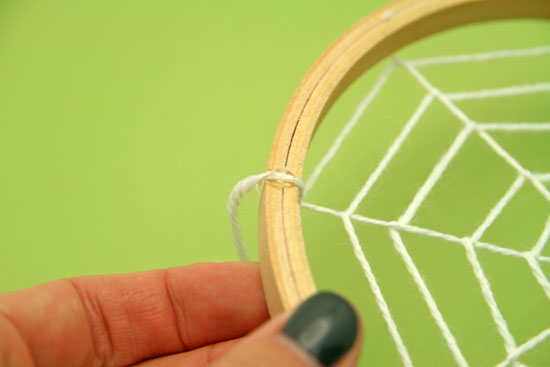
Take a small piece of double-sided tape and place it on the outside of the inner ring; using the full skein of yarn(that is, NOT the yarn you pre-cut), attach the yarn to the hoop using this tape.

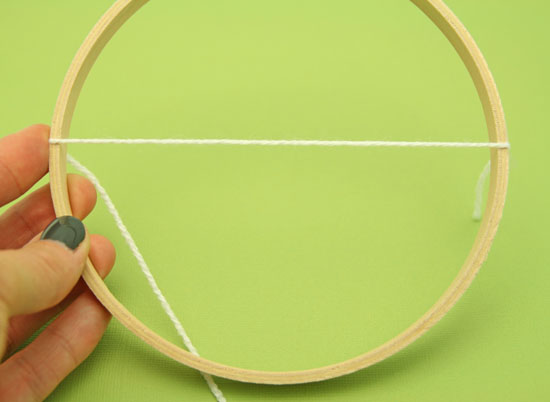
Place another piece of tape directly opposite the first on the opposite side of the ring, then stretch the yarn across and attach it to the hoop. Stretch it relatively tightly.

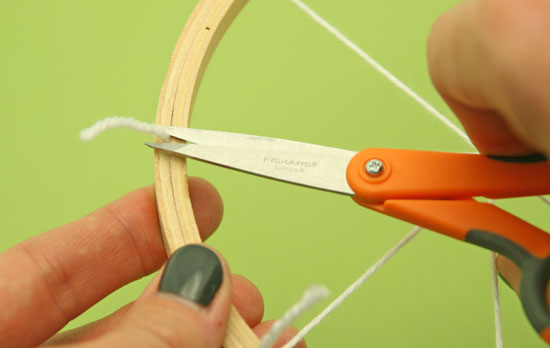
Snip off the yarn, leaving a tail a few inches long.

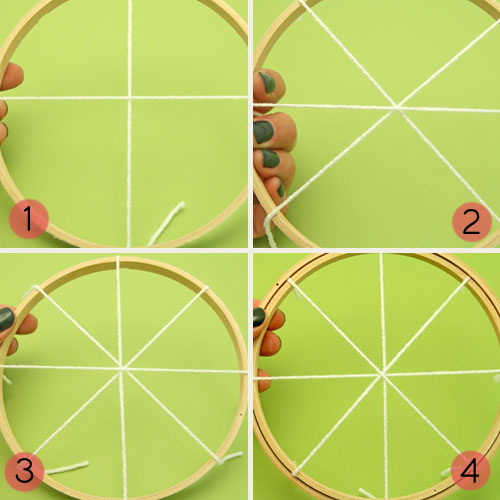
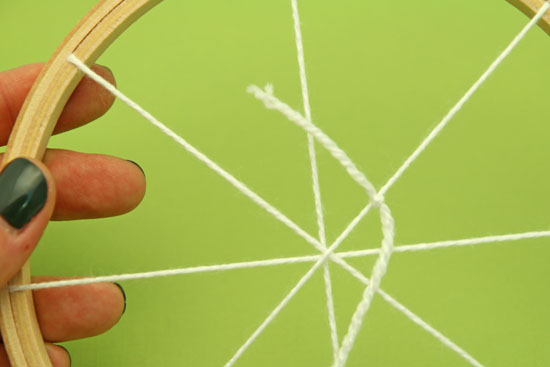
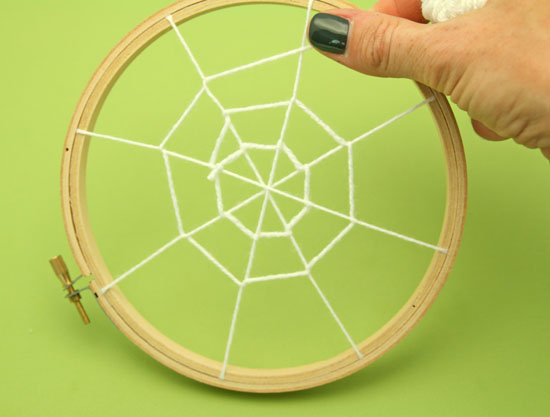
Continue to attach these single strands of yarn across the hoop as you see in the photo below (#s 1 – 3). Then, replace the outer ring (#4).

Once you’ve got the ring on, pull the strings tight; you want them to be relatively taut for the weaving of the web. This step is a bit of a dance; you’ll need to tighten the ring enough so you can still pull the yarn, but not so much that the yarn won’t move.

Once it’s secure, snip off all the loose ends.

Now you can begin your weaving. Take the pre-cut yarn and tie it to one of the strings near the center of the web.

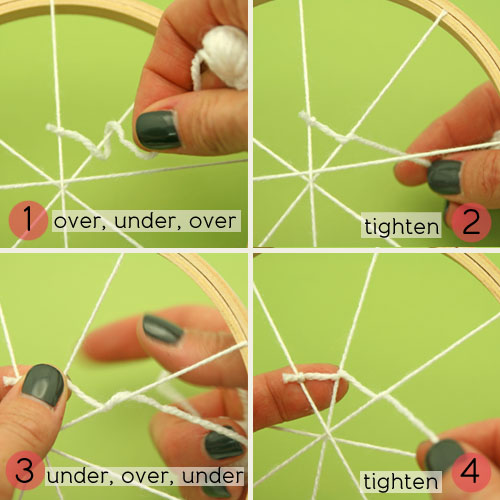
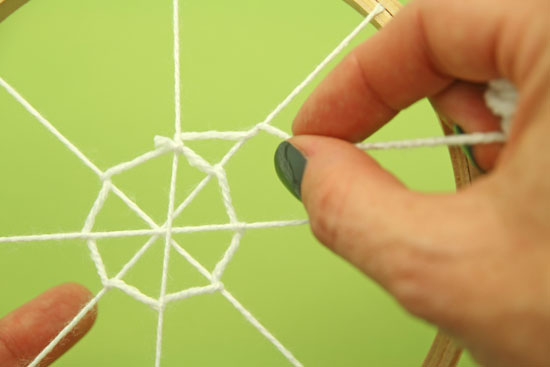
To weave tightly and evenly, start by bringing the long end of the yarn over the adjacent string, then under, and then back over again. Tighten it up by holding the initial knot while pulling the yarn tightly. (You want to hold the first knot so that you aren’t pulling the first string completely out of alignment.) See #s 1 and 2, below.

For the next weave, bring the yarn under the next string, then over, and then under again. Tighten. (See #s 3 and 4, above.)

By alternating the over/under/over and under/over/under pattern, your weaving is more consistent and it’s easier to tighten up.

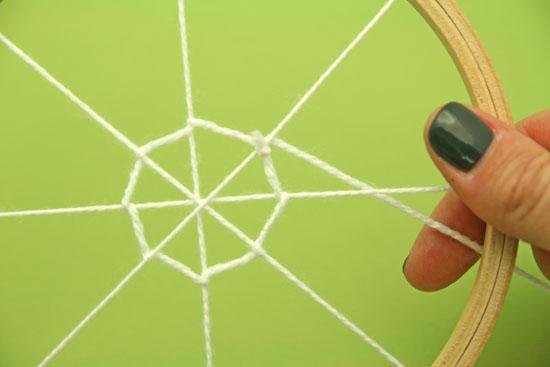
Continue weaving like this until you are back where you started.

Now, continue weaving by moving the next set of twists up a bit closer to the embroidery hoop.

Here you can personalized your web by making your concentric circles closer together or farther apart. Your choice!

Keep going around and around…

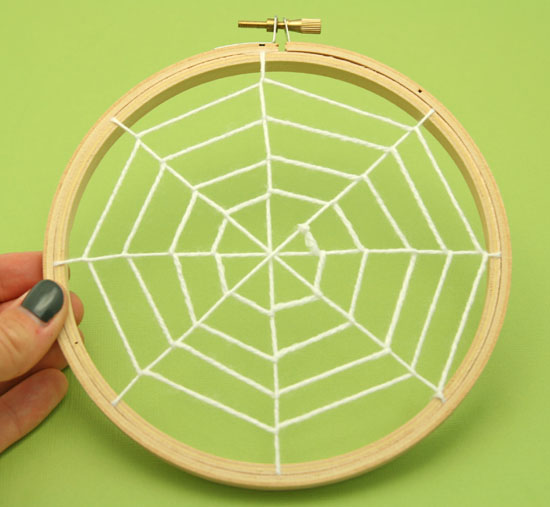
… until you’ve reached the embroidery hoop.

Bring the yarn around the outside of the hoop and secure it to the back with a bit of hot glue.

Once it’s dry, snip the end of the yarn off.

Then you can add a fun little spider or just leave it as it.

Fun, huh? And it takes no time at all.


{ 0 comments }

DIY Ombre Knotted Bracelet

knottedbracelet5

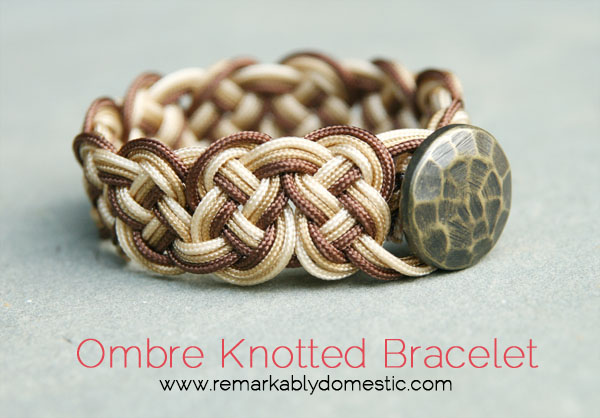
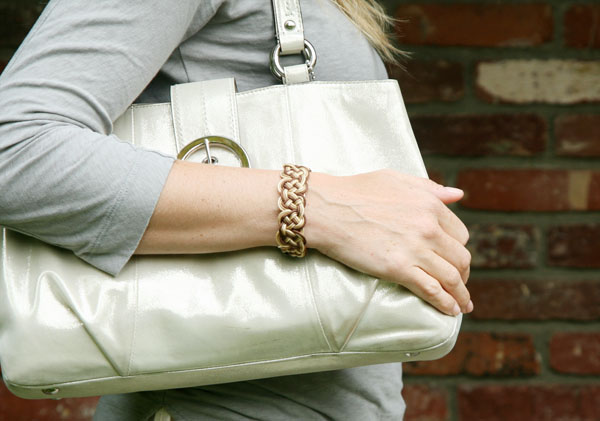
Ermagherd, peeps, this is the epic bracelet tutorial! It took me weeks to design the pattern, not because it’s so complicated but because I looked at so many different kinds of knots and I couldn’t decide. Indecision 2012! Turns out, I liked the first step of a larger knot the best and finally decided to run with that. But then the tutorial itself was never-ending, with all the Phototaking and Photoshopping and Photouploading.

But it’s done, and it’s here!

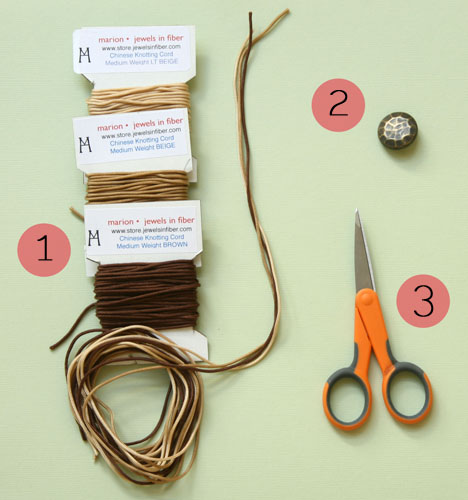
Here’s what you’ll need to make this bracelet:

1. medium weight Chinese knotting cord in three shades of one color, each strand cut to 2 yards (alternately, you could choose three totally independent shades for a different look)

2. a button with a shank

3. scissors

4. (not pictured) some kind of glue to secure your final knots; I used Hypo-Cement but you could use hot glue or even Elmer’s

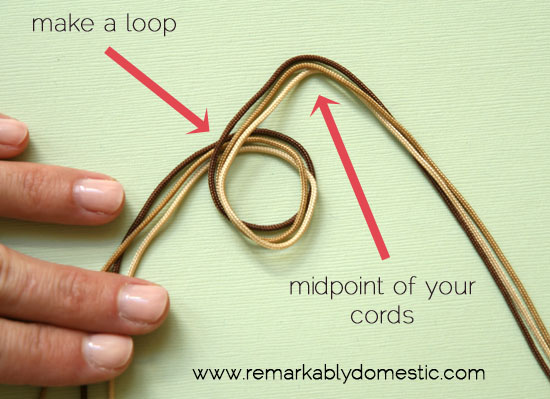
To start, you’ll cut your cords to length and lay them together. You will be knotting them as if they were one cord. Fold them over so that you are starting with the halfway point, right in the middle.

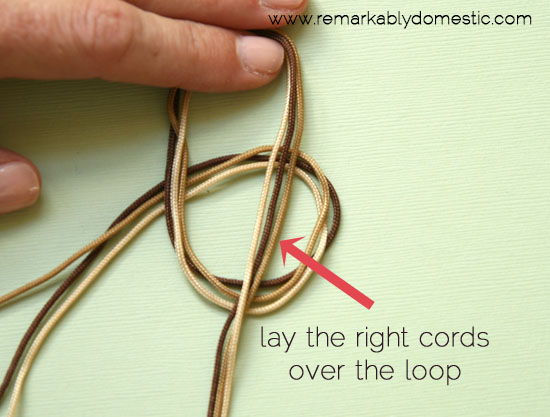
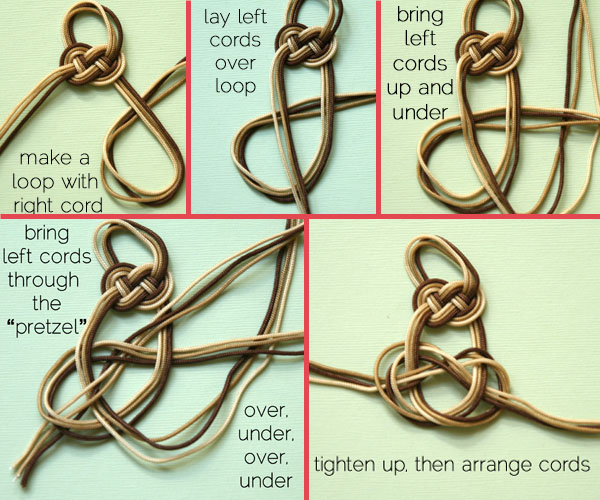
Make a loop with the left-hand cords.

knottedbracelet2

Make sure the loop goes under the left-hand cords as pictured above.

Then, lay the right-hand cords over this loop.

knottedbracelet3

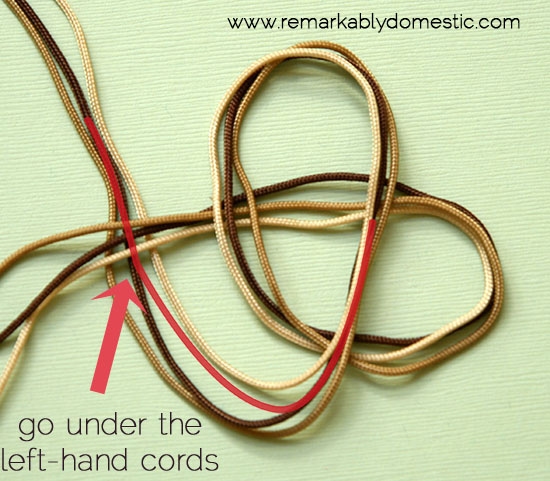
Take the right-hand cords and bring them up and under the tail of the left-hand cords.

knottedbracelet4b

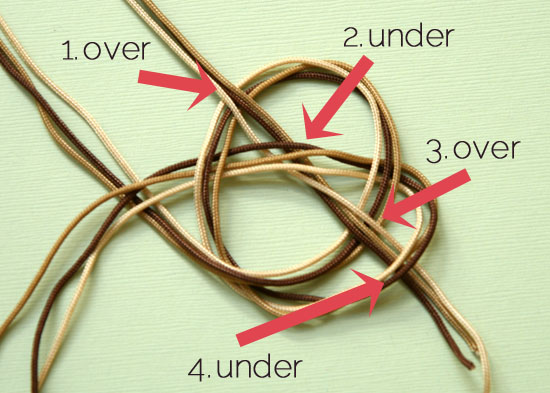
Take the end of the right hand cords (the ones you just pulled up and under the left-hand cords) and weave them through the loops that form a kind of pretzel shape: over, under, over, under.

Then, pull that cord through.

knottedbracelet7

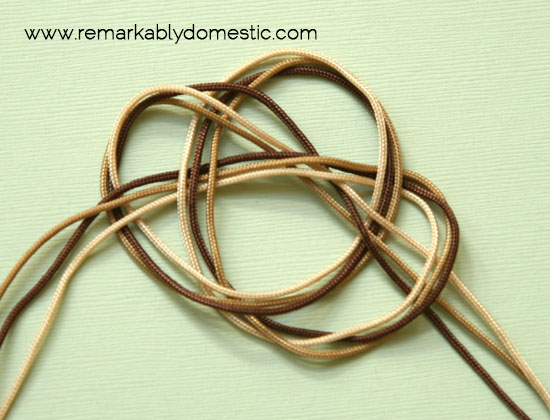
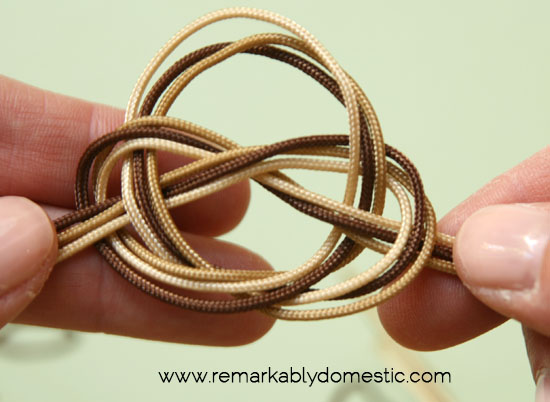
Now you can tighten this knot up a bit, but not all the way. This is where it gets tricky and a little persnickety. You’ll notice that your three cords, that should be laying nicely in shade order (that is, darkest to lightest or lightest to darkest) have gotten all cattywampus in the process of knotting. They are so inconsiderate.

knottedbracelet8

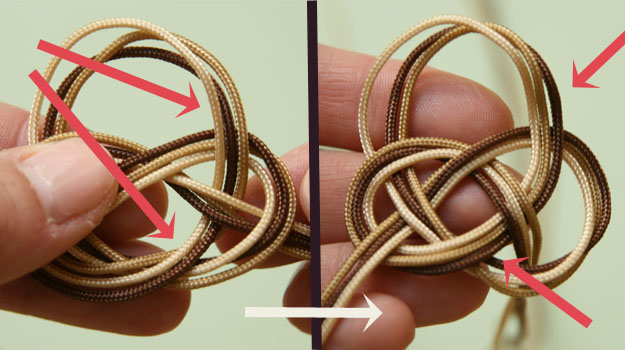
See that? It’s all crazytown up in there. (Besides the fact that my cuticles are like, so. dry.) Before you tighten the knot completely, you are going to arrange the cords so that they are in the proper order. I know, it sounds insane, but it’s really not that hard.

You can see in the photos above, where I’ve used arrows, the before and after. This is the beginning of me rearranging the cords. To illustrate it better, I’ve created a little video of the process of realigning the cords:

Oh, Lordy, I know, that’s the weakest video ever, but like I said, this was so epic I just wanted to get it up and running.

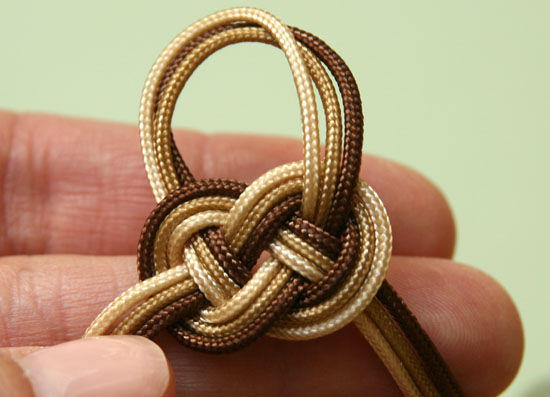
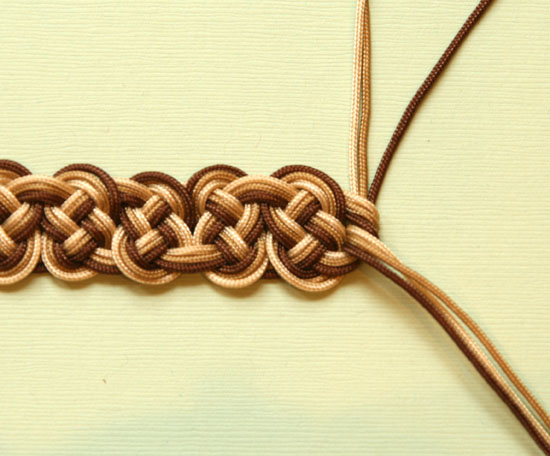
Once you’ve arranged all your cords, your first knot should look like this:

Tighten it up so that the top loop is big enough to go over your button.

The next knot is the same, except in the opposite direction.

Once you’ve arranged the cords and tightened it all up, it will look like this:

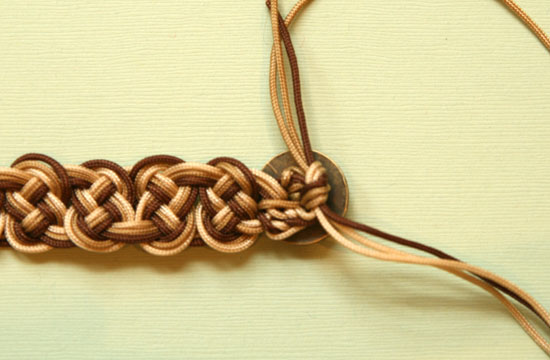
Now, repeat the whole process, starting with making a loop on the left-hand side. You will continue knotting, alternating between starting with the left-hand and right-hand cords. When your bracelet reaches the desired length, you can add your button.

First, tie a single overhand knot at the end of the bracelet to secure your knotting. It won’t be very tight, but you are going to add your button afterwards which will secure everything.

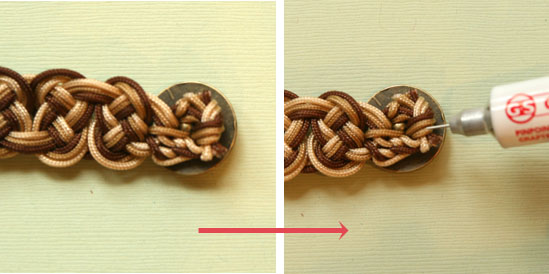
The number of cords you will be able to thread through will depend on the size of the shank on your button (that sounds vaguely obscene, doesn’t it?). Mine only fit two cords through, since I have a small shank (I figured I should just go with the obscenity, right?). I sent one cord from each side through the button and then tied some knots. Truth is, though, that this kind of cord is relatively slippery and doesn’t hold a knot that well, so we will secure it with some glue in a minute.

I know, this knotting looks INSANE, but no one’s going to see it, right? I wanted to make sure it was secure.

Cut the ends of your cords and then add a little glue to the ends and the knot to make sure it doesn’t come undone.

Once it’s dry, you’re good to go!

Hope you enjoyed!

Pin It

{ 50 comments }

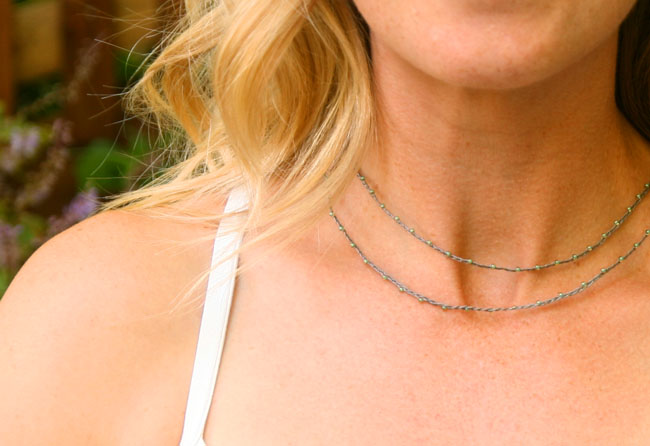
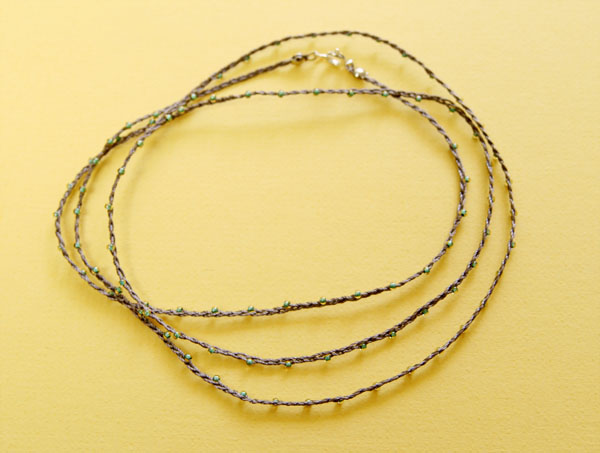
I’ve been taking some private yoga lessons over the last few months to up my yoga game, as it were. And one day, my lovely yoga instructor Holli was wearing this beautiful and simple necklace. I looked at it more closely, and, as is my wont, I thought, “I could make that!” So I did.

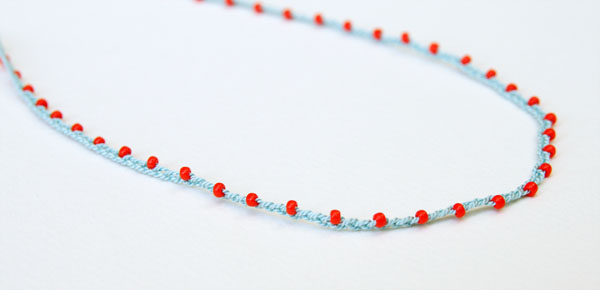
Or at least I made a version of it. It’s so simple and easy, and you could make it in any color combinations you want.

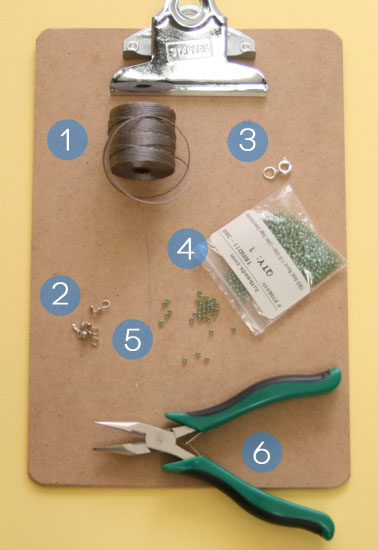
Here’s what you’ll need:

1. 3 1/2 yards beading thread, size 4, cut into three 42″ lengths (I used C-Lon bead thread in size D, but you can use whatever thread will fit into the holes of your seed beads), in your choice of color

2. 2 bead tips (you should be able to find these at Michaels)

3. one clasp (available at Michaels)

4. seed beads in your choice of color (size 11.0, which is standard size)

5. a beading needle (optional)

6. jewelry pliers for closing your bead tips

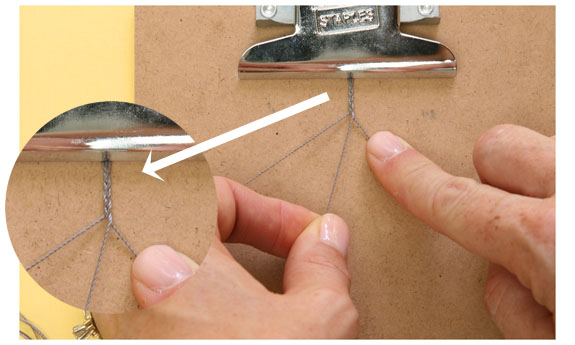
You may also want a clipboard or a piece of tape to anchor down your cords while braiding.

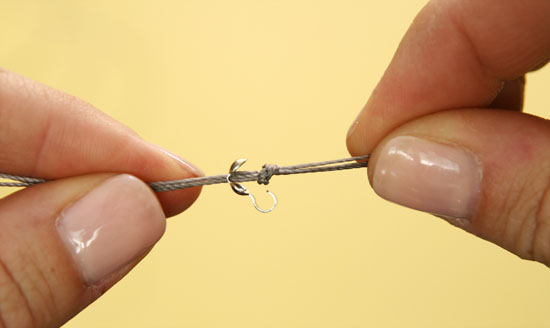
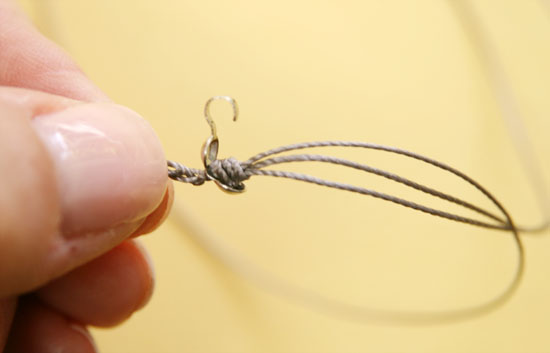
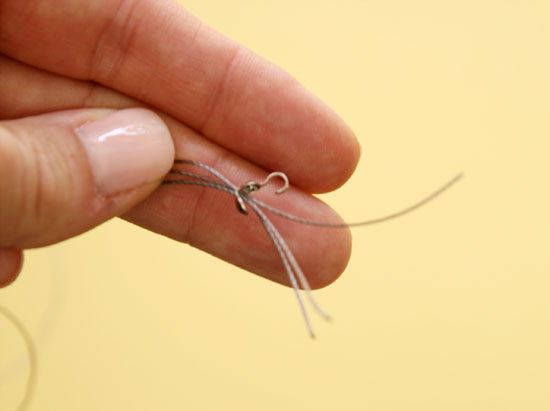
To start, gather your three threads together and feed them through your bead tip. You may need a beading needle to get the last thread through, depending on the size of the hole in your bead tip.

Then, tie an overhand knot with your three threads:

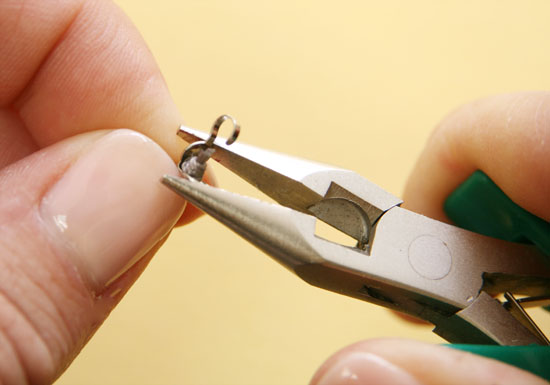
And push this knot into the clamshell of the bead tip. Cut off the ends and close the clamshell with your pliers.

Now you’ll begin braiding, in a traditional braid. (If you don’t know how to braid: bring the left string into the middle of the other two strings, then the right string into the middle of the other two strings, and keep repeating.)

Braid about an inch or two before you start adding your seed beads.

Now, here’s where you get to be super creative and decide what your necklace will look like. There are two different variables here that you’ll need to choose:

~ spacing

~ placement

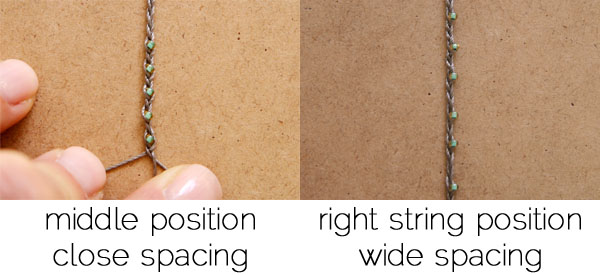
For spacing, you’ll want to decide how far apart you want to place your beads. I spaced mine pretty widely, so I added a bead and then braided 4 times before I added another bead. You can choose to add beads whenever you want, but you will likely want to be consistent.

For placement, you can either add the bead to the outer strand or the middle strand.

Here are two different patterns that illustrate what these choices mean:

So here is where you get all artistic and designy.

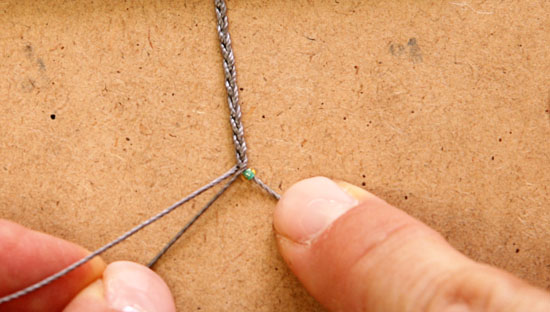
The pattern on the right is how I made my necklace. To start beading, slide the bead onto the string of your choice and push it right up against the braiding.

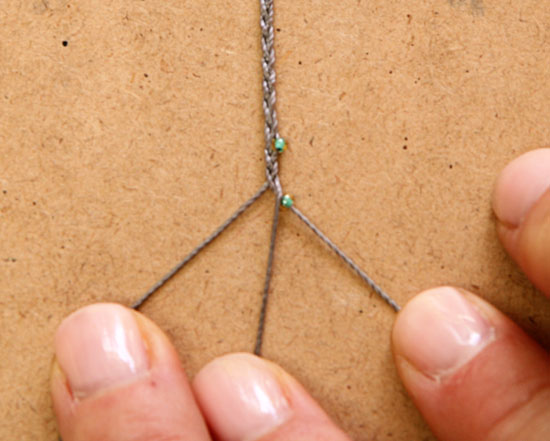
Now, continue braiding until you are ready to add another bead. This might be after your next crossover of the string with the current bead on it, or it may be after several crossovers. The trick, though, is to keep that bead where it is; don’t let it slide down the string at all, or it will end up in another position (say, the middle string position). Also, don’t let your braid twist. I like to work my braid flat on a surface, always keeping it flush against the table, so I’m sure it doesn’t flip or twist.

When it’s time to add your next bead, go for it.

Then, continue beading and braiding until you reach your desired length. Here, you have a choice, too; I made mine 32″ long so I could double it up, but you could make a single strand that’s much shorter. (Obviously, you can adjust the length of your strings if you are making a shorter necklace, too. To be safe, count on each strand being twice as long as your desired finished length.)

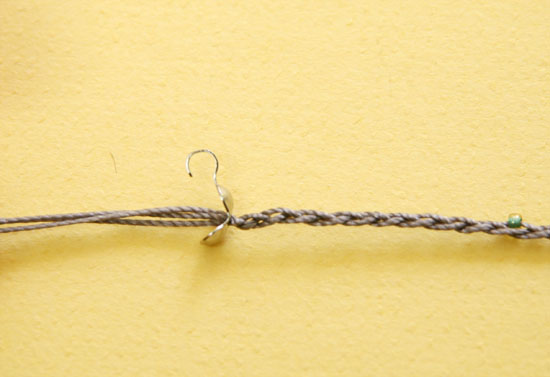
When you are just about to the length you want, stop adding beads and braid for an inch or so.

Add your second bead tip just like you did the first.

Tie a knot again, getting it as close as possible inside the bead tip.

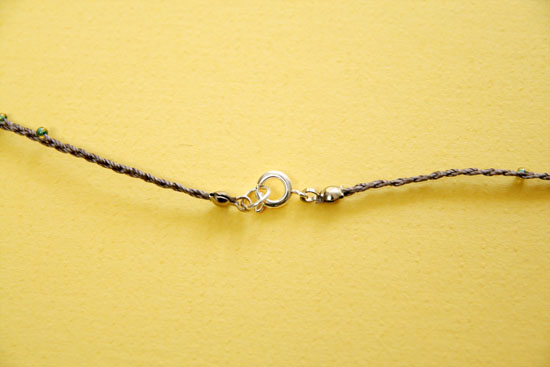
Cut off your ends and close the bead tip as you did before. Then, add your clasp to the ends of the necklace with the jump rings.

Now, wear it with pride to the grocery store, out to dinner, or while doing your favorite yoga pose (trikonasana, anyone?).

Besides the different patterns you can make, using different colored cords and beads makes a big difference in your outcome.

If you make one, send me a pic! I’d love to see your creations.

{ 7 comments }

Today I’m bringing you my first DIY for the Pottery Barn Kids challenge!

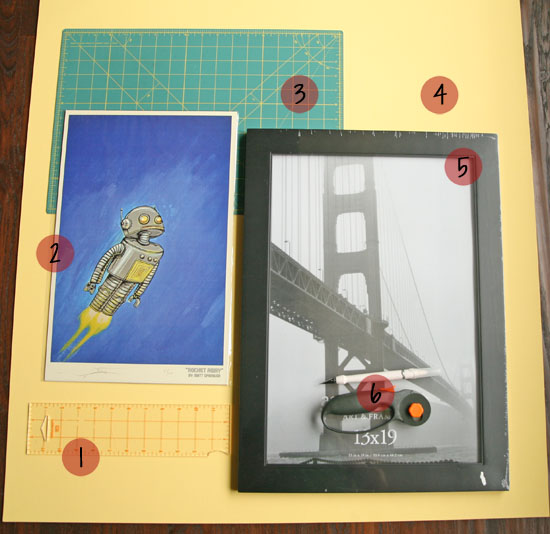
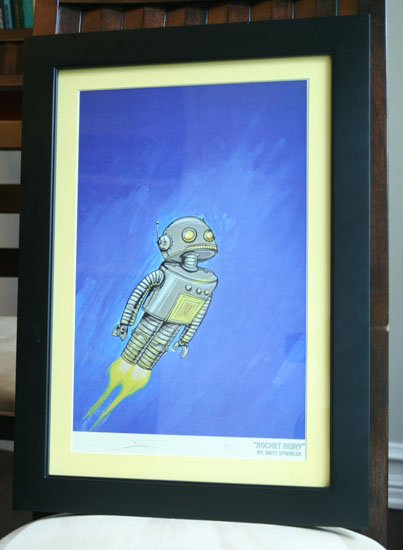
I wanted to put some real wall decor in the 5 year old’s room, replacing the “default decor”: the Ireland poster and the taped-up Toy Story 3 poster. So I got these fantastic robot prints from an amazing artist, Matt Spangler. He creates wonderful images of robots that are perfect for a kid’s room. I got two in a sort of blue and red scheme to match the stuff from PBK.

Zoom, Zoom, Boom! and Robot Away by Matt Spangler


The last time I checked on getting some prints like this framed, I went to Aaron Brothers, and, I kid you not, they wanted me to pay $350 FOR EACH PRINT. I nearly fainted. I actually got so jammed that when she said “three-fifty,” I was like, “three dollars and fifty cents? what?” I couldn’t even process $350.

So I knew that I would need to frame these prints myself. I really wanted them matted, too, so I set about finding slightly larger frames and some mat board. The nice thing about matting your own artwork is that you can customize everything to your liking. The bad part is that you have to be pretty precise and careful. But if I can do it, you can!
Here’s what you’ll need:

1. A ruler
2. An amazing piece of art to frame

3. A self-healing cutting mat

4. Mat board in your choice of color

5. Frame in slightly larger size than your print

6. A craft knife, and optionally a rotary cutter

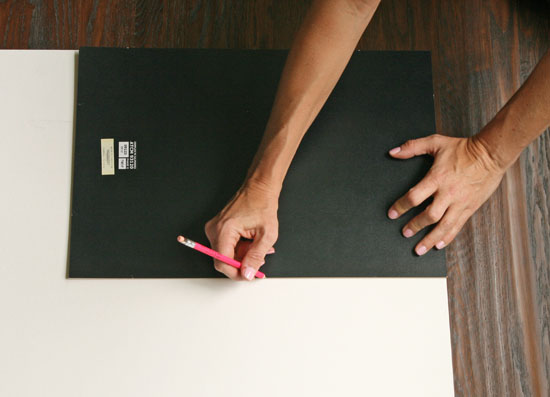
First, take your frame apart. Use the back panel as a template for cutting the outside of your mat. Turn the mat over so the right side is facing down, and lay the back panel on top. It works well if you line it up with two of the pre-cut edges, so you only have to cut two sides. Trace the outline of the back panel onto the mat board, making sure it is lined up as precisely as possible.

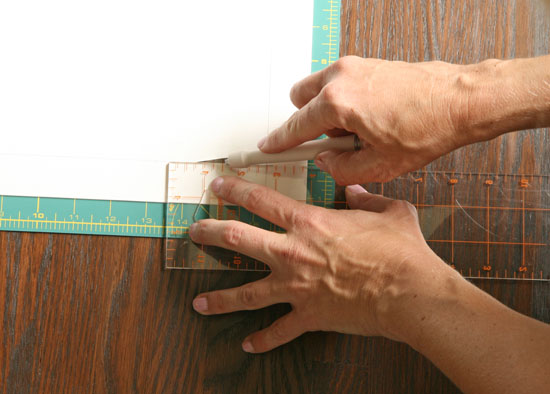
Cut along your traced lines with a rotary cutter or a craft knife. The rotary cutter is a little easier for this part. Make sure you use a straight edge to make your cut perfectly straight.

At this point, if you want to make things easy on yourself, you could simply lay your print on top of the mat board, secure it, set it in the frame and call it a day. But if you want a bona fide mat, you’ll have to continue and cut the inside perimeter of the board.

Determine how big you want the inside opening to be by laying your print on top. Measure the sides and decide how much of the mat you want on each side. Make sure you make opposite sides equal.

Once you have the measurement for the thickness of each side, flip the mat over again and draw the lines for these dimensions. You’ll end up with a square or rectangle drawn on the back.

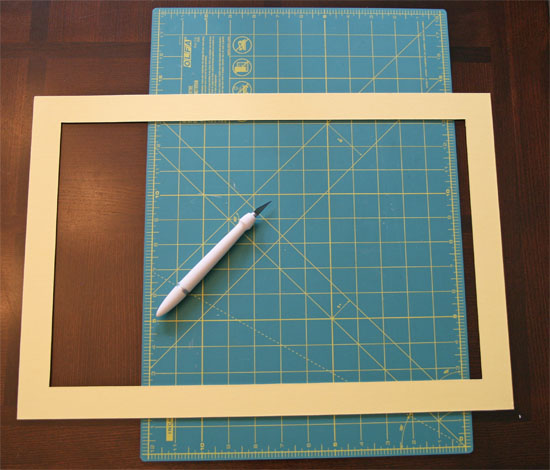
Here’s the trickiest part. Cut the inside perimeter with a craft knife, again using a straight edge to guide you. Be very careful with the edges. You don’t want to overcut your traced edges, since it will show in the corners. I found that cutting right up to the corners and then very carefully cutting the corners sort of “freehand” helped me to keep them clean.

Once you’ve cut all the sides, you’ll have a completed mat.

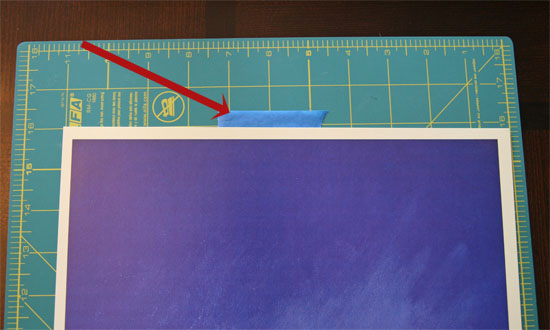
To fit the mat and print into the frame, lay the print down on a surface. Place a small piece of painter’s tape underneath the print, sticking out about 1/2″.

Arrange your mat on top of the print just as you want it. When it’s in place, press down on the area where you’ve added the tape. Now your print is lightly secured in place, and you can flip the whole thing over and add a few more pieces of tape.

Set it in the frame and stand back and look at your handiwork!

You’ll be seeing this print and Zoom, Zoom, Boom! hanging over the 5 year old’s desk soon!

{ 2 comments }