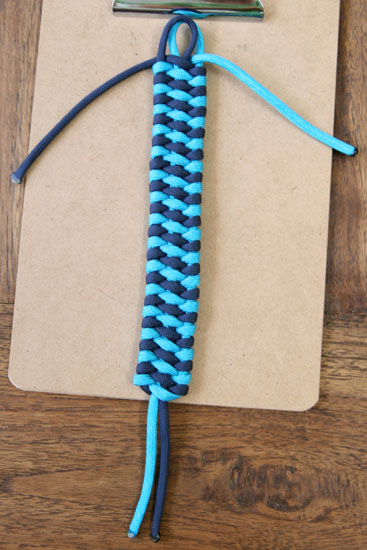
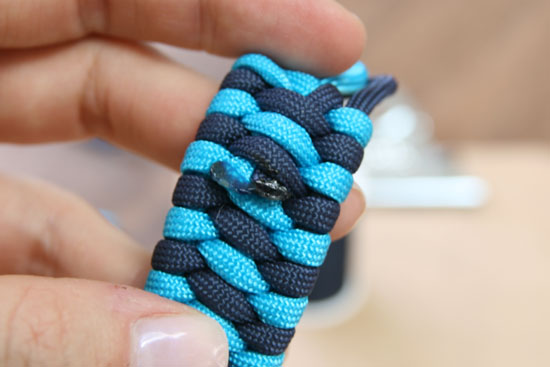
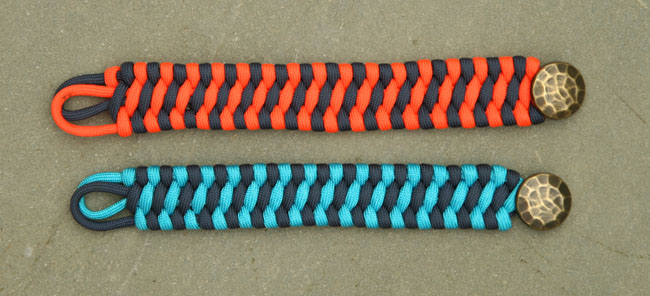
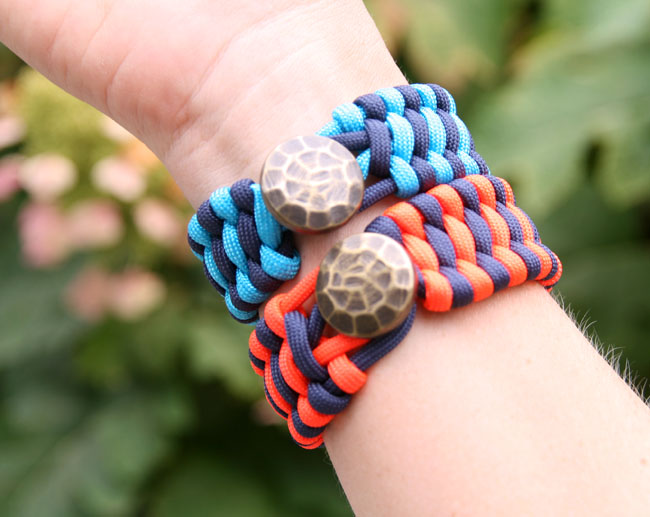
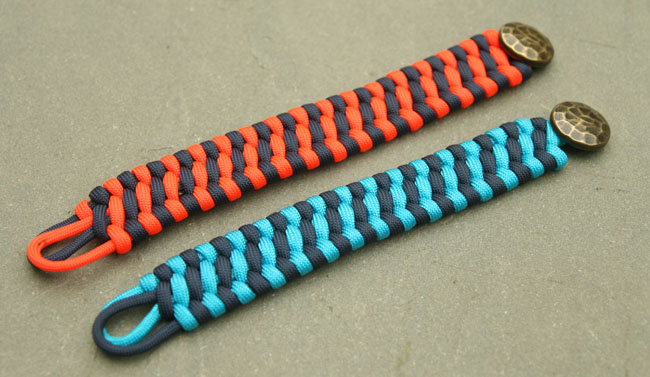
How To: Woven Cuff Bracelet

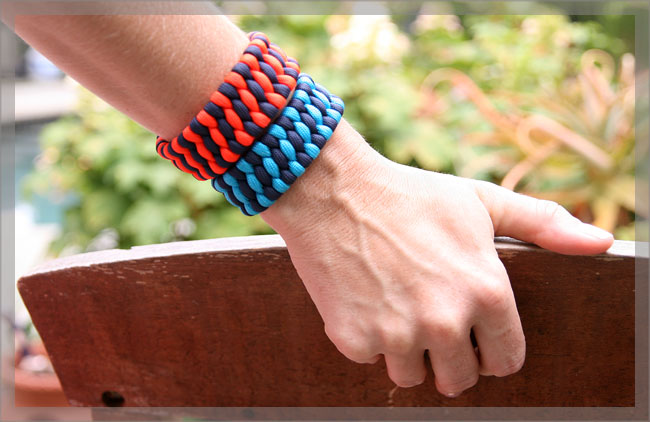
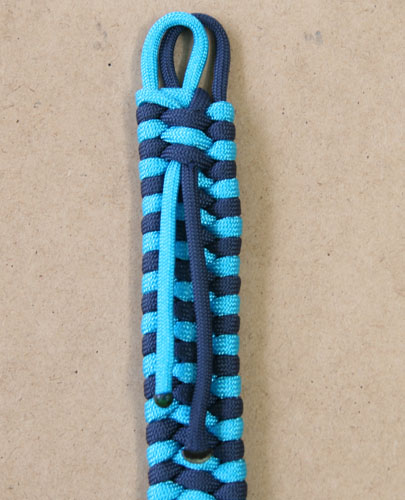
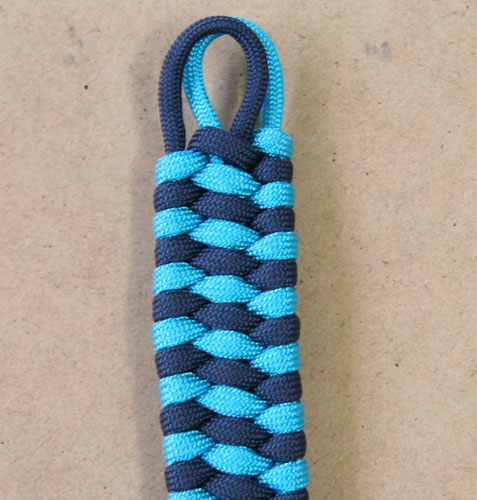
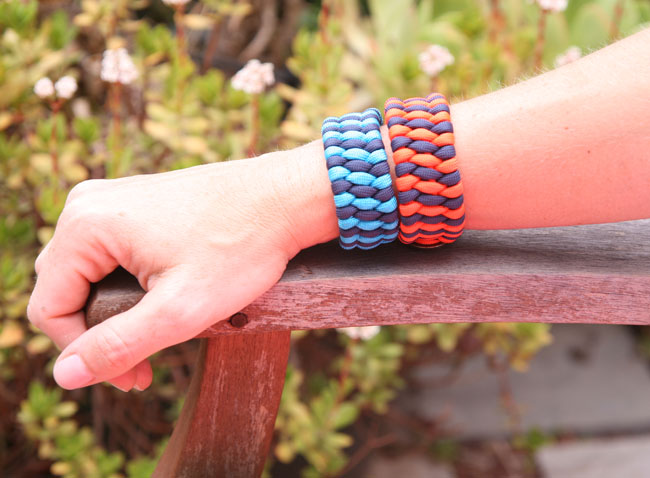
I’ve been looking into more and different kinds of knotting for bracelets lately, and I found this pattern that works nicely for a cool cuff bracelet. I used paracord (utility cord originally used for parachutes, now widely used for other applications) and a brass button for closure. The paracord is relatively thick, which makes this bracelet more of a cuff.

I found a video tutorial for this pattern on YouTube from a guy who calls himself “Tying It All Together.” Those of us who watch him know him as TIAT, too. If you want to see a nice video tutorial for this pattern, you can check his out here. I simplified the steps a bit, and his doesn’t include the finishing of the bracelet. Oh, and he doesn’t talk in his videos, but they are very easy to follow. He goes slowly.

(For those of you who like useless cocktail party trivia, this pattern is apparently called a trilobite bar. Wow!)

For the project you’ll need:

  • two 5 1/2′ lengths of paracord (550), in whatever colors you choose. I ordered mine from Etsy seller HomerPelican.
  • a lighter or match
  • needle and thread
  • a button with a shank for the closure, preferably a slightly larger one (a shank means there are no holes in the button, but a little loop on the back of it)
  • pliers (optional)

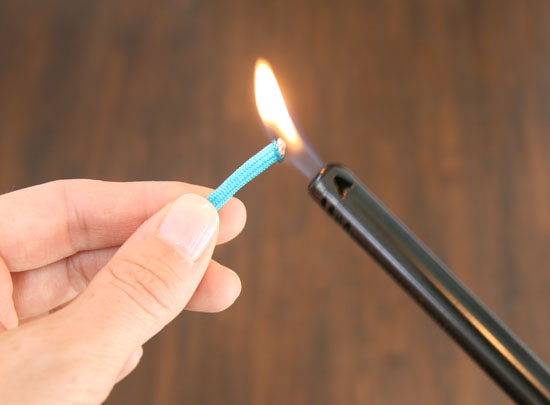
To start, you’ll need to cut your cord to the right size. Paracord is a little finicky since it will fray and separate if you don’t seal it. So, once you’ve cut your 5 1/2 feet, you’ll want to burn it to melt the fibers together.

You’ll need to hold the flame on it for about 10 – 15 seconds, until both the inner and outer fibers melt a little.

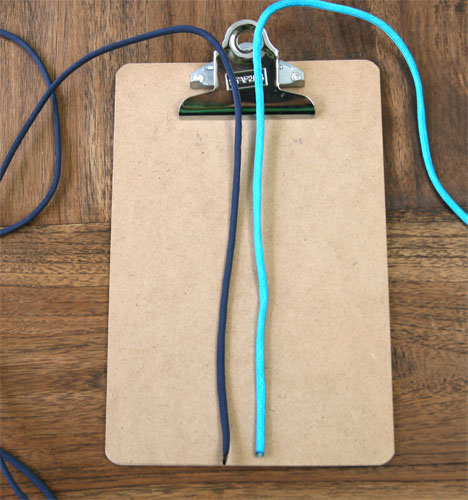
To set up the bracelet, you will put the two cords together and fold them over, with a short end and a long end. The short end should be about 2″ longer than you want the finished bracelet to be (so if your bracelet will measure 7″, make the short end 9″).

Then, you’ll stack the cords on top of each other and attach them to a clipboard (or you can use tape and attach it to a table).

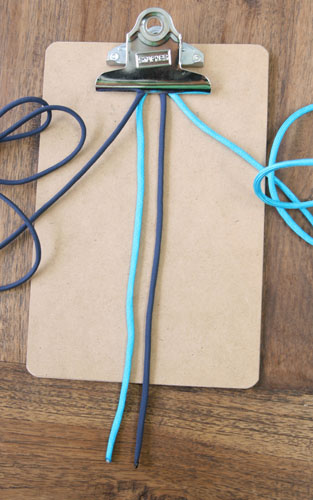
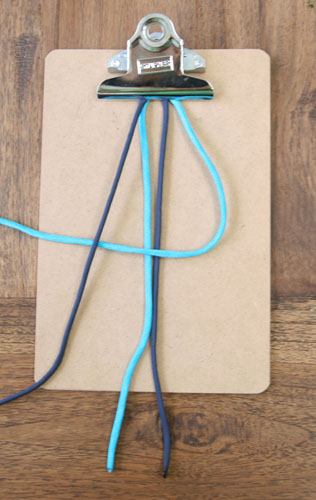
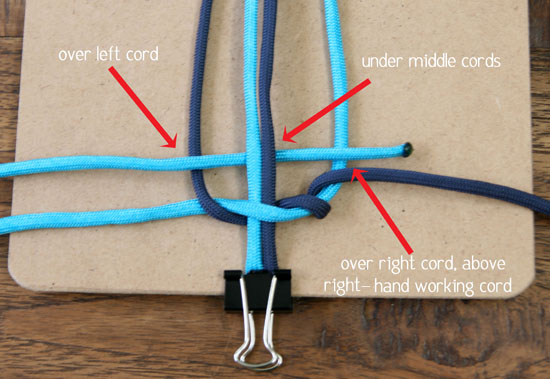
To start, you will take the long cord on the right and lay it over the middle cords, perpendicular to them. Then, you will lay the long left hand cord over the right hand cord.

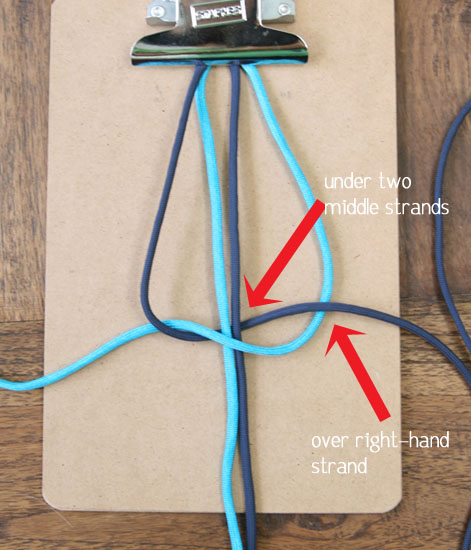
Easy peasy. Now, bring the long left hand cord under the middle cords and over the long right hand cord.

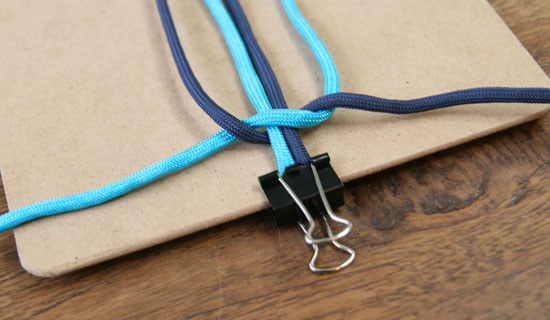
This is the foundation for the bracelet. To make things clearer, from here on out I will refer to the far left cord, the one that you will be moving, as the “left working cord,” and the far right one as the “right working cord.” I will refer to the left cord (above, the navy cord) as simply the “left cord” and the right one as “right cord” (above, the neon teal cord). The two center cords are the “middle” or “center” cords. Hope that makes sense.

Now, you want to move the very simple knot you’ve made above down the two middle cords a bit. You want the distance from the top of the cords (the bend that you’ve attached to something) to the knot itself to be the length of your finished bracelet.
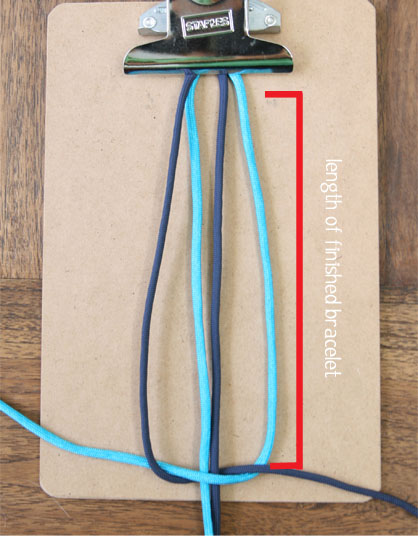
As a final bit of set-up, you’ll want to secure your middle cords down so they don’t flop around. This allows you to keep tension and not worry about so many cords. I’ve done it with a binder clip, but you can also use tape.

Okee doke? Now it’s time to weave!

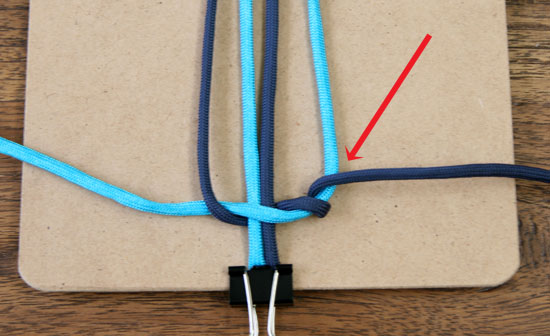
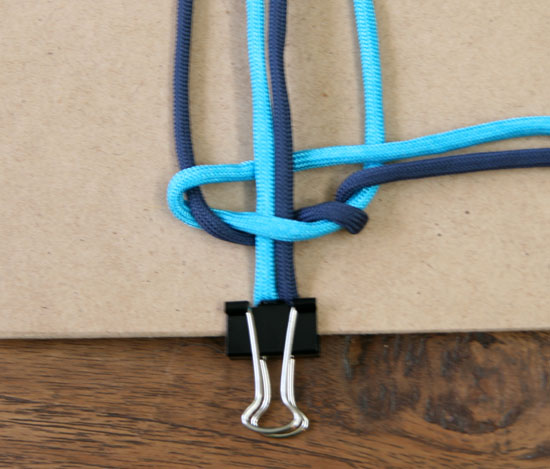
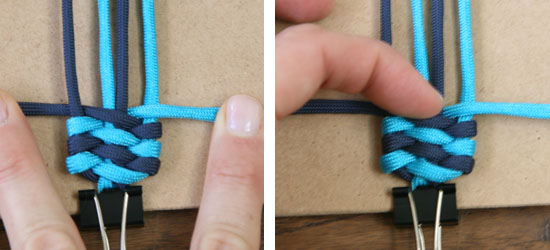
First, take the right working cord and wrap it around the right cord.

Now, take the left working cord and lay it over the left cord, under the middle cords, and over the right cord, placing it above the wrap you did in the last step.

Now pull the left working cord tight.

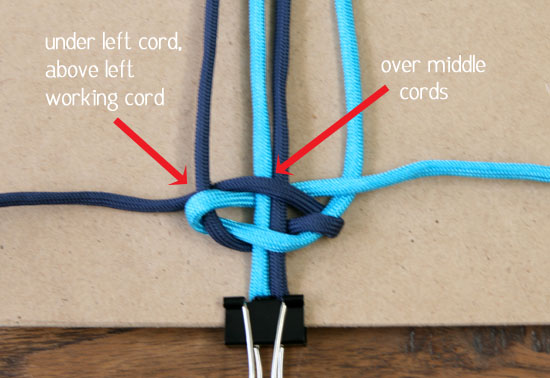
Take the right working cord and put it over the middle cords and under the left cord, above the left working cord.

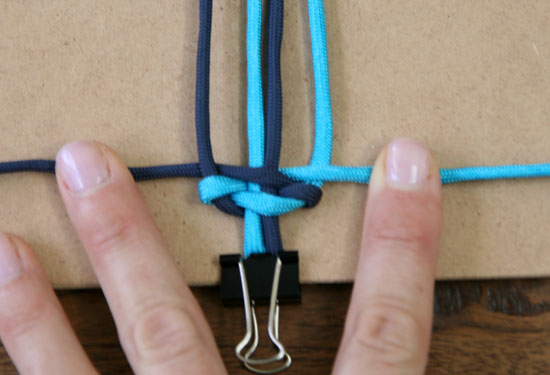
Now, tighten both working cords.

This is the basic sequence for weaving. You will continue to cross over the cords. So, here’s the next set of weaving:

As you go, tighten up both horizontally and vertically.

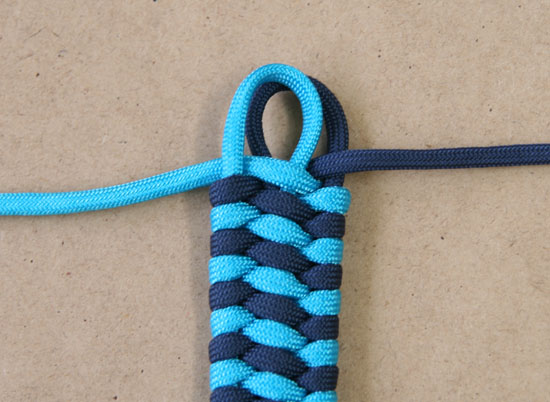
Keep weaving until you have a loop at the top that will fit your button.

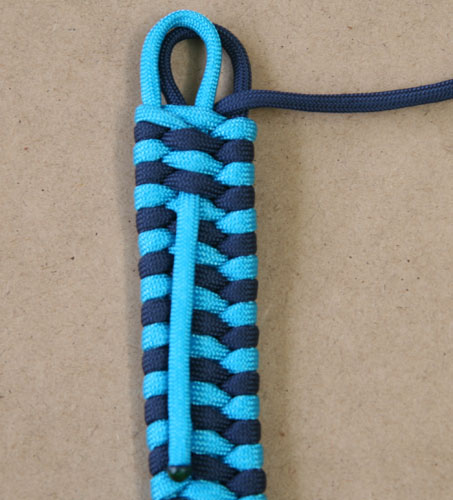
Now you are going to tuck the tails from the top into the back of the bracelet’s weave. First, flip the bracelet over.

Now, take the left hand cord and thread it under 3 – 4 of the middle weaved cords:

Do the same with the right hand cord.

We’ll come back to trim these later. Now your bracelet looks like this:

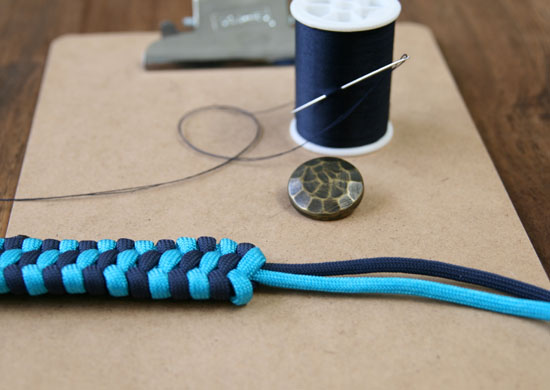
Time to attach your button. For this you will need thread, a needle, and your button.

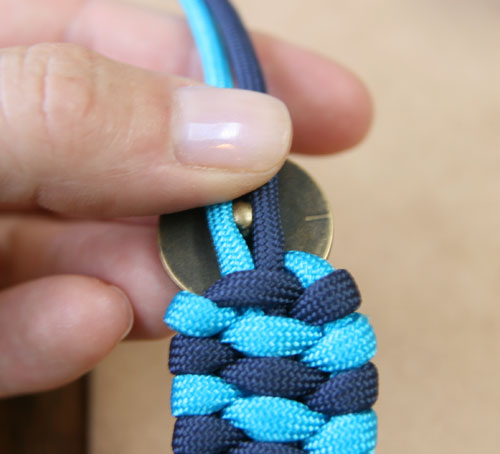
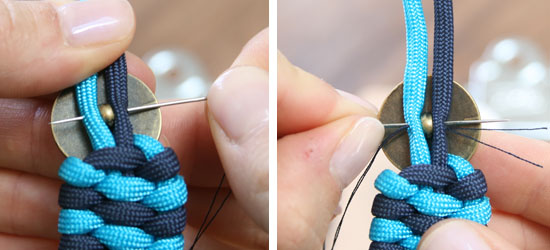
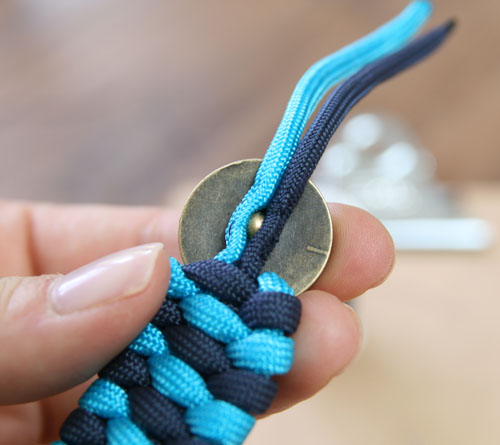
Place the button’s shank in between the two cords, with the face of the button on the front side of the bracelet.

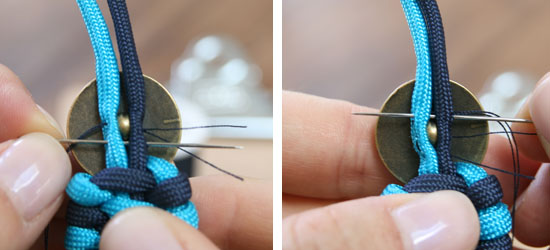
Now you will sew the button on by threading the needle through both the cords and the hole in the shank, back and forth.

Once you’ve got some good stitches through the shank, you should sew the cords together both below the shank and above it.

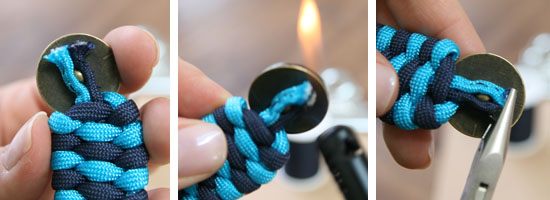
Your sewn button will look like this from the back:

To finish it off, cut the cords underneath the button and melt them to seal. While they are still hot, you can use pliers to squeeze the ends to make them flat, so they lay a little better under the button.

Now you’ll want to cut the top cords as well, and melt them. Be careful not to melt the bracelet itself; it helps if you bend the bracelet so that the cord ends are pointing upwards and are not flush on the bracelet.

You can tuck these little melted ends inside the next woven cord; it’s easier to do if you smoosh them with the pliers while they are hot.

Done! I think they are pretty cute.

Let me know if you make any! Happy day!

{ 40 comments }

DIY Neon Bead Choker

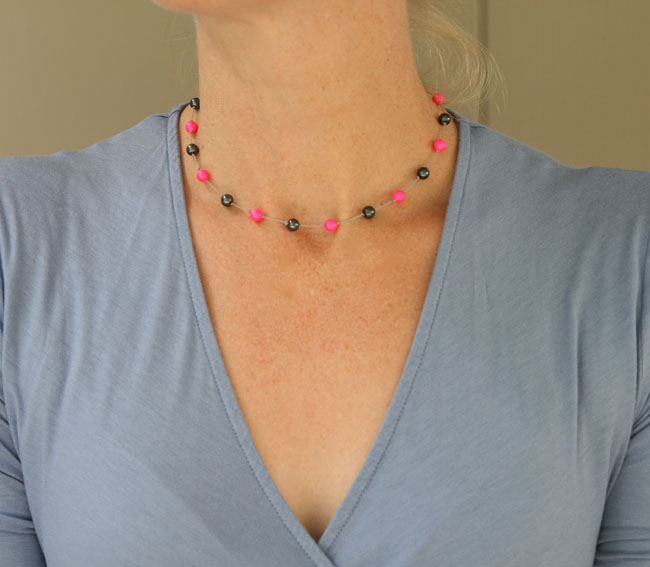
I promised you I had another neon bead project, and here it is!
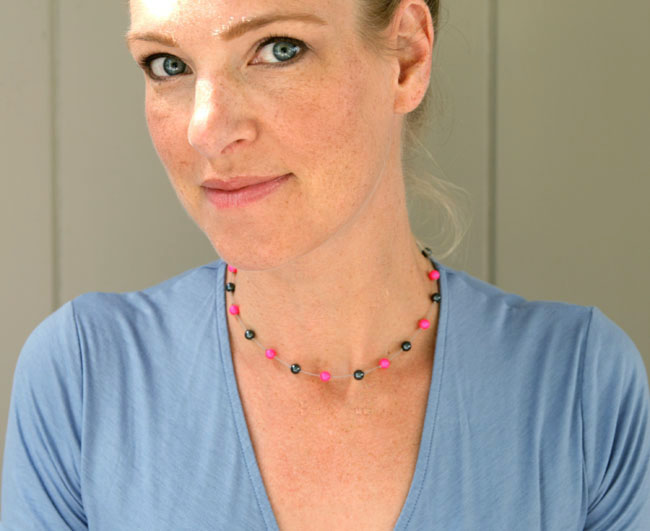
These are the third variety of beads that I ordered in the neon. They are Swarovski neon crystal pearls in 6mm. I wanted to make some kind of necklace, and as is my modus operandi, I didn’t want it to be too outrageous.

I found the dark gray beads at Michaels; they were super cheap and I actually just bought them because they were on sale and I figured I’d use them sometime. They looked perfect with the neon beads as a way to incorporate neon into an everyday look. I find that mixing neon with neutrals looks really nice and makes it totally wearable.

For this project, I used silk beading cord (I chose light gray in size 4), the two kinds of beads, bead tips and a clasp. A bead tip is a small metal piece that hides the knot you put at the beginning and end of the cord, and also has a hook on it so you can attach a clasp. The main tool you will need is jewelry pliers.

To start, cut your cord to the appropriate length. Depending on how closely you space your beads (and therefore how many knots you’ll have), you can estimate that you’ll want to at least double the length of the finished necklace. So if you want a 16″ choker, cut at least 32″ of cord. Make a knot at the end of your cord and apply the bead tip over it. (If you need help with the bead tips, check out this video tutorial from Jewelry Supply.)

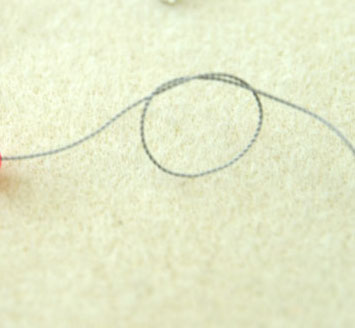
To add your first bead, make a very loose knot it the cord, but don’t tighten it.

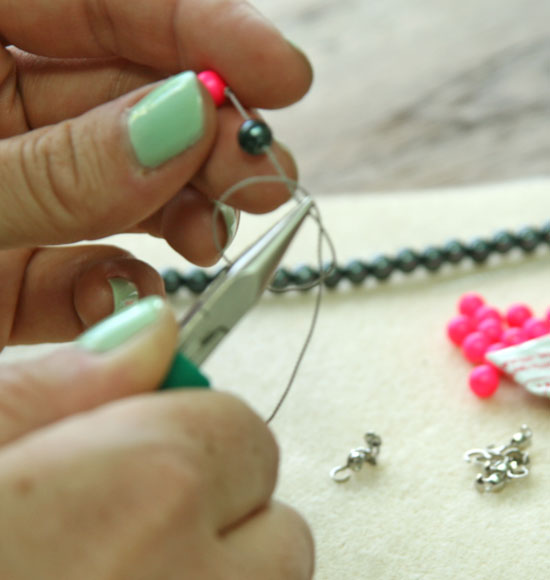
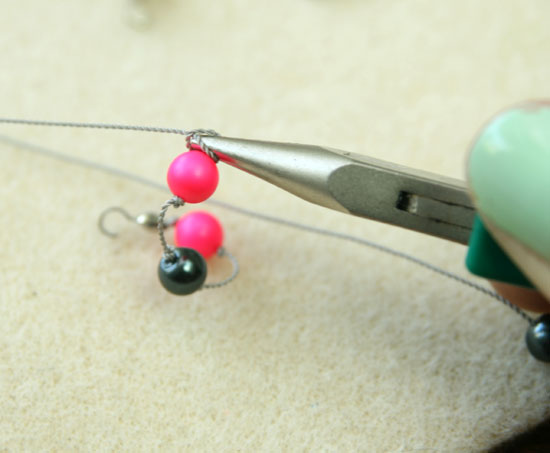
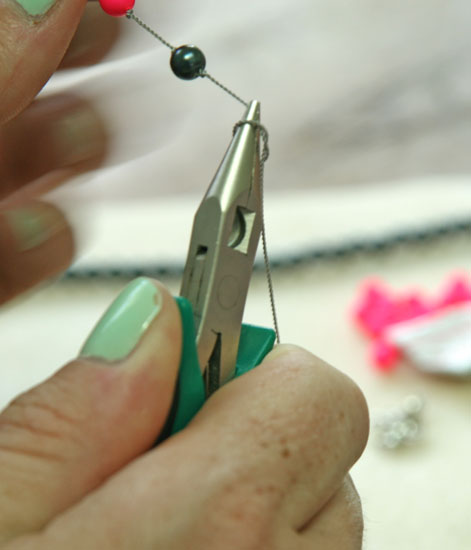
Decide where you want your bead to fall. (I put about 1/2″ of space between my beads.) Slide your pliers through the loose knot and grab the cord with the tips of the pliers right where you want your bead to fall.

By grabbing the cord with the pliers, you essentially cement that spot as the place where your knot will fall. Now, start to tighten your knot, being careful not to let the knot slide over the pliers (that is, keep the knot you are tightening laying on top of the pliers).

As you get the knot tightened as far as it can go with the pliers in place, slowly slide the pliers out while tightening the knot the rest of the way. And you will have your first end knot for a bead.

Now, add the bead to your cord, sliding it next to that knot. The knot will stop the bead from moving further on the cord.

Make your loose knot again, and again slide your pliers through the loose knot. Now, push the bead up to the first knot, holding it there firmly. With the pliers, grab the cord right next to the bead, as closely as you can, with the tips of the pliers.

Tighten down as you did for the first knot, releasing the pliers when the knot is almost complete.

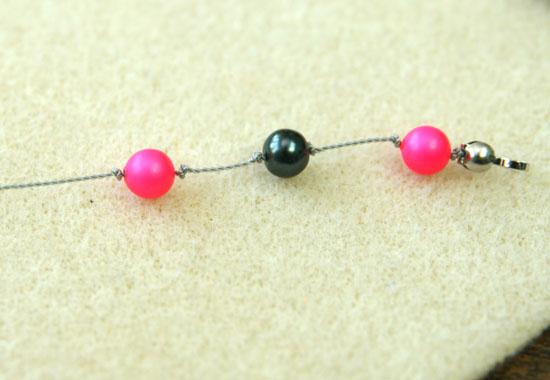
Now you should have a bead that is stable on the cord because it is held in place by two knots.

Continue knotting and beading until the necklace is the length that you want. At the end, you will put the bead tip on and then knot the cord so that the knot falls inside the bead tip.

Attach a jump ring to one end and a clasp to another, and you’re done. Then, sport your neon with pride!


Pin It

{ 1 comment }


Inspired by all the Sharpie tie dye shirts I’d seen on the interwebs, I thought to myself, “This could be a good way to produce ikat.” And you know what? It was!

In the process, I discovered that there are two ways to go with this craft, both resulting in different looks that are, in my opinion, equally cool. You can decide which, if either, you like best.

For this tee, you’ll need:

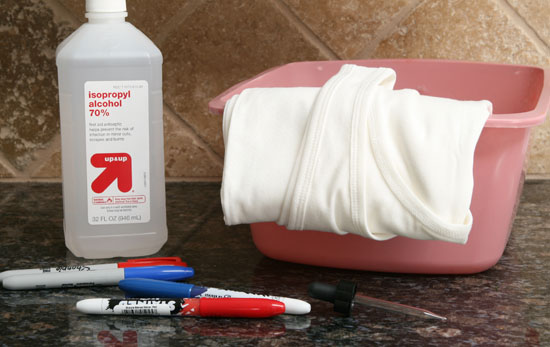
  • a white tee of your choice (I used a tank from Target)
  • 2 Sharpies in the same color, one standard and the other a “Stained” Sharpie fabric marker
  • rubbing alcohol
  • dropper or other tool for dripping alcohol
  • container over which to stretch your shirt

You will start with the fabric marker, which doesn’t run when you use the alcohol. I wanted the core of the ikat diamond pattern to remain intact; without it, all the ink from your drawn design can sometimes spread, leaving nothing in its wake.

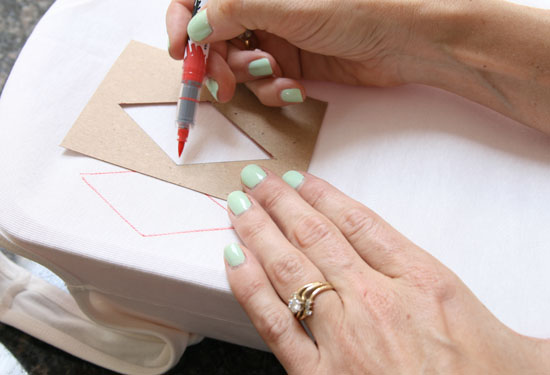
I also constructed a little template so that all my diamonds would be uniform. If you aren’t that uptight, if you are an excellent artist, or if you like the uneven look, you can freehand them.

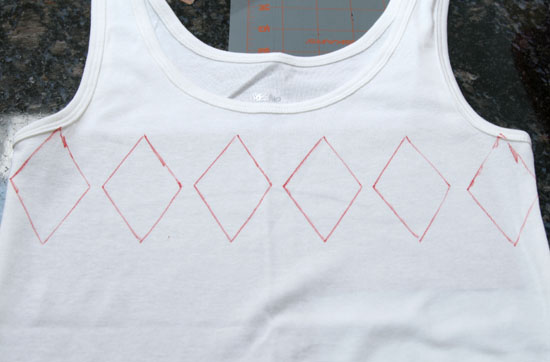
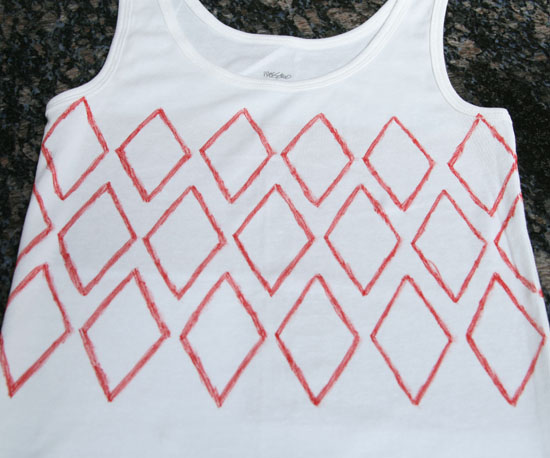
Start by drawing your diamond pattern where you’d like it on the shirt. I decided to do 3 rows of diamonds across the chest of the shirt.

I started with my shirt stretched over the container, but it wasn’t tight enough, so I switched to putting some cardboard between the layers so the marker didn’t bleed through.

That’s my first row. Once I completed the outline of the design, it looked like this:

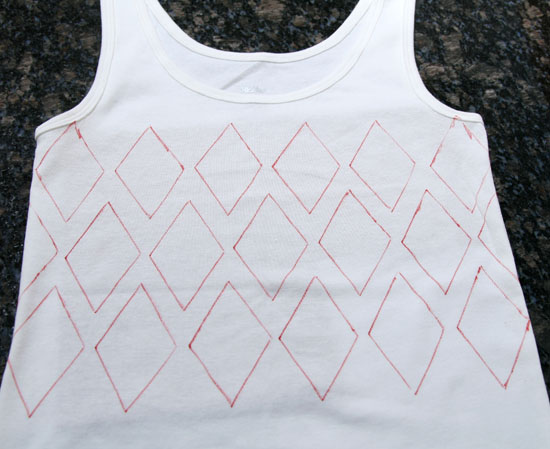
My design went all the way around the shirt, continuously.

Now you want to thicken the lines of your diamonds, still using the fabric Sharpie.

You don’t need to be that neat here, but do keep in mind none of this will feather or bleed out. I thickened my lines to about 1/4″. The nice part about the Sharpie fabric marker is that it’s a brush-style tip, so it sort of fades of its own accord around the edges.

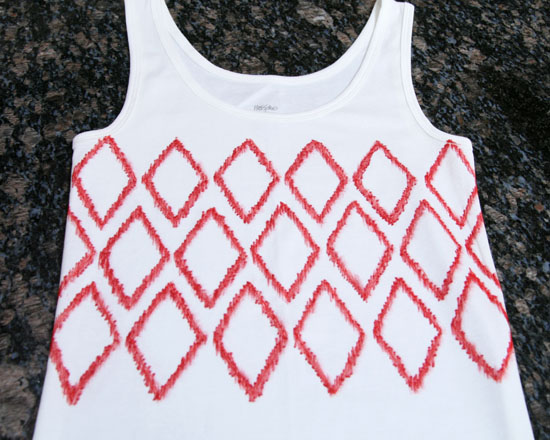
Once you’ve thickened all the lines, it’s time to start in with the regular Sharpie. You are going to trace over the diamonds you have, but sketching in an up-and-down motion along the length of each side.

You want that sort of feathered, messy look.

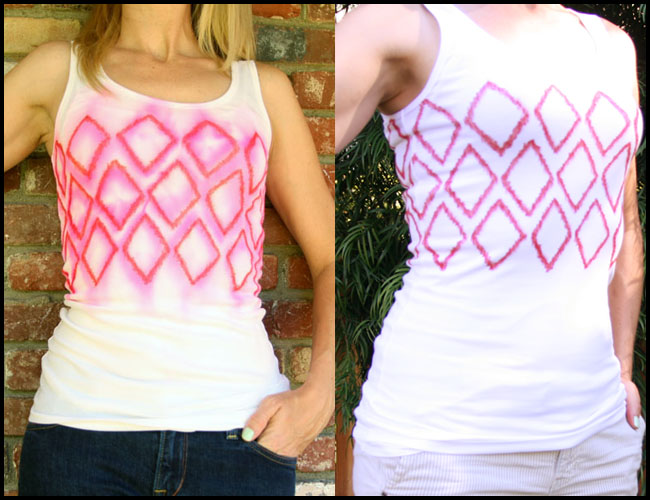
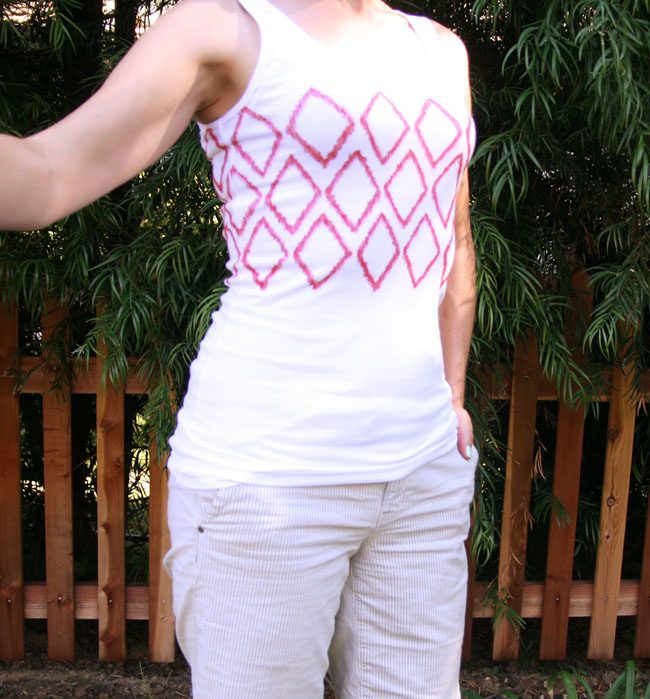
Once I finished, I realized, “Hey. This looks pretty cool on its own!” I almost didn’t want to drip it because it was so neat looking. So I tried it on and modeled it.

And I thought it looked pretty cool. So, if you like this look, you can be done! You’ve got a neat and tidy ikat tee.

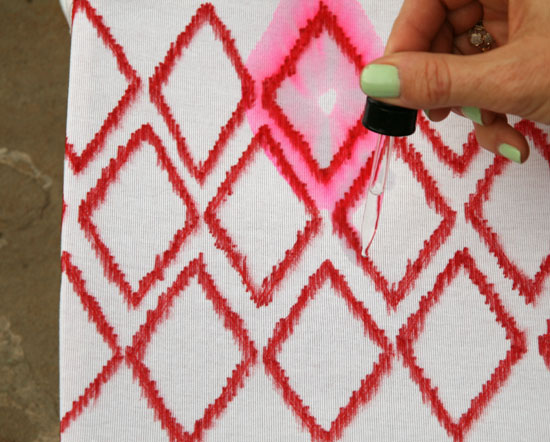
But I had to press on to see what happened with the alcohol. At this point, you’ll stretch your shirt over the container, with the front and back on opposite sides (that is, the front will be stretched over the opening, and the back will be on the back of the container).

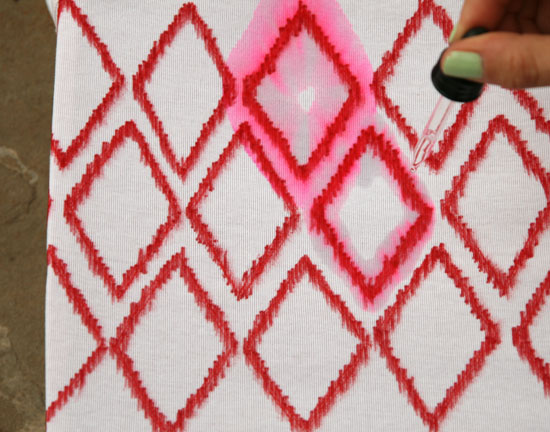
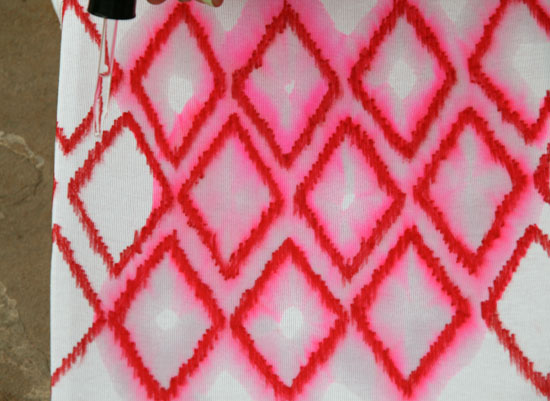
Use your dropper to drip small amounts of alcohol directly on top of the lines of your diamonds. You’ll want to follow along, almost tracing again over the diamonds with the alcohol. (This differs from what you do in Sharpie tie dye, where you want to drip in the center of the pattern so it feathers outward. Here, you want the feathering to go both in- and outward.)

You’ll need to turn the shirt to get all the sides. Be careful not to set it on anything you don’t want stained, since the Sharpie will be running.

You’ll also want to take care that you don’t fold the shirt upon itself, since the color will run into the white parts of the shirt that you want to keep clean.

Once I finished all the diamonds, I went around the top and bottom border and dripped alcohol so that the line of “wetness” was relatively straight. This evened out the feathering and faded it nicely into the white of the shirt.

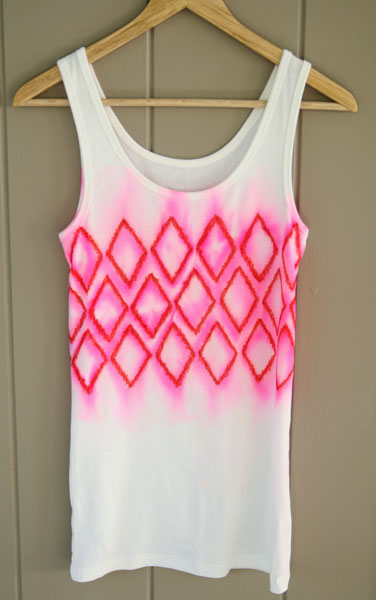
What I love about this version, too, is that when the color runs, it changes, so you’ve got a cross between a red and a neon pink shirt. Totally awesome.

Hang it up so that the two sides don’t touch; I put it on a wooden hanger.

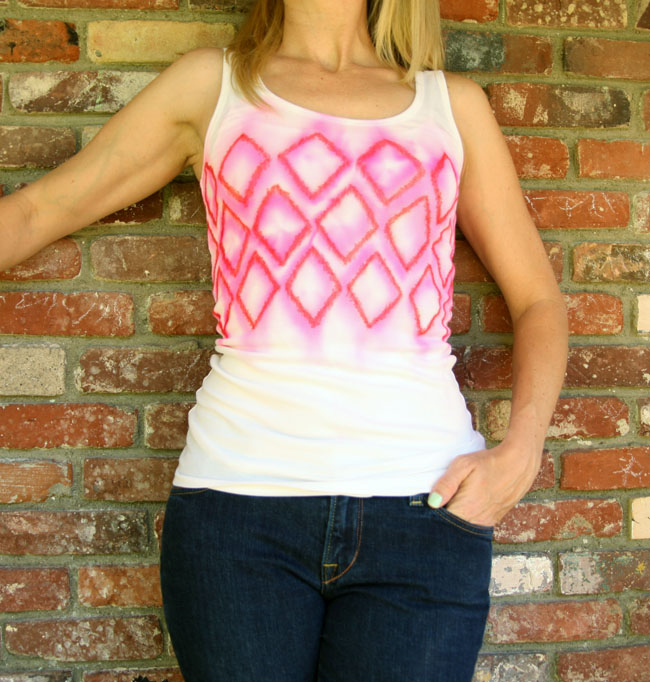
I let mine dry overnight. And then I rocked it!

There are all different kinds of patterns you can make, using multiple colors, sizes, and shapes. If you make one, be sure to send me a pic!

{ 7 comments }

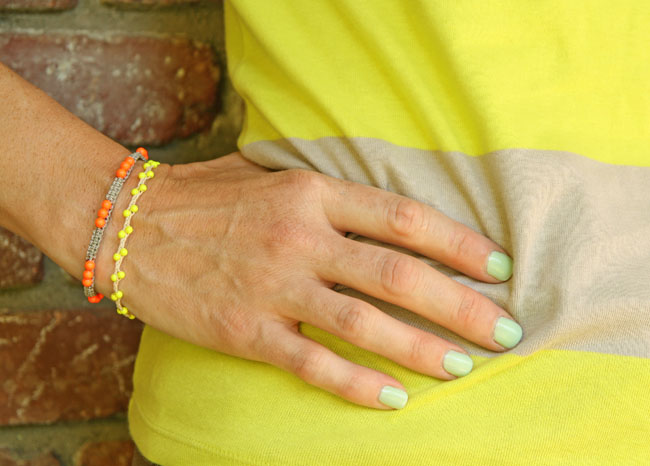
I saw these neon beads the other day on P.S. I Made This, where Erica made beaded shirt pockets with rather large neon beads. True confesh? It seemed kind of clunky and overwhelming to me. But, the beads are super cool, so I ordered some up from Fire Mountain Gems.

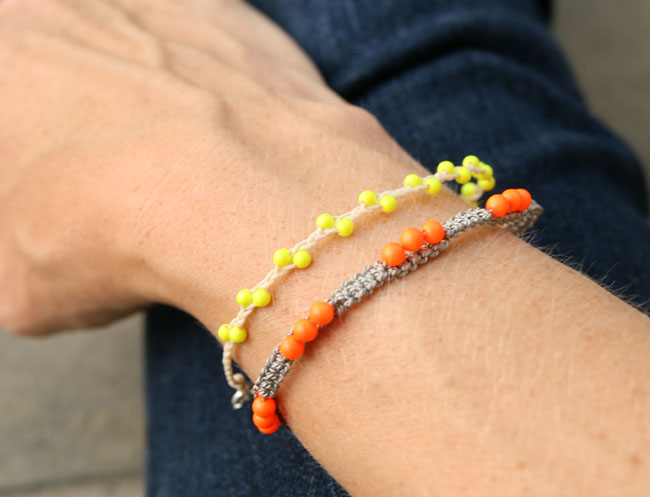
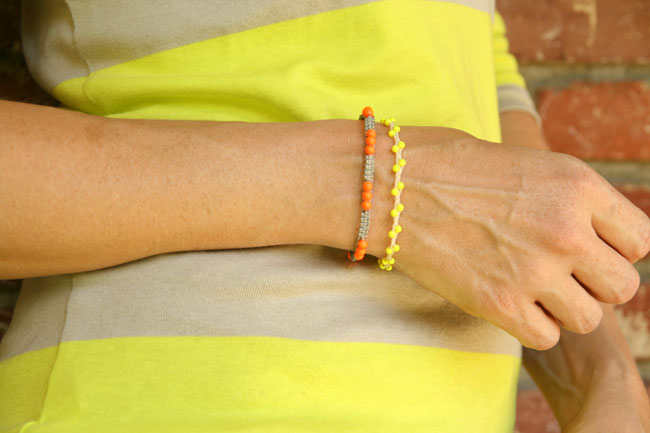
I wanted to make some jewelry for the fall with these fun neon colors. Even better that I have this cool sweater that’s a perfect transition to fall (see above!) that is neon yellow and tan. I decided to make two bracelets in different styles, but both styles I’ve featured here before. What’s new are the beads and the clasp. I wanted something a little more finished than the button-and-loop closure.

The main problem here is that the holes in these beads, even the larger ones, are very small. So it was hard to find string that would fit through. For the first bracelet, the neon yellow one, I used the waxed linen twine and the braiding technique I featured here. I used 3mm neon yellow Swarovski pearls, which was a little harrowing because they just barely fit onto the twine. Sometimes I had to try 3 or 4 different beads to find one that fit. But I managed to get them all on, and I think it looks pretty cool.

For the second bracelet, I wanted to do the beaded macrame. Problem was, I couldn’t get even the larger beads to fit on the Chinese knotting cord. So I mixed it up. I got some silk beading cord, which comes with the beading needle already attached. That’s the key to success, because you can’t add your own beading needle since doubled up cord won’t fit through these beads.

The macrame looks a little different in a twisted cord, but I think it still looks cool. Here’s how I did it, including how I attached a clasp instead of a button for the closure.

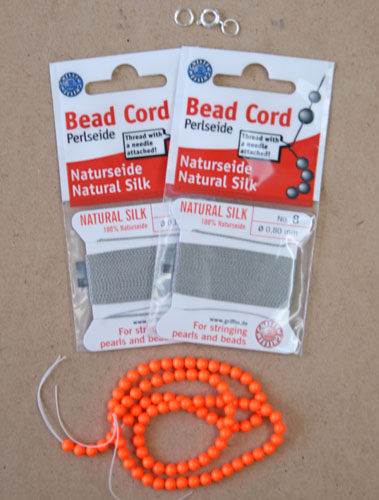
You’ll need:


  • 2 packages of bead cord, size 8, in your desired color. Make sure they come with the needle already attached. This one by Griffin does.
  • 4mm neon Swarovski pearls in your choice of color
  • clasp
  • Hypo cement jewelry glue (not pictured)

As I mention in my tutorial on how to make these micro macrame bracelets, cut your cord into two lengths, one 2 yards and one 30″. What’s important is that you cut the part with the needle into the 30″ length. The 2 yard length does not need a needle on it. These packages come in 2 meter lengths, so I used one for the 30″ length and the other to get the 2 yards.

One additional step you will need if you use this cord is ironing. When the cord comes off the card, it is bent into little segments. I ironed my quickly to take out the bends.

It’s much easier to work with once you’ve ironed it, and it takes about 10 seconds.

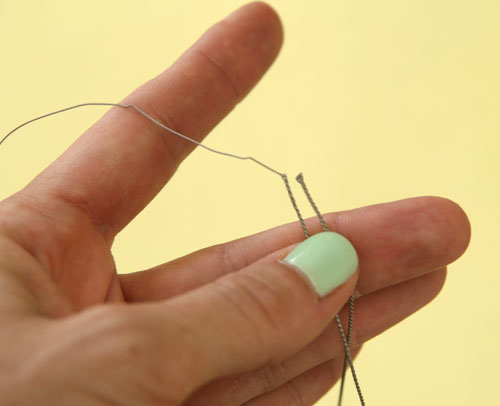
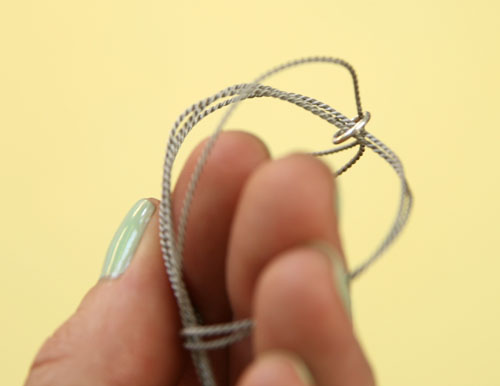
One other adjustment: since the 30″ cord has a needle on the end, make sure you don’t count the needle as part of the length. (That is, it should be 30″ of cord plus the needle.) Also, when you fold the cord in half, don’t count the needle. You should end up with the two ends matching up like this:

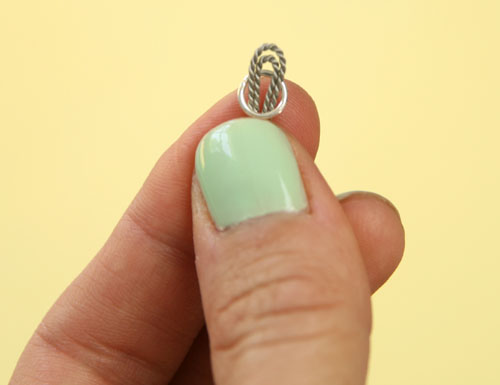
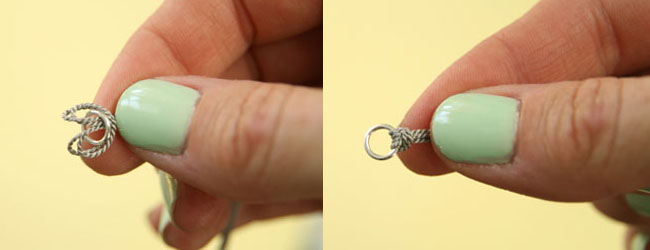
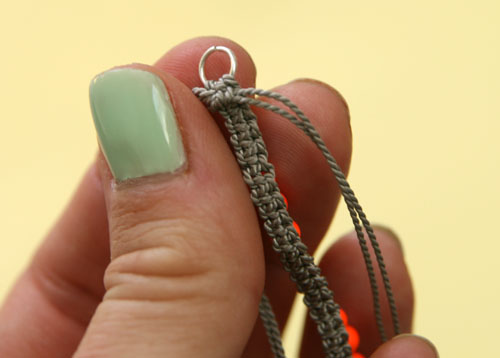
To attach the jump ring for the clasp, you will fold the cord over as in the original tutorial, but instead of tying a knot and leaving a loop, you will thread this loop through the jump ring.

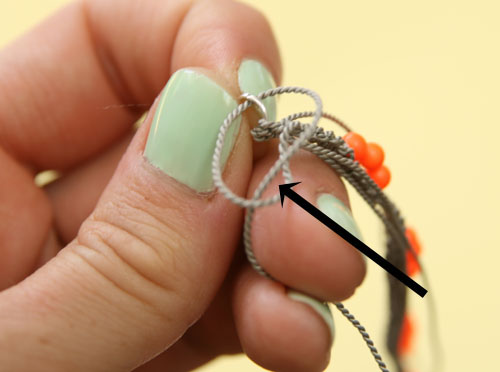
You are going to make a Larkshead knot here by bringing the ends of the cords up and through the two loops of cord.

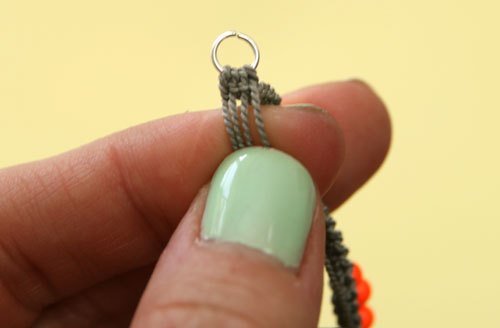
Now you are ready to start knotting. Follow the instructions for the beaded macrame bracelet on my tutorial. You can choose whatever pattern you want; I used the 3 beads at a time pattern. You will always use the end of the cord with the needle on it to add beads.

Once you’ve got your bracelet to the right length, it’s time to add the clasp. You will be using another jump ring and attaching the clasp to that. Take each cord (you will have four) one by one and tie a half hitch like this: with the wrong side of the bracelet facing you, bring one of the cords through the jump ring from front to back.


After you bring the end of the cord through, bring it around and through itself on the front side of the jump ring.

Pull it tight.

Repeat the same procedure with all four of the cords.

Now, take the left two cords and the right two cords and tie a knot.

Tie another knot the opposite way to complete a square knot. Add a little jewelry glue over the knot to secure it. When it dries, you can trim the ends of the cord off. Add your clasp and your bracelet is complete.

I have one more neon jewelry project to show you, so stay tuned!


Pin It

{ 3 comments }